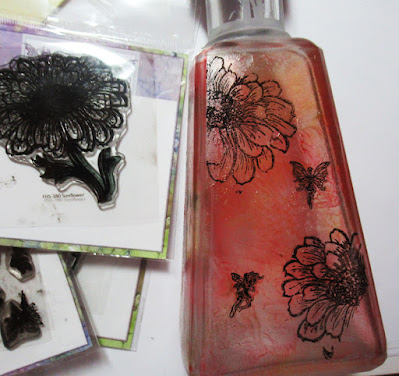
Hi everyone, I've created a sweet Floral Fairy Bottle using EtchallⓇ.
3/26/23
Etchall - Floral Fairy Bottle
Place a glass bottle in etchallⓇ dip 'n etch.
Allow it to sit in the liquid at least 15 minutes.
Remove, rinse and dry off.
Using a Gel Press, I added some pretty spring colors on it - red, yellow, blue.
Using a brayer, I mixed the colors.
Place each side of the bottle on the gel plate, picking up the paint.
Add more paint to the gel plate, if necessary.
Repeat until the bottle is covered.
Allow to dry thoroughly before continuing.
Selecting assorted stamps, create designs on each side of the bottle.
Etchall gives the bottle "teeth" which allows you to stamp images without smudging or slipping.
To finish, I added some ribbon around the top.
Thanks for stopping by.
Steph
Labels:
etchall,
Fairy Hugs Stamps,
Fairy Stamper,
gel press
Fairy Hugs Enchanted Library
Sharing a card using Fairy Hugs stamps available at Fairy Stamper.
Fairy Hugs Stamps:
Fairy Hugs Paper: Tanglewhisper
Stamp the Enchanted Library in the center of the panel.
Die cut the Enchanted Library from the background and mat with cardstock.
Reassemble the die cut pieces to the background and create the card.
Stamp the sentiment and also die cut it.
Mat with cardstock and add to the card with foam adhesives for dimension.
Thanks for stopping by.
Steph
3/25/23
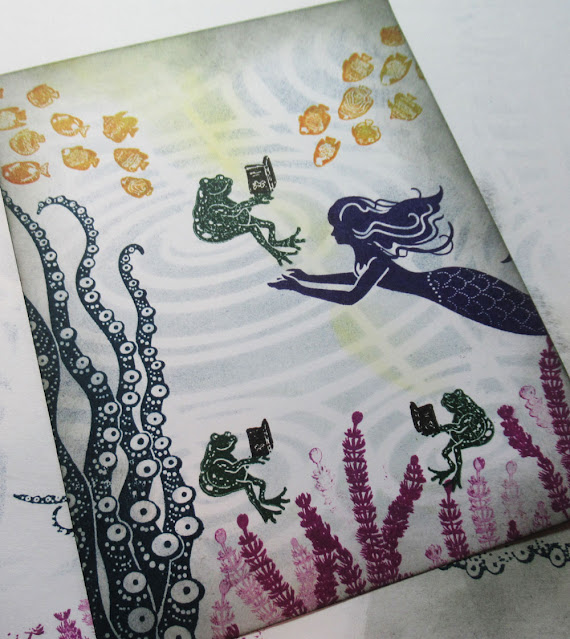
Fairy Hugs Reading Toads
Sharing a card using Fairy Hugs stamps available at Fairy Stamper.
Fairy Hugs Stamps:
Reading Toads
Reading Toads
Stencil: Fairy Rainfall
Place the stencil on a white panel and use Distress Oxide Inks in blue and green to create the background.
Stamp the toads in the puddles, then create the scene around them.
Stamp Tentacles on the left side and Doria on the right side.
Add Twisted Seaweed and the Fish School.
The yellow was a mistake, but I love the added effect.
Mat the panel withe navy cardstock, then add to a white card.
Add Read from the Reading Toads to the card.
Thanks for stopping by.
Steph
3/22/23
BPM - Be Mine
Hi everyone, I'm using some amazing stamps from Blank Page Muse and I Break for Stamps.
Supplies:
Stamps: Kisses Cammie
Be Mine
Stencil: Hearts and Broken Hearts
Cut white cardstock 4" x 5" and stamp sentiment in the right corner.
Emboss with black embossing powder.
Place the stencil on top and lightly ink with distress ink.
Stamp Cammy and color with Copic Markers.
Fussy cut and add Cammy to the card.
Thanks for stopping by.
Steph
Looking for more Inspiration? Click the links below!
The Blank Page Muse Shop https://blankpagemuse.com/
FB Fan Page https://www.facebook.com/groups/bla...
Instagram - Shop https://www.instagram.com/blankpage...
Instagram - Blog https://www.instagram.com/blankpage...
Pinterest https://www.pinterest.com/blankpage...
Save 15% of your Blank Page Muse orders with discount code: BPMSteph
Labels:
Blank Page Muse,
copics,
I Brake for Stamps
3/18/23
Fairy Hugs Explore
Sharing a card using Fairy Hugs stamps available at Fairy Stamper.
Fairy Hugs Stamps:
Create a center fold card from white cardstock.
Cut black cardstock for the center panel and cut another white panel.
Stamp the sentiment in the center, then arrange the Lending Trunk and Reading Hedgehogs.
Stamp Alina in black ink and die cut.
Mat with a larger black circle and adhere to the left side of the card.
Die cut explore and allow Alina to sit on it.
Add black dots around the card fronts.
Thanks for stopping by.
Steph
3/11/23
Fairy Hugs Aubrie
Sharing a card using Fairy Hugs stamps available at Fairy Stamper.
Fairy Hugs Stamps:
Aubrie
Aubrie
Using a white card, place the stencil on top and ink with yellow distress ink.
Using a paper from the Tumbleshine pack, stamp the Lending Trunk on the right side.
Stamp Aubrie.
Assemble the card.
Thanks for stopping by.
Steph
3/5/23
Fairy Hugs Storyteller
Sharing a card using Fairy Hugs stamps available at Fairy Stamper.
Fairy Hugs Stamps:
Using a sheet of Tumbleshine paper, die cut a circle to fit the center.
Ink Ginger's Tropicals with green and orange and stamp around the circle.
Stamp the Storyteller in the center and surround with the Condo Dewllers holding the lights.
Perch a frog on the corner of the ship.
Add a phrase in the corner.
Thanks for stopping by.
3/4/23
Fairy Hugs Grandpa
Sharing a card using Fairy Hugs stamps available at Fairy Stamper.
Fairy Hugs stamps:
Stamp Grandpa Huxley in black ink and emboss.
Mask Grandpa then stamp the Lending Trunk.
Add grass and the hedgehogs.
Add the sky and stamp the phrase.
Add color to the wings to emphasize the dragons.
Mat with navy cardstock before adding to a white card.
Thanks for stopping by.
Steph
3/3/23
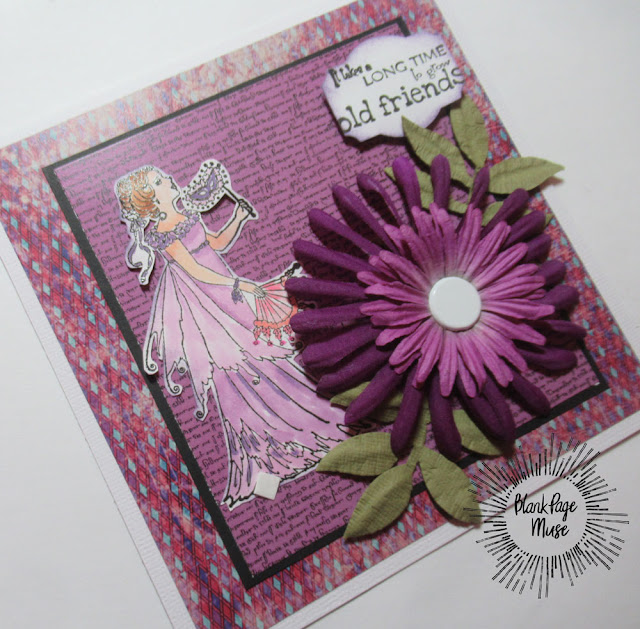
BPM - Old Friends...
Hi everyone, I'm using some amazing stamps from Blank Page Muse and I Break for Stamps.
Supplies:
Stamps - Masquerade, Old Friends
Paper Pack: Masquerade 6x6 Paper Pack
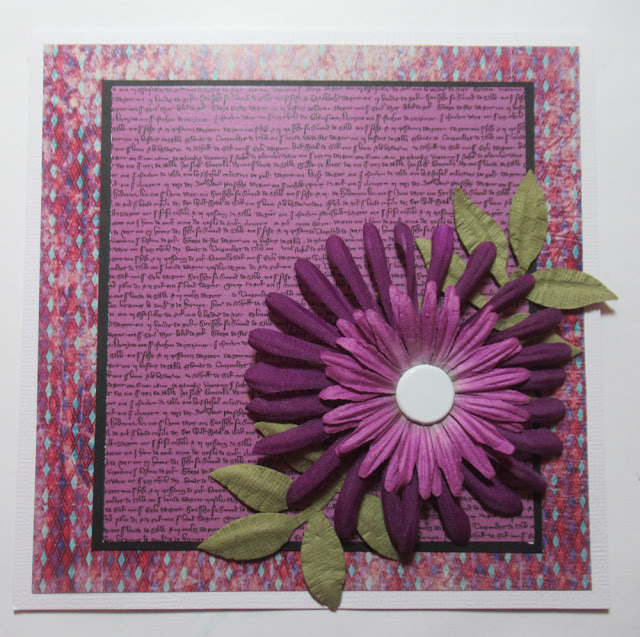
Create a card from white cardstock.
Cut a sheet of paper from this pack to fit the card base.
Cut another sheet smaller and mat with black cardstock.
Assemble the layers, then add the flowers and leaves to the right corner.
Stamp the woman and color with Copic Markers.
Fussy cut her and add her to the card.
Add the sentiment to the upper right corner.
Thanks for stopping by.
Steph
Looking for more Inspiration? Click the links below!
The Blank Page Muse Shop https://blankpagemuse.com/
FB Fan Page https://www.facebook.com/groups/bla...
Instagram - Shop https://www.instagram.com/blankpage...
Instagram - Blog https://www.instagram.com/blankpage...
Pinterest https://www.pinterest.com/blankpage...
Save 15% of your Blank Page Muse orders with discount code: BPMSteph
Labels:
Blank Page Muse,
copics,
I Brake for Stamps
3/1/23
Easter Wishes Scored Card
Hi everyone, it's a new month and the challenge on the Scor-Pal blog is to create anything you want, just be sure it includes more than one score.
I've created a sweet Easter card that is very easy to mass produce if you need a large number of Easter cards this year.
Cut cardstock 6"x8".
Place the 8" side across the Scor-Pal and score every inch, for a total of 7 scored lines.
Mountain/Valley fold the score lines to create the card base.
Score cardstock in half and place a large oval die over the fold and die cut.
This creates the card, but misses the oval tip.
To solve this, use the same die and die cut another oval to complete the card.
Adhere to the card front.
Center the oval card on the scored base.
Using Scor-Tape, adhere the bottom edge of the card to front base.
Flip over and adhere the other side of the card to the back base.
Die cut Rinea Gold Glossy Foil to fit the card base and emboss.
Die cut smaller eggs from various colors of Rinea Foiled Papers and adhere to the card.
Place Scor-Tape on the wood bunny and place on the card.
Stamp the sentiments and place on the card.
Thanks for stopping by.
Steph
Labels:
embossing,
joyclair,
Rinea Foils,
scor-pal,
scor-tape
Subscribe to:
Posts (Atom)


