2/28/13

Cobblestone Bridge


Hi Everyone, Cornish Heritage Farms Rubber Stamps  will be teaming up with Faber-Castell Design Memory Craft for a blog hop this week! 

Two lucky winners will win a $50 prize pack.

Here’s how you can win:

1.        You have until midnight EST on February 28th to complete the hop. 

2.       Cornish Heritage Farms Rubber Stamps and Faber-Castell Design Memory Craft will have a new craft to share with you every day.  Visit their  blogs and leave a comment on each post.  This way, we’ll know you were there. 

Cornish Heritage Farms Rubber Stamps http://cornishheritagefarms.blogspot.com

3.       Have fun!  We look forward to seeing your comments. 

Good morning.  I hope you've been following along this week as the designers at Cornish Heritage Farms are blog hopping with the Faber-Castell Design Memory Craft design team. 


Using this wonderful Thomas Kinkade stamp -  Cobblestone Bridge  - I first stamped the image with Clearsnap's Guacomole Chalk Ink on white cardstock.  Chalk Ink is the best ink to use to get the details of the Thomas Kinkade stamps to really stand out.  I wanted to add color to specific areas of this stamped image and the  Faber Castell Gelatos were the perfect coloring agent. 

I added Lemon and Tangerine from the Yellow Gelatos set around the houses and trees, rubbing the colors in with my fingers.  I then added some Blue from the Blue Gelatos under the bridge to complete the image.


There are so many different ways to add color to detailed stamps, but I love how the Gelatos allow you to add color so easily and exactly where you want the color!
 
Be sure to stop by and see what all  the designers have been creating by clicking on these links:

Faber-Castell Design Memory Craft http://designmemorycraft.typepad.com/design-memory-craft/

Cornish Heritage Farms Rubber Stamps http://cornishheritagefarms.blogspot.com

Thanks for stopping by today.


2/27/13

Sincere Thanks


Hi Everyone, Cornish Heritage Farms Rubber Stamps  will be teaming up with Faber-Castell Design Memory Craft for a blog hop this week! 

Two lucky winners will win a $50 prize pack.

Here’s how you can win:

1.        You have until midnight EST on February 28th to complete the hop. 

2.       Cornish Heritage Farms Rubber Stamps and Faber-Castell Design Memory Craft will have a new craft to share with you every day.  Visit their  blogs and leave a comment on each post.  This way, we’ll know you were there. 

Cornish Heritage Farms Rubber Stamps http://cornishheritagefarms.blogspot.com

3.       Have fun!  We look forward to seeing your comments. 

 
Hi everyone, If you saw my Monday post, you'll notice I used this same CHF Trees Backgrounder stamp.  It honestly is one of my favorite stamps.   This time, however, I "painted" white cardstock with blue Faber Castell Gelatos and water then stamped the Trees Backgrounder with Clearsnap Candied Yam Ink on top.   Since the blue background has different shades due to the amount of water used, I created this wonderful water colored background effect.


The sentiment is from an amazing set of stamps called  Script Essential Expressions.

Be sure to stop by and see what all  the designers have been creating by clicking on these links:

Faber-Castell Design Memory Craft http://designmemorycraft.typepad.com/design-memory-craft/

Cornish Heritage Farms Rubber Stamps http://cornishheritagefarms.blogspot.com

Thanks for stopping by today.

2/26/13

Love U


Hi Everyone, Cornish Heritage Farms Rubber Stamps  will be teaming up with Faber-Castell Design Memory Craft for a blog hop this week! 

Two lucky winners will win a $50 prize pack.

Here’s how you can win:

1.       You have until midnight EST on February 28th to complete the hop. 

2.       Cornish Heritage Farms Rubber Stamps and Faber-Castell Design Memory Craft will have a new craft to share with you every day.  Visit their  blogs and leave a comment on each post.  This way, we’ll know you were there. 

Cornish Heritage Farms Rubber Stamps http://cornishheritagefarms.blogspot.com

3.       Have fun!  We look forward to seeing your comments. 

Good morning.  I hope you've been following along this wee as the designers at Cornish Heritage Farms are blog hopping with the  Faber-Castell Design Memory Craft design team. 

Today, I decided to do something different.


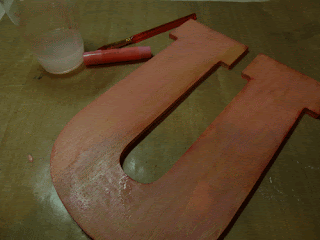
Finding some unfinished wood letters, I decided to use  Faber Castell Gelatos as my coloring agent.  I first colored the letter with Cotton Candy.  Using the included paint brush and some water, I painted the color into the letter.  To make the letter darker, I added more Cotton Candy as needed. 


I then added some Guava to the edges of the letter and gently worked the color into the letter with my fingers.  I wanted to create a halo effect around the letter.  Then, using a little water and my fingers, I rubbed Red Cherry along the side edges of the letter.


Using CHF Large Dots Backgrounder, I inked it with Gold Metallic and spritzed it lightly with water.  Since I wanted a distressed effect, I randomly stamped the image all over the letter, adding more Gold Metallic and water to the stamp as needed.


Using watercolor paper, I scribbled Cotton Candy, Guava, Gold Metallic and Lavendar randomly on the paper.  Then, using a paintbrush and water, I colored the entire piece of paper.  I heat set the paper to help the drying process, then I repainted the paper again to get a layered effect.


I created the flower doily by stamping the large floral image from Ornamental Beauty twice onto the paper I just created using black ink.  I then embossed the images with Pearl embossing powder to get a subtle gray color.  I also stamped the interior circular image from the same set using black ink and then embossed it with Pearl embossing powder.  I then added some Gold Metallic and Guava around the edges of the 3 stamped images.


Using the stamp in the  Red Gelatos set, I colored it with the Faber Castell black marker, fussy cut the flower, then added some Cotton Candy and Guava to the cut out image.  I then placed all layers together and added a brad through the center before adhering them to the wood letter with Scraperfect's the Best Glue Ever.


To finish my letter, I die cut LOVE from black and pink cardstock using my Cricut Expression.  I adhered them to the left side, then added some Want2Scrap Rhinestone Swirls on the right side.


You can see what all  the designers have been creating by clicking on these links:

Faber-Castell Design Memory Craft http://designmemorycraft.typepad.com/design-memory-craft/

Cornish Heritage Farms Rubber Stamps http://cornishheritagefarms.blogspot.com

Thanks for stopping by today.


2/25/13

Every day is a blessing


Hi Everyone, Cornish Heritage Farms Rubber Stamps  will be teaming up with Faber-Castell Design Memory Craft for a blog hop this week! 

Two lucky winners will win a $50 prize pack.

Here’s how you can win:

1.        You have until midnight EST on February 28th to complete the hop. 

2.       Cornish Heritage Farms Rubber Stamps and Faber-Castell Design Memory Craft will have a new craft to share with you every day.  Visit their  blogs and leave a comment on each post.  This way, we’ll know you were there. 

Cornish Heritage Farms Rubber Stamps http://cornishheritagefarms.blogspot.com

3.       Have fun!  We look forward to seeing your comments. 

 
I have been having so much fun with Faber Castell's Gelatos.  They are so much fun to work with and when used with Cornish Heritage Farm stamps, you can create some amazing projects. 

The Trees Backgrounder stamp from CHF makes a great generic card.  I wanted to create a sunrise background for my stamp, so I colored white cardstock with Buttercream, Lemon and Tangerine Gelatos from the Yellow collection,  plus Guava and Lavender  Gelatos from the Red collection.   Each Gelato set comes with a paint brush, so I used a little water and created a fun background. 

You can let the paper air dry, or you can heat set it if you want to work on it right away.  Once it was dry,  I stamped the Trees Backgrounder stamp on top using Clearsnap Candied Yam Chalk Ink.


I stamped the sentiment from A Time to Stamp set with the same Candied Yam Chalk Ink, then added some Lemon Gelato over the stamped sentiment.

See what all  the designers have been creating by clicking on these links:

Faber-Castell Design Memory Craft http://designmemorycraft.typepad.com/design-memory-craft/

Cornish Heritage Farms Rubber Stamps http://cornishheritagefarms.blogspot.com

Thanks for stopping by today.

2/21/13

Lovely

This is one of my new  posts on the  Classy Cards blog.   

This awesome With Sympathy stamp set is from Justrite Stampers.  It has 12 different phrases, several small images, a frame and this lovely rose.  So, even though the stamp set is perfect for creating Sympathy cards and projects, there are so many other options available to you.  I chose to use the rose as a focal image and created a generic card that would easily be used for Valentine's Day, Mother's Day or even a birthday.

Using Tim Holtz Distress Markers, I colored the image as follows:

Rose:  Mustard Seed and Spiced Marmalade
Leaves, stem:  Crushed Olive and Forest Moss and Old Paper


I used the  Printery collection pad from Prima, selecting 4 different papers and using elements from each one, cutting and tearing for dimension.  The sentiment was also cut from one of the papers in this collection and added to the card front with Joy Foam Adhesives.


Once colored, I added a little glitter to the interior of the rose using Gelly Roll Stardust Pen.  This pen adds just the right amount of shimmer and shine and dries very quickly.

Supplies:
Cardstock: Bazzill
Pattern paper: Prima
Stamps: Justrite
Markers: Tim Holtz


2/19/13

LIfe is beautiful

A new card for Cornish Heritage Farms.  Why not use the stamps to create your own background paper?  It's easy and fun too.


All the elements I used for this card are from the Ornamental Beauty stamp set.  This stamp set contains about 20 different stamps that can be used for any occasion.  I created my own paper by stamping one of the images randomly on  cardstock.  After cutting it to fit the front of my card, I inked the edges of the paper.


After stamping the elements I chose for this card, I inked the edges and matted them with cardstock to highlight the stamped images.  For the focal point, I used a glitter pen to highlight the flourishes.

Thanks for stopping by today. 

2/17/13

Love Fest @ Splitcoaststampers


Here is the ad box for the Love Fest if you would like to add it to your blog

Hi everyone, hope you will all join in on the Love Fest challenges at Splitcoaststampers


Here are the cards I created for Scor-pal.:

Diaper Card
Supplies:
Scoring Tool: Scor-Pal
Adhesive: Scor-Tape
Cardstock, Pattern paper; DCWV
Dies: Spellbinders
Ink: Clearsnap
Punch: EkSuccess


Cut cardstock 8 1/2" x 10"
Score at 5" and 9", then turn your paper and score at 2", 2 1/8", 6", 6 1/8"
 
 
Create the "T" section by cutting along the 2 1/8" and 6" scores to the center score line

 
Fold on the score lines
 
Use a circle punch to punch the leg sections and cut as needed to create the diaper shape 


Cut pattern paper to fit the front of the card
Ink edges with Clearsnap Ink
Cut a coordinating piece of pattern paper to fit inside the card - add a sentiment of choice -
perhaps Congratulations, It's a boy/girl, It's a Baby Shower - the ideas are endless

 
Die cut 2 circles from cardstock and pattern paper - adhere together
Place adhesive on the left side of the circle and adhere to the card
Die cut the Stork from pattern paper and place on the circles with foam adhesives
Place a Velcro dot under the circle to use as the card's closure


Easel Card

Supplies:
Scoring Tool: Scor-Pal
Adhesive: Scor-Tape
Cardstock: Coredinations
Dies: Spellbinders
Stamps: Magnolia
Ink: Memento
Markers: Copic Markers
Other: Ribbion, stick pins


Using Grand Calibre Scalloped Circle dies, create card, by first scoring the cardstock in half and then placing the die slightly off the scored edge
Die cut a separated Scalloped Circle for the top layer


Score the center of one piece of the card  to create the easel
Place Scor-tape on the folded section and adhere the top layer

 
Die cut 2 Grand Circles from red cardstock - lightly sand each layer
Die cut a circle from kraft cardstock - emboss with a Cuttlebug embossing folder
Die cut a smaller circle from red cardstock


Wrap ribbon around card before adhering smaller circle with foam adhesives
Add stick pins and a flower to the bow
Stamp Magnolia images and color with Copic Markers then add to the smaller circle
Stamp sentiment and adhere to the base with foam adhesives to use as the "stopper" to hold the easel upright


Thanks for stopping by today.  Don't forget to check out the LoveFest at Splitcoaststampers.


2/15/13

Thank You

I always seem to need Thank You cards, and since I had some lovely  papers from Webster's Pages,   this card came together quite easily.  Each double sided paper is so very pretty.    

I chose the subtle green print as the card's base which I inked and matted with brown cardstock before adhering to the card.  I then cut around the floral image of another paper because I wanted it to be the focal point of the card.  After cutting it out, I also matted it with brown cardstock, then adhered it to the lower left side of the card.  Using a left over strip of striped paper from Webster's Pages, I matted it with brown cardstock and placed it towards the top of the card because this area needed something more.


The sentiment is from Justrite Stampers Spring Words which I stamped with Clearsnap Ink on a left over scrap of paper from Webster's Pages, then matted it with brown cardstock before it adhering to the card.

Thanks for stopping by today.

2/14/13

Scor-pal Valentine's Day Project

Happy Valentine's Day everyone.

Here's a little snippet of my project appearing on the Scor-pal blog today.


Hope you'll stop by and check it out.

With Love

It really is quite easy to incorporate the amazing products from Globecraft Memories
into anything you create.  


I used the smaller cross in the Cross Charms set, covering it with Poodle Skirt Enamel Powder.  The bezel is from the Heart Charms set   and I coated it with Enchanted Aubergine Enamel Powder several times.  I then applied the heart to the bezel with Glastique Finishing Glaze.  It works great as an adhesive too.


I applied several coats of Glastique and you can see the wonderful shine it gives this piece.  I added several pearls to the center of the cross, then tied ribbons to the bezel.


I used this piece as the focal point of my card, adding it to die cut ovals with foam adhesives for additional dimension.


Thanks for stopping by today.

Supplies:
Cardstock: Bazzill
Charm, Enamel Powder: GlobecraftMemories
Pearls: Want2Scrap
Stamp: Stampavie

2/13/13

Happy Valentine's Day and Thinking of You

I have 2 cards up on the Zig Kuretake blog today.

Happy Valentine's Day
 
 
Supplies:
Cardstock: Bazzill
Pattern paper:  K&Co
Stamps: Hero Arts, Hampton Arts
Markers: Zig
Pearls: Want2scrap
 
Thinking of You


Cardstock: Bazzill
Pattern paper:  Graphic 45
Stamps: Hero Arts, Darice
Markers: Zig
 
Pop over to the Zig blog and see what the designers have been creating.


2/12/13

Scraperfect and Scor-pal

Check out this awesome Scraperfect Project - the Best Cleaner Ever for cleaning anything!!!  I used it to clean my Scor-pal and went from a grungey mess  - 


to pristine in no time at all.


You have to try this - check out the Scraperfect blog to see how!

I love you

It's another challenge at Cornish Heritage Farms  and Anne has asked us to create a Valentine's theme.  Don't forget Valentine's Day is Thursday.

I created a heart shaped card using Spellbinders Scalloped Heart dies and ivory cardstock.  Then I cut another heart from red cardstock.


I used the large flower stamp in the Ornamental Beauty stamp set to create the background by stamping it repeatedly in black ink  on white cardstock, then I die cut it into a heart shape.  I added several more hearts on top.

 
The sentiment is from Script Essential Expressions which consists of 56 different sentiments and phrases.  A few pearls finished the card.
 
Thanks for stopping by today and don't forget to see what everyone has created today.


2/6/13

Reflect


It's Thomas Kinkade week at Cornish Heritage Farms.  This is the week we all show off what we have done with these wonderful stamps.

I chose to work with the Light of Peace stamp which is another incredibly detailed Thomas Kinkade stamp.


I stamped the image with Color Box's Guacamole Chalk Ink as I've discovered that this is the best ink to showcase the amazing details.  Unfortunately, when I picked up the stamped image, I smudged it!!!  I was extremely annoyed at myself until I looked a little closer and realized that it gave the image  a very reflective look.

Of course, then I had to add the sentiment from A Time to Reflect stamp set.

Don't forget to stop by everyone's blog to see what they've done with this week's Thomas Kinkade stamps.


Thanks for stopping by today.

With Sympathy

It's another challenge at Justrite Stampers  and since I recently got these stamps in the mail, I just had to play with them.

The rose is from the With Sympathy  stamp set.  This set is fast becoming one of my favorites because it has a lot of possibilities.  Although it is a Sympathy set, it can also be used for a generic Thinking of You card, a Valentine's or Love card, or just use the individual elements and create any type of card you need. 


I colored the roses with Zig markers, adding a little Wink of Stella to the tips for a little shimmer.  Because I wanted the roses to stand out, I cut around the image.
I used the Nested Oval Medallion Dies to hold my images, stamping a background for my roses with one of the elements from the Botannical Medallions and Banners stamp set. 

As I didn't want any other papers to compete with my stamped images, I embossed the white background paper with a Cuttlebug embossing folder.   I wrapped some sheer ribbon around the card then added the image with foam adhesives.
Thanks for stopping by today.

Supplies:
Cardstock: Bazzill
Stamps:  Justrite
Dies: Spellbinders
Markers: Zig Markers


Life is Better with Friends

This is my post today at the Rubber Buggy.


Using a Bild Malarma stamp, I colored her with an assortment of Copic Markers after first stamping her on Copic Xpress It Blending Cardstock.  As I wanted her to be the focal point, I fussy cut her and mounted her on a black cardstock oval which I die cut with a Spellbinders die.  Before placing her on the card, I added foam adhesives for some dimension. 

Supplies:
Cardstock: Bazzill, Copic Xpress It
Stamp: Bild Malarma
Ink: Memento
Markers: Copic Markers


Thanks for stopping by today.


2/4/13

You are the Joy

Good morning, it's Steph again with a tutorial on creating a card that would be wonderful for a wedding card or even a Valentine's Day card.   It's posted on the Classy Cards Blog.


Create a 5 1/2" x 5 1/2" square card from red cardstock, scoring it perfectly with the Scor-Buddy.
Using papers from Trimcraft's Love Letters paper pad, cut papers 5" x 5" and create a layered effect by using the striped paper as the base layer.
Add a strip of red cardstock the top and bottom edges of the heart layer.
Using Doodle Twine in pink and lime, wrap it around the heart paper three times.
Tie a bow on the right side and spread the twine apart.
Add to the card base.


Die cut all the hearts using the Spellbinders Classic Scalloped Hearts.
Die cut a large heart from black cardstock.
Die cut a smaller heart from white cardstock.
Die cut a small heart from black cardstock.
Die cut a small pink heart from the heart paper.
Stamp a sentiment from Justrite Stampers Wedding Nested Sentiments on the white heart.
Sponge Spun Sugar Distress Ink around the edges of the white heart, then layer it on the larger black heart.
Add the 2 smaller hearts to the bottom of the heart to fill in the empty space and to add some visual interest.
Adhere the heart to the card using Joy Foam Adhesives for dimension.

Thanks for stopping by today.

Supplies:
Cardstock: Bazzill
Pattern paper:  Trimcraft
Stamps: Justrite Stampers
Dies: Spellbinders
Twine: Doodlebug


2/1/13

Triangle Explosion Book


This is a project  using my Scor-pal, 3 pieces of cardstock and assorted pattern papers from Fancy Pants Designs.

To begin, prepare your cardstock as follows:

1 piece of cardstock is 12" x 12" - score at 4" and 8", turning the paper and scoring again 4" and 8", creating 9 equal sized squares.
Cut 1 piece of cardstock 10 1/4" x 10 1/4"  and score at 3 1/2" and 6 1/2", turning the paper and scoring again at 3 1/2" and 6 1/2", creating 9 equal sized squares.
Cut 1 piece of cardstock 8 1/2" x 8 1/2" and score at 2 3/4" and 5 3/4", turning the paper and scoring again at 2 3/4" and 5 3/4, creating 9 equal sized squares.

Cut along the score lines and remove the corner pieces.  Your three pieces of cardstock should look like a "t"


Fold each piece along the scored lines.


To form the triangle, cut each piece on the diagonal.  Find the center of each edge and cut to the score lines.

Add Scor-Tape to the center of each piece and assemble together to form one unit.


Using assorted papers from Fancy Pants Designs - The Good Life Collection - cut pattern paper to fit each triangle.


Layer 1 - cut 8 pieces, each 3 3/4" x 3 3/4".


Layer 2 - cut 8 pieces, each 3 1/4" x 3 1/4".


Layer 3 - cut 8 pieces, each 2 3/4" x 2 3/4".

To finish the inside, add a 2 3/4" x 2 3/4" square to the base.

Decorate as desired.  I added stamps around my box.

Punch holes in the tops of each point and thread ribbon through the holes. 


Fill the box with candy or other little treats and pull the ribbon together to close.


This is the perfect item to put in the Christmas tree since it doesn't weigh very much, or even use as a place setting on the dining room table.


Supplies:
Cardstock: Bazzill
Pattern paper: Fancy Pants
Scoring Tool:  Scor-pal
Adhesive: Scor-Tape
Stamps: Cornish Heritage Farms
Ink: Memento


Thanks for stopping by today.

Steph