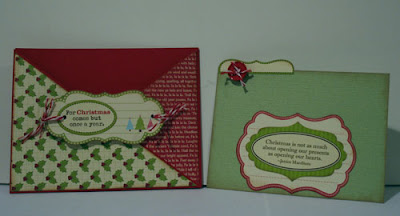
This is it! The last day of 2011 and the last post of the year at Just Imagine / Kreaxions. So Happy New Year to everyone. Here's hoping that 2012 is better for all of us.
Supplies:
Card: DCWV
Cardstock: Kreaxions
Punch: Just Imagine/Kreaxions # 310
Stamps: Hero Arts, Inkadinkadoo
Punches: Stampin Up
Brads: Creative Impressions
Ink: Clearsnap Canary Chalk Ink
Markers: Copic, Spica
Tinsel: Clearsnap
12/31/11
12/28/11
You are my happy
I was playing with inks yesterday and this card is the result. I love the soft, subtle colors of the Soft Pastels Colorbox Chalk Paintbox.
Using the Jumbo Rollagraph Wheel - Define It and Watermark Embossing Ink , I created a pattern on gray cardstock, which I then embossed with Colorbox Donna Salazar Jasmine Embossing Powder. Using Foam Stylus Tips. I added colors from the Soft Pastels Colorbox Chalk Paintbox. I then used a tissue to rub off some ink, allowing the embossed words to show through.
I stamped my image with Colorbox Donna Salazar Black Inx and then embossed with Colorbox Donna Salazar Black Embossing Powder. I used Spellbinders dies to set my image and create the label. Hero Arts stamp with Colorbox Donna Salazar Black Inx was used on white cardstock that was cut to fit the label.
Supplies:
Define It Rollagraph
Donna Salazar Jasmine Inx and Embossing Powder
Paint Box Soft Pastels Inks
Donna Salazar Black Inx and Embossing Powder
Graphic 45/Hampton Art Stamp
Hero Arts Stamp
Spellbinders dies
Bazzill cardstock
Entering in the following challenges:
Simon Says
Cutie Pie
My Mum's Craft shop
12/26/11
Peace, Joy
Hope the New Year brings Peace and Joy to you and your family.
This Magnolia image was fun and quick to work with, just needing a few Copic markers to blend the colors. I used the new Clearsnap Emboss Gloss on the hat's trim and added Donna Salazar's Jasmine Embossing Powder. Love it. Now you can emboss anything, anywhere!!
I also used Donna Salazar's Truffle Inx to outline all the papers.
Supplies:
Stamp: Magnolia
Cardstock: Bazzill
Pattern Paper: Authentique
Ink: Colorbox Donna Salazar Truffle Inx
Embossing: Clearsnap Emboss Gloss; Donna Salazar Jasmine Embossing Inx
Markers: Copic
Dies: Spellbinders, Nestabilities
Twine: The Twinery
12/25/11
Merry Christmas
Have a sweet Christmas.
Scor 8 1/2" x 10" cardstock.
Use the package Rollagraph Wheel with Stephanie Barnard Strawberry Ink on a strip of cardstock approximately 2x8. Then emboss with Scentz Peppermint and Snickerdoodle Embossing Powder.
Stamp a Hero Arts sentiment on white cardstock and emboss with Scentz Peppermint and Snickerdoodle Embossing Powder.
Place some kisses in a cellophane bag and tie the sentiment on with Twine.
Once the box is complete, add some Glue Gloss and Fairy Dust Glitter.
Hope everyone has a Merry Christmans and a wonderful 2012.
Supplies:
Cardstock: Bazzill
Inks, Glitter, Glue Gloss, Embossing Powder, Rollagraph: Clearsnap
Score Tool: Scor-pal
Stamps: Hero Arts
Twine: The Twinery
12/24/11
Merry Christmas Eve
Merry Christmas Eve to you. This is today's post at Just Imagine / Kreaxions.
As we all know, tomorrow is THE day. Hope everyone is done with their shopping and gift wrapping and taking some time to enjoy and relax. Just in case you need to create a card, here's a perfect one for today.
Because I didn't want to take away from the stamped image by using pattern papers, I opted to use Kreaxions punch 312 along the edge of the card. It's a perfect addition to the stamped image. As you can see, a large and small snowflake is punched each time you use the punch. Since I wanted the punched snowflakes to show, I also punched a strip of white cardstock and adhered it "off center" under the edge of the card.
The image was stamped on blue, white, pink and gray cardstock with Colorbox's Donna Salazar Jasmine Inx and embossed with Jasmine Embossing Powder. I then paper pieced the scene together and lightly inked around the snowman with Petal Point Inks for some depth.
Before adhering the image, I spritzed the black card with Clearsnap's Vanilla Smooch Spritz.
Enjoy your holiday season.
Supplies:
Cardstock: Bazzill
Ink: Colorbox Petal Point Inks-Celebration, Donna Salazar Jasmine Inx and Embossing Powder
Stamp: Stampabilities
Punch: Kreaxions
12/23/11
Wintertime
Time to finish those last minute cards and gifts. I used Bo Bunny pattern papers on this set, first punching along the bottom of my card with Kreaxions punch #311. I loved the open effect along the edge, so I inserted some pattern paper to finish off the bottom of my card.
The stamp was colored with Copic Markers. The sentiment was stamped with Donna Salazar Black Inx and then embossed.
\
The box was made with 2 pieces of pattern paper, each 8" x 8", then folded and scored. No tape was used and the box stays together nicely. I used the same punch on white cardstock and added it around the box. Then, I just added some twine to hold it together and you are done - a perfect box for something small and awesome!!!
Add a tag and voila - done and done.
Supplies:
Cardstock: Bazzill
Pattern paper: Bo Bunny
Stamps: Hero Arts
Punch: Kreaxions #311
Ink: Colorbox Petal Point
Twine: The Twinery
12/22/11
Winter Wonderland
It is time for snow. I can feel it coming. Who wouldn't love the following card, made with a mixture of Clearsnap and Imaginisce products. It was so much fun to make.
I used the Doodle Rollagraph wheel along the bottom of the cardstock with Jasmine Inx and Embossing Powder. I then used Design Adhesives Snow Fun with Jasmine Embossing Powder along the top section of the card. A piece of Imaginisce Christmas Magic paper was added in the center.
Before adhering the snowman and sentiment, I spritzed them with Vanilla Shimmer Smooch Spritz for a little shimmer. Once they dried, I added them to the card with foam adhesives.
Clearsnap Supplies:
Jumbo Rollagraph Wheel Doodle
Ink: ColorBox Donna Salazar's Jasmine Mix'd Media Inx
Embossing Powder: ColorBox Donna Salazar's Jasmine Embossing Powder
Snow Fun and Jolly Greetings Design Adhesives
Winter Sky Designer Foils
Vanilla Shimmer Smooch Spritz
Imaginisce Supplies:
Santa's Little Helper collection -
Christmas Magic pattern paper
Season's Greetings Words Die Cuts
12/21/11
Blog Hop - Clearsnap and Imaginisce
The designers at Clearsnap are blog hopping this week with Imaginisce. What a combination!!! Check out the Clearsnap designers here each day and check out the Imaginisce designers here each day. Don't forget to leave comments as there are prizes!!!!
Continuing with the Christmas theme, I decided to create a card and matching gift bag that I could put a few goodies in and give to a friend this Christmas.
I spritzed the papers with Vanilla Shimmer Smooch to add a little extra sparkle.
This is a close up of the snowflakes that I stamped and embossed with Donna Salazar's Jasmine Inx and Embossing Powder. Check out the shimmer from the Vanilla Smooch Spritz across the gift bag.
Add some dimentional stickers from Santa's Little Helper collection and you've got a gift set ready for gifting.
Supplies:
Cardstock: Bazzill
Pattern paper: Imaginisce Santa's LIttle Helper
Ink, Embossing Powder: Colorbox Donna Salazar Jasmine
Smooch: Clearsnap Vanilla Shimmer
Thanks for stopping by.
Enjoy.
12/19/11
Merry Christmas
Christmas is only a few days away and it's time to finish up Christmas card. I've had this stamp for quite awhile, but could never get the stamped image to look quite right. But, I was able to finally get the look I wanted with Colorbox's Petal Point Celebration Inks and Scentz Snickerdoodle Embossing Powder.
Cut cardstock to fit card front.
Cut 2 pieces of Graphic45 pattern paper to fit front.
Punch edge of one with Fiskars punch.
Ink stamp with 3 stamp colors, being careful not to overlap too much.
Spritz the stamp with water and stamp on white cardstock.
Add Scentz Snickerdoodle Embossing Powder and heat set.
Die cut into a circle and ink edges with gold.
Mat with brown cardstock die cut into a scalloped circle.
Stamp sentiment in gold ink and emboss with Scentz Snickerdoodle Embossing Powder.
Add to card front.
I love that the Snickerdoodle Embossing Powder did not overpower the ink colors. It allowed the colors to show through while providing a nice metallic effect.
Clearsnap Supplies:
Ink: Colorbox Petal Point Celebration (red, green gold)
Embossing Powder: Colorbox Scentz Snickerdoodle
Other Supplies:
Stamps: Hero Arts, All Nite Media
Cardstock: Bazzill
Pattern paper: Graphic45
Punch: Fiskars
Dies: Spellbinders Nestabilities
Labels:
bazzill,
clearsnap,
fiskars,
hero arts,
spellbinders
12/18/11
Enjoy the Little Things
12/17/11
Authentique and Scor Pal Blog Hop
Welcome to the Authentique and Scor-Pal blog hop. If you are hopping along with us today, you should have come here from Tiffany DeGough's blog. If you did, you are in the right place! Welcome!
If you aren't already a follower, I'd love to have you follow my blog!
Today's Blog Hop Order:
Authentique Paper – http://authentiquepaper.blogspot.com/
Tifany DeGough - http://inkblotsbytrd.blogspot.com/
Steph Ackerman - http://www.stephaniescraps.blogspot.com/ HERE
Emily Lanham - http://createserendipity.blogspot.com/
Gini Cagle - http://www.ginicagle.blogspot.com/
Misty Buck - http://mistylynnwhat.blogspot.com/
Lisa Andrews - http://www.scrappingwithlisa.blogspot.com/
Brenda Smith - http://theimperfectscrapper.blogspot.com/
Katie Tate - http://bothsidesofthepaper.blogspot.com/
Cristine Redmond - http://onescrappynovice.blogspot.com/
Kittie Franken - http://kittyfranken.blogspot.com/
Scor-Pal – http://scor-pal.blogspot.com/
Authentique papers are very sturdy and can hold up to the whatever I create. I was lucky enough to work with the Splendid paper line this month. These shoes are always fun to make and this paperline was perfect to use. I love that the papers are doublesided because both sides are visable in my projects. I used my Scor-pal to get good crease lines so the shoes would stand up well. Add a quick and easy matching purse and the recipient is sure to be thrilled!! This purse is about 4" wide, but it's big enough to hold some candy, chapstick or even a gift card.
I wrapped up some candy kisses and placed them inside the shoes for a little something sweet for the recipient.
Remember, there are 2 Blog Hop Prizes:
From Authentique Paper – Authentique Paper prize pack ($20 retail value)
From Scor-Pal – Scor-Buddy ($20 retail value)
To win:
Participants should leave a comment on each blog along the hop.
Winner will be chosen randomly from all comments on the manufacturer blogs AND the DT blogs. (Winner must have a US/Canada address).
Blog Comments Close: Monday, December 19th @ 11:59pm (Pacific)
Winner Announced:
Wednesday, December 21st (on Authentique Paper blog and Scor-Pal blog)
Have a great day and thanks for stopping by. Now head over to Emily Lanham's blog.
12/15/11
Merry Christmice
This is the card I submitted for the first round of the Spellbinders Design Team tryouts. Alas, I did not make it, so I can now show off this card. I love how it all came together.
I started with Spellbinders Grand Scalloped Circles and created the card base, allowing the cutting edge to go off the edge of the cardstock so I had a card. I then used my Scor-pal to score the card. I cut another seperate Scalloped Circle for the top layer which I adhered half way up to create the stand.
I used a digi image from Elizabeth O. Dulemba and colored it with Copic Markers, adding some Spica pens for shimmer.
I cut a Grand Circle from black cardstock and a smaller Circle from gray cardstock. On the gray cardstock, I used Clearsnap's Music Notes Rollagraph Wheel with Ancient Page Pine Ink, then also inked around the edges of the circle. Some black twine from the Twinery was used around this circle.
For the base, I added another gray circle which was inked with Ancient Page Pine Ink. The sentiment was also stamped then inked with Ancient Page Pine Ink was added to the center of the base with foam adhesives to allow the card to stand up once it was open. Finally, I inked around the scallops with Donna Salazar's Black Mix'd Media Inx.
Supplies:
Dies: Spellbinders Grand Circles, Grand Scalloped Circles, Large Circles
Scoring tool: Scor-pal
Cardstock: Worldwin
Ink: Clearsnap, Donna Salazar - Black Mix'd Media; Ancient Page Pine
Stamps: Clearsnap Rollagraph wheel - Music Notes; Hero Arts sentiment stamp
Image: Digi image by Elizabeth O. Dulemba
Markers: Copic Markers, Spica Pens
Twine: The Twinery
Foam Adhesive: Helmar
Labels:
clearsnap,
copics,
spellbinders,
twinery,
worldwin
12/14/11
Merry Christmas
My post today at Papertemptress features a new Christmas card using some amazing Papertemptress papers.
Supplies:
Cardstock: Papertemptress - Red Pepper, Olive Brown Bag, Pearl Glimmer
Stamp: Hero Arts
Ink: Clearsnap Stephanie Barnard Strawberry
Embossing Powder: Clearsnap Scentz Peppermint
Twine: The Twinery
Embossing Folder: Cuttlebug
Supplies:
Cardstock: Papertemptress - Red Pepper, Olive Brown Bag, Pearl Glimmer
Stamp: Hero Arts
Ink: Clearsnap Stephanie Barnard Strawberry
Embossing Powder: Clearsnap Scentz Peppermint
Twine: The Twinery
Embossing Folder: Cuttlebug
Labels:
clearsnap,
cuttlebug,
hero arts,
papertemptress,
twinery
12/13/11
Cheers
It's almost Christmas and we are finalizing our gifts. Gifts always need tags, so pull out your supplies and make a few. I guarantee they will be original!!
Giving a bottle of wine at the holidays always seems so boring; however, add a hand made tag and you've got a wonderfully festive holiday gift!
I used the Christmas Gifts Rollagraph Wheel with Stephanie Barnard Strawberry ink, then added Scentz Snickerdoodle Embossing Powder. Not only does the embossing powder create a fun blend of colors when mixed with the red ink, it also gives off a wonderfully festive scent while creating!!
Lots of Thoughts Design Adhesives created the "To/From" on the label and I added Scentz Peppermint Embossing Powder on top. One of the Banner Wishes "Cheers" was a perfect addition under the wreath. Cherry Pie Design Adhesives was used on the banner and Scentz Peppermint Embossing Powder was used on the sentiment.
I die cut holes in the tags and added an Imaginisce die cut Wreath on top. A little red ink just finished off the edges of the die cut. Just place the tag over the neck of the wine bottle and you are done. Why not create one or two today.
Clearsnap Supplies:
Ink: Colorbox Petal Point, Pinwheel; Stephanie Barnard Strawbery Dye Ink
Design Adhesives: Lots of Thoughts, Banner Wishes
Designer Foils: Cherry Pie
Embossing Powder: Scentz Peppermint and Snickerdoodle
Rollagraph Wheel: Christmas Gifts
Other Supplies:
Cardstock: Bazzill
Die cuts: Spellbinders Nestabilities
Images: Imaginisce
Labels:
bazzill,
clearsnap,
imaginisce,
spellbinders
12/12/11
Clearsnap
Check out Clearsnap's Christmas cheer.
Christmas is coming early and Santa is bringing inkpads, and Sparkle Fibers, and Smooch Spritzes to all the land, early! Add this blinkie to your blog and be entered to win a prize pack of ColorBox inkpads, Sparkle Fibers, and Smooch Spritz to start off the new year right! After you add the blinkie to your blog, post a link to it on our Facebook Fan Page and you'll be entered to win. We're choosing one winner each day until Christmas! Winners will be posted here on our blog posts each day, starting tomorrow.
How To Add a Blinkie: Copy the code from the box above. Then, on your blog, add a gadget to "Add Html Code" (differs depending on the blog platform you are using i.e. Blogger, Typepad, etc). Paste the code you copied into the box that appears. Then click "Save" or "Add to Blog". That's it! Don't forget to post your link on our Facebook Page to be entered to win.
If you do not have a blog, please feel free to leave a comment here. We'd love it if you would share about us on Facebook. Thank you!
12/11/11
12/10/11
World's Greatest Mom
It's always Mother's Day when you have a wonderful Mom. Don't ever forget to let her know how much she means to you.
Using punch 311 and the Circle Punch, I created a doily for my sentiment, adding brads in the center of the punched pieces.
I cut a larger circle to mat my doily and help it stand out from the background.
Supplies:
Pattern paper: GCD Designs, PaperLoft
Punch, Circle Cutter: Kreaxions
Brads: Basic Grey
Ink: Clearsnap Chalk Ink
12/8/11
Imaginarium Designs
Imaginarium Designs is having a Design Team Call so I am showcasing my use of chipboard. I like to create a variety of projects and love to use chipboard for dimension.
I used chipboard elements down the right side of the page to hold information.
This butterfly card has a scalloped circle and butterfly cut from matboard, inked and embossed.
Used chipboard photo turns and letters.
Chipboard cut into 4" squares and covered with pattern paper, creating a post it note holder for coaches/teachers. The chipboard pieces were bound with the Bind it All, then placed in cellophane bags for a quick gift-to-go.
I cut chipboard with my Cricut as the base for the mountains before adding the cardstock.
The chipboard tree was painted and added to my card as the focal element.
For this mini envelope album, chipboard elements were used throughout.
Chipboard cut into 4" squares, covered with pattern paper and bound with the Bind It All to create a mini album about a newborn.
This is a Maya Road chipboard purse with chipboard inserts.
I altered these wooden letters altered with pattern paper and assorted chipboard elements.
Thanks for looking.
12/7/11
Christmas Planner
Christmas is getting closer and what better to help plan for the holidays than using a Planner. You can add recipes, gift lists, things to do, save receipts, etc. And it is so easy to create. Just start with a marble notebook and build it from there.
I added tabs to the pages so I could break down the specific categories I wanted to focus on.
Supplies:
Cardstock: American Crafts
Pattern paper: Little Yellow Bicycle
Ink, Embossing Powder: Clearsnap Donna Salazar Mix'd Media Black
Brads: Bo Bunny Garden Girl
Punch: Stampin Up
I added tabs to the pages so I could break down the specific categories I wanted to focus on.
Supplies:
Cardstock: American Crafts
Pattern paper: Little Yellow Bicycle
Ink, Embossing Powder: Clearsnap Donna Salazar Mix'd Media Black
Brads: Bo Bunny Garden Girl
Punch: Stampin Up
Labels:
american crafts,
bo bunny,
clearsnap,
little yellow bicycle
12/5/11
Jillibean Soup and Scor Pal
This week the Scor-pal Designers are excited to be sharing some last minute gift ideas using product from our friends at Jillibean Soup.
You'll want to stop by each the Scor-pal blog each day this week for new ideas and to leave a comment. Next Monday we will choose one random comment from the week to win a Scor-buddy. Which is perfect for creating last minute gifts or given as a gift for the special crafter in your life.
Also, be sure and stop by the Scor-pal Fan Page and leave a comment too because we will be giving away a Scor-Tape prize pack over there to someone who left a comment both there *and* on the blog. Because, after all, when you are making special gifts you want them to stay together and you want the best.
Of course, be sure and stop by the Jillibean Soup Blog too because they are playing along with Scor-pal this week as well!
I adore these pretty Christmas papers from Jillibean Soup and I had so much fun creating with them.
Using my Scor-Pal, I made Criss Cross cards from cardstock and decorated them with Jillibean papers. These cards are really quick and easy to do and so much fun to decorate. The interior card pulls out and can showcase a nice sentiment or some more pretty paper.
Little boxes can add just the right touch to any occasion. These little boxes can easily hold 3 Ghiradelli chocolates for a little something sweet for that special "someone". Just add a little ribbon and a tag to finish them off.
Thanks for stopping by today.
Supplies:
Scoring tool: Scor-pal
Cardstock: Bazzill
Pattern paper, stickers, buttons: Jillibean Soup
Ink: Clearsnap Chestnut Roan Chalk Ink
Twine: The Twinery
12/3/11
Thinking of You
The softness of Clearsnap inks provided a dreamy look to this card.
I used the butterfly punch (604), using the punched butterflies as stencils for the backg round of my card. Placing the butterflies down, I lightly inked over them with Clearsnap's Chiffon Ink. Once I was done, I lightly inked the spaces between the butterflies with Clearsnap's Peridot Ink. A light spray of Smooch Spritz in Vanilla shimmer added a little bit of shine. The sentiment was stamped directly on the inked and spritz background.
Then I used punch #924 to create a border across the center of my card.
12/1/11
Hershey fun
The December contest has been posted at Scrapbook Express and it is countdown time.
Check out the requirements in the forum and post your layout before December 31 here. There are prizes involved!!!!
Since it is a countdown layout, here is what I used:
10 letters in title
9 black brads
8 numbers and dashes in date
7 journaling strips
6 scallops
5 flowers
4 colors of cardstock
3 photos
2 pieces of pattern paper
1 color of ink
0 buttons
Supplies:
American Crafts Oatmeal, Crimson, Black, White Cardstock
Bo Bunny Et Cetera Extra pattern paper
Bo Bunny Et Cetera Symphony pattern paper
Clearsnap Fluid Chalk Cat's Eye Dark Brown Ink
Queen & Co Black Brads
Cricut Expression, Plantin Cartridge
Spellbinders Scalloped Borderabilities
Prima flowers
Labels:
american crafts,
bo bunny,
clearsnap,
prima,
spellbinders
Subscribe to:
Posts (Atom)