3/27/19

New Home Thanks

Hi everyone I've got a new card on the Just For Fun Rubber Stamps blog using some great stamps available from the store to create my card.  


Using the Collaged Row Houses, I stamped them in black ink then used Memento Markers to color them.  I then die cut around the houses, fussy cutting around the roof so it remained intact.  Next, I die cut a larger panel and placed it on a black card.  Ribbon was wrapped around the card and the stamped panel was added on top with foam adhesives.


I used thanks from Sentiments 1 stamp set.


Thanks for stopping by.

Steph


3/22/19

Clear Scraps Canvas Panel

Hi everyone, I'm on the Clear Scraps blog with a new canvas.


I wanted to focus on one of the new XL Script Words so I decided to create a canvas.

I began by scrunching tissue paper and adhering it to the canvas, being sure to allow some of the texture to remain.   I then placed it aside to dry thoroughly before continuing.


Once dry, I spritzed it with assorted colors of Fireworks! Shimmery Spray Inks.


Using one of the new XL Script Words - You got this - I painted it with Plaid paint.


Using a script stamp with black ink, I stamped it randomly around the canvas.  Adhering a doily to the canvas, I placed the XL Script Word on top with a small spray of flowers.


Separating the Hearts Chipboard Embellishments, I also painted then stamped them.  They made for the perfect embellishments.


Thanks for stopping by.  

Steph


3/20/19

Roaring 20s Canvas

Hi everyone,  I'm participating with the Designer Craft Connection blog hop this month and we are working  with Plaid.  Plaid has an amazing array of paints and DIY Art Supplies.  

At Creativation, Plaid debuted one of their newest products - a mistable version of Mod Podge which works as a glue and sealer as one.  It's a water based formula that dries quickly.   Spritz Mod Podge on your project or use with a paintbrush. 

Spritz Mod Podge on a canvas.  Create texture by crumpling tissue paper and then place it on the spritzed canvas.  Don't smooth it out when adhering to the canvas, just pat it in place.  Allow to dry.


Use assorted colors of FolkArt Acrylic paints to paint the canvas. I used Fire Coral, Villa Green, Ocean View, Sunflower and Baby Pink.


Spritz with water allowing the colors to blend.


Use  the Long Script stamp from JFFStamps, along with Crafter's Companion stamps, using VersaFine Clair Ink to stamp randomly about the canvas.


To add feathers, I respritzd those areas of the canvas with Mod Podge, then placed the feathers.  Mod Podge really helped the feathers stay in place!  It also helped adhere a strand of pearls to the canvas.


Stamp, color and fussy cut the Crafter's Companion images and words and arrange them about the canvas.  Mix up the placement of the words for visual interest.  Also add some wood gears on the canvas.


When happy with the placement, I spritzed the words and adhered them to the canvas.  The ladies were adhered with foam adhesives for dimension.  


What do you think?
 
Please see what the other designers have created.  A full list can be found here.

Please note that just like a paint brush, Mod Podge Ultra Spray tops need to be cleaned after every use. If they aren't they will clog and become unusable.

Thanks for stopping by.

Steph


3/17/19

Easter Mini Album with Rinea

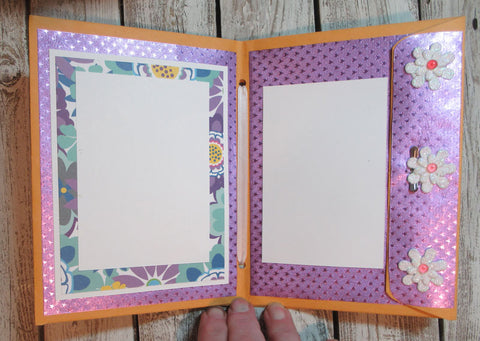
Hi everyone, I've got another Easter post on the Rinea blog.   Spring is almost here and that means Easter won't be too far behind. If you love documenting specific events or holidays, check out this Easter Envelope Album I've created.

Easter Envelope Album

I started with the Pastels Foiled Paper Variety Pack which includes such wonderful colors as Lavender, Jade and Turquoise. I then mixed in an assortment of coordinating foiled papers.

Easter Envelope Album

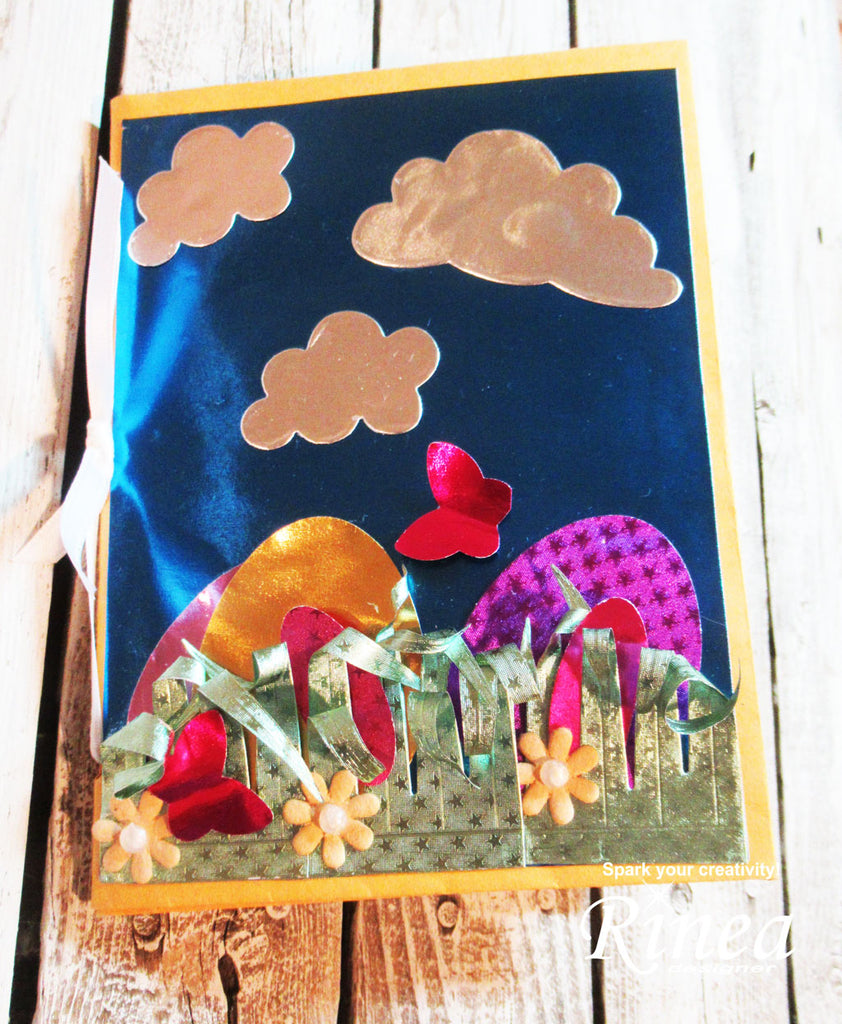
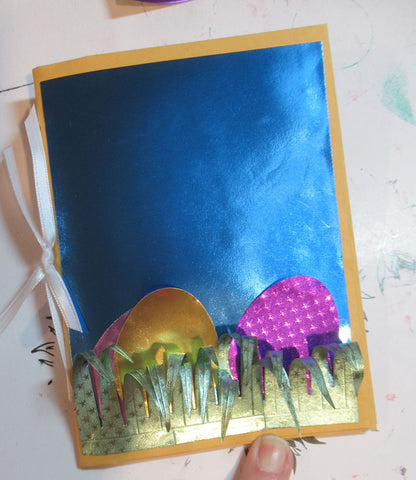
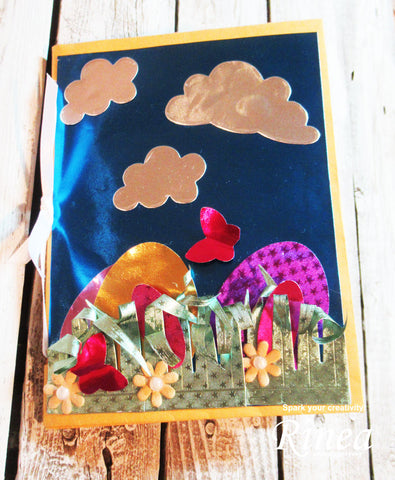
I began by folding the envelopes in half and tying them together with a ribbon. The front cover has a beautiful Sapphire/Gold Glossy Foiled Paper as the base. The grass was die cut twice from Jade Starstuck Foiled Paper using the 3D Hyacinth Die Set. Once the grass was adhered, I simply rolled and/or folded the strips to create movement. Easter eggs were die cut from Violet Starstruck Foiled Paper, Silver/Gold Glossy Foiled Paper and Lavender/Gold Glossy Foiled Paper using Spellbinders oval dies, and then slipped behind the grass.

Easter Envelope Album

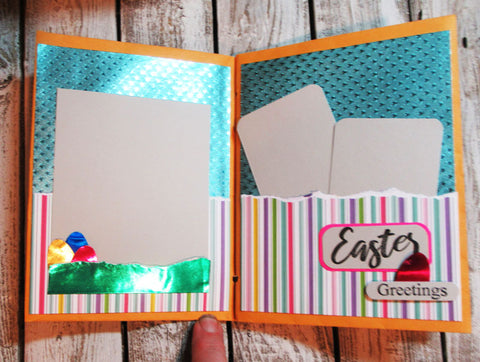
Each page starts out with a base of foil - Turquoise Starstruck Foiled Paper, Jade/Gold Glossy Foiled Paper, Lavender Starstruck Foiled Paper, Blush/Gold Glossy Foiled Paper and Jade Starstruck Foiled Paper. The envelope flaps were allowed to be free creating pockets in the album.

Easter Envelope Album

Pattern paper was added to each page creating a pocket on the right side. Scraps of foils were used to create the Easter eggs which were placed behind a torn strip of Emerald/Gold Glossy Foiled Paper which simulated grass. Easter Greetings was stamped using Joy Clair stamps.

Easter Envelope Album

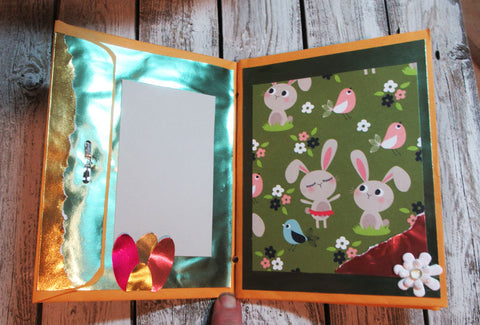
A torn strip of Silver/Gold Glossy Foiled Paper was added to the flap. Pattern paper was added and a torn strip of Blush/Gold Glossy Foiled Paper was added to the right side. Tiny flowers and a dew drop was added to finish the page.

Easter Envelope Album

Additional pattern papers, flowers and dew drops were adhered to the next pages.

Easter Envelope Album

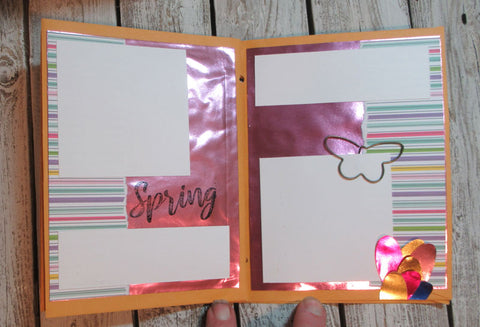
Pattern papers were adhered to the next 2 pages. Spring was stamped with Staz On ink. Tiny Easter eggs were arranged on the right side and a metal butterfly was used as a decorative element.

Easter Envelope Album

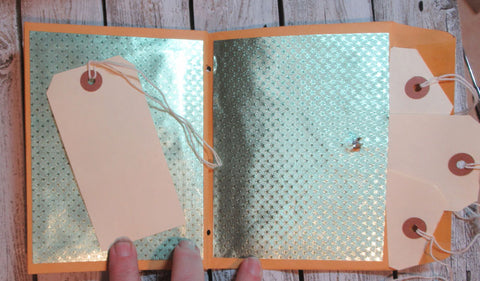
Tags were added to the last page. Opened you can see how additional tags can be placed inside the envelopes. Use them for additional photos or as journaling tags.

Easter Envelope Album

Finally, Silver/Gold Glossy Foiled Paper was die cut to create the clouds. Several small Easter Eggs were punched from Fuchsia/Gold Glossy Foiled Paper and Fuchsia Starstruck Foiled Paper and inserted amongst the blades of grass. Butterflies were also punched from Fuchsia/Gold Gossy Foiled Paper and added around the eggs. Finally, several flowers and dew drops were added amongst the blades of grass.

I hope you've enjoyed this album.

Thanks for stopping by.

Steph


3/14/19

Happy St. Patrick's Day with Etchall

Hi everyone, with St. Patrick's Day approaching, I've created some fun shamrock "mugs" for an upcoming party.


EtchallⓇ etching crème makes etching fun and easy.


Start by deciding on the theme.  Since St. Patrick's Day is approaching, I chose to add shamrocks around the mug.  I used painter's tape to mask off the area I did not want etched.


Using a spoon, I placed the etching crème around the mug and used the Squeegee to cover the entire surface.  Overlaying it on the painters tape ensured, I'd have nice straight lines around the mug.


As you can see my etching creme is very dark.  Over time the color changes but that does not diminish it's effect-it still etches wonderfully.  I let the etching crème sit about 15 minutes, then scraped it off the mug and back into it's jar.  Since etching crème is reusable, there is absolutely no waste!


Then just rinse off the mug, remove the shamrocks and remaining etching crème and towel ⓇⓇdry.


Happy St. Patrick's Day.

Thanks for stopping by.

Steph

3/13/19

Happy Birthday Flowers

Hi everyone I'm on the Just For Fun Rubber Stamps blog sharing a new card using some great stamps available from the store to create my cards.  


I used the Cone Daisies, stamping them on white cardstock with black ink and coloring them with assorted Memento Markers.


Using Lawn Fawn dies, I die cut the image into 2 parts and lightly inked the edges with beige ink.


I created a card from kraft cardstock and assembled the card, placing a layer of kraft cardstock between the layers


Happy birthday is from Sentiments 1 stamp set.

Thanks for stopping by.

Steph


3/8/19

Let your Dreams Fly.....

Hi everyone, my newest post on the Arnold Grummer blog is this pretty Butterfly canvas panel.


Handmade papers can create amazing projects.

Using a 5" x 7" canvas, I spritzed the top 2/3 with several colors of Tattered Angels Glimmer Mists.


Using an assortment of hand made papers, I die cut butterflies from lighter papers and their shadows from darker papers.  Assemble the butterflies then ink them in assorted colors.


To complete the canvas, use molding paste randomly through a brick stencil.  Allow to dry.


Place the butterflies on the canvas.  Add several different colored dew drops on each butterfly, then add additional dew drops for the butterfly tails.


Using a left over scrap of hand made paper, stamp the phrase in black ink.  Tear around the phrase and ink the edges before adding it amongst the butterflies.


Now let your Dreams fly......

Thanks for stopping by.

Steph

Floral Phone Stand

Hi everyone, I'm on the Clear Scraps blog with this Vintage Phone Stand.


Clear Scraps has an assortment of different styles and sizes of phone stands.


I painted the phone stand with Plaid paint.


Then I covered the front with pattern paper and inked the edges with pink ink.


Pretty isn't it?

Thanks for stopping by.

Steph


3/7/19

Easter Treat Boxes with Rinea Foiled Paper

Easter Decorations

Hi everyone - Steph here with a fun Easter project to share. Easter is not too far off now, but you still have time to make some Easter projects.

Easter Box

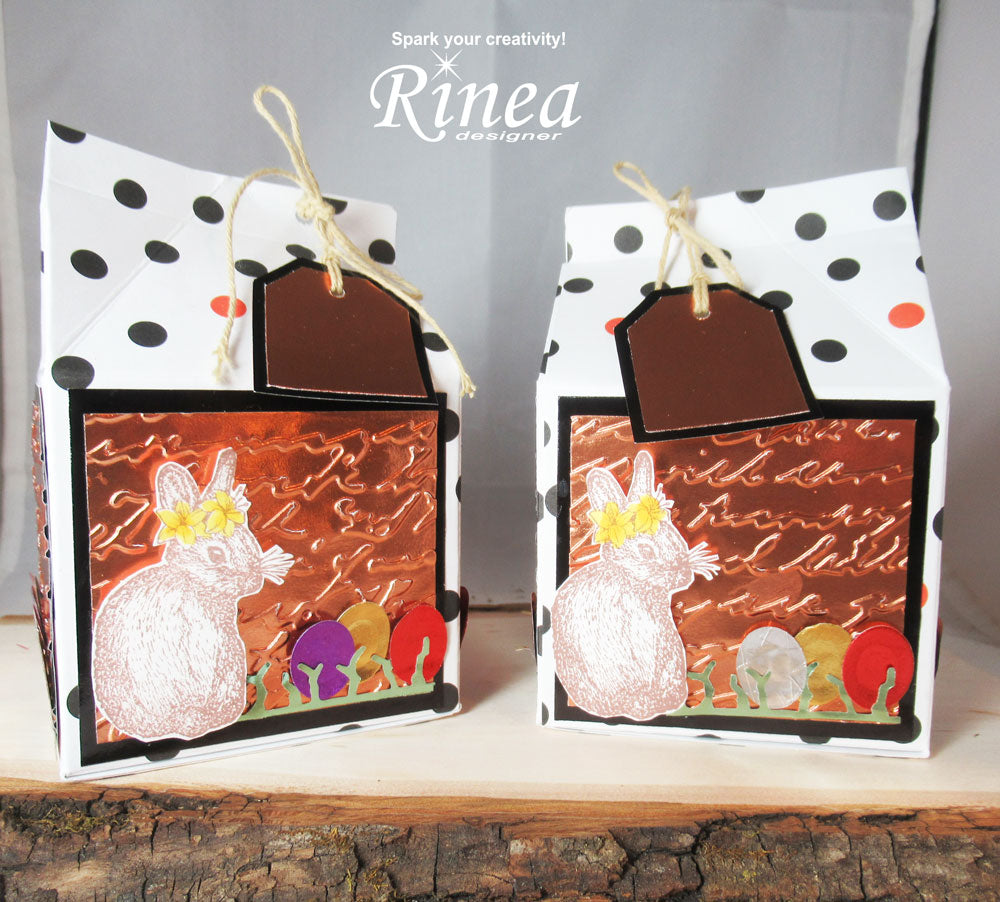
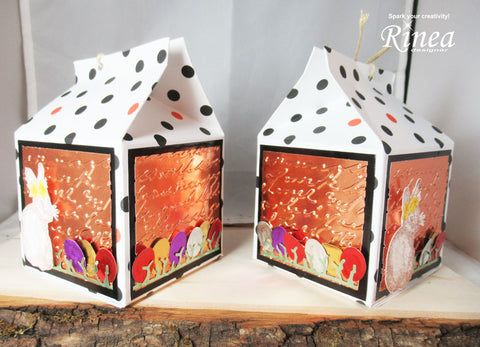
I love creating boxes for little treats for any holiday, but at Easter, you can get really creative with colors as Spring is on the horizon. I started with the Earth Tones Foiled Paper Variety Pack as the base. This variety pack includes such colors as Mocha, Copper and Ebony.

Easter Treat Boxes

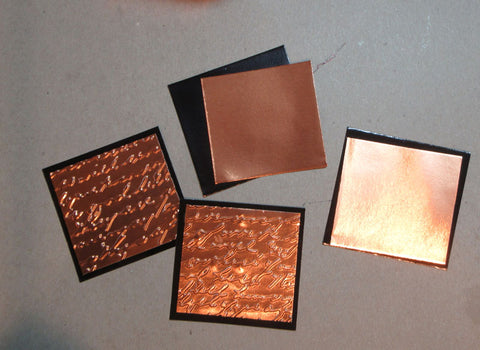
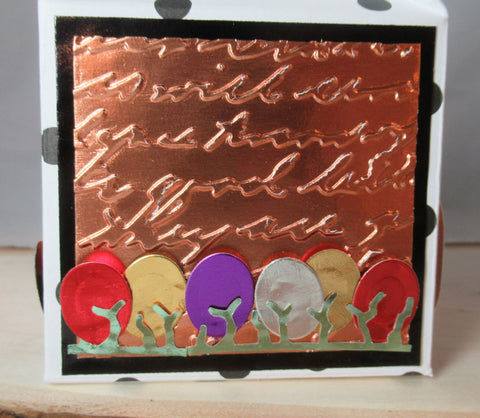
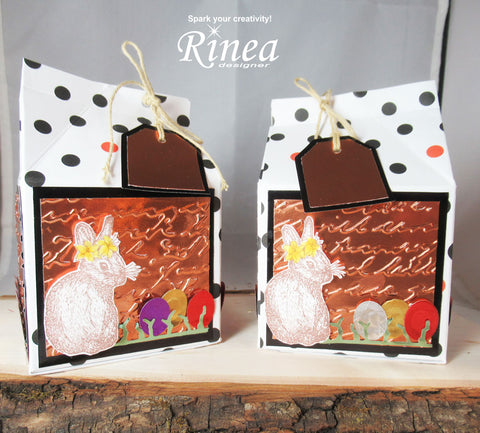
I used Ebony/Gold Glossy Foiled Paper and Copper/Gold Glossy Foiled Paper for the sides of my treat boxes, then embossed the Copper layer with a Cuttlebug embossing folder for dimension. These foils emboss beautifully! The panels were then adhered to each side of the box.

Easter Treat Box

Using a punch, I punched Jade/Gold Glossy Foiled Paper to simulate grass, adhering each piece across 2 opposite sides of each box. Next, I used the smallest oval die from Spellbinders Oval die set to create an assortment of different colored Easter eggs from scraps of foils - Ruby/Gold Glossy Foiled Paper, Violet/Gold Glossy Foiled Paper, Silver/Gold Glossy Foiled Paper.

Easter Treat Box

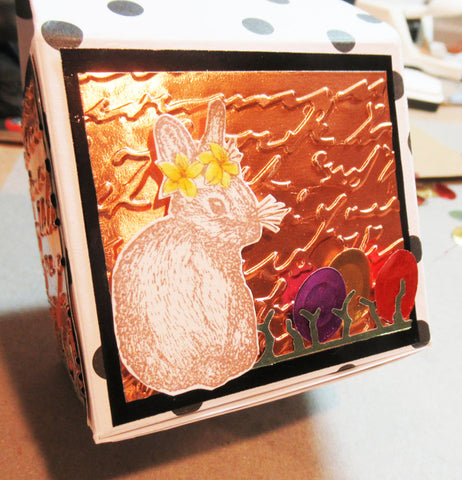
On 2 opposite sides I added bunnies from the Joy Clair Easter Greetings stamp set with a smaller piece of grass and more Easter eggs. All the eggs and the grass were adhered with Beacon 3 in 1 Adhesive.

Easter Treat Boxes

Finally, I created tags from Ebony/Gold Glossy Foiled Paper and Copper/Gold Glossy Foiled Paper, tying them to the treat boxes.

Easter Treat Boxes

How about making a bunch and give to everyone this Easter.

Thanks for stopping by.


Steph