10/30/21

Happy Halloween with Fairy Hugs

Hi everyone, I have another Fairy Stamper project to share.  Happy Halloween!


I created a background with inks and gel press then used Fairy Hugs stamps:

Thanks for stopping by.


10/29/21

TLC Designs Thankful Fairy

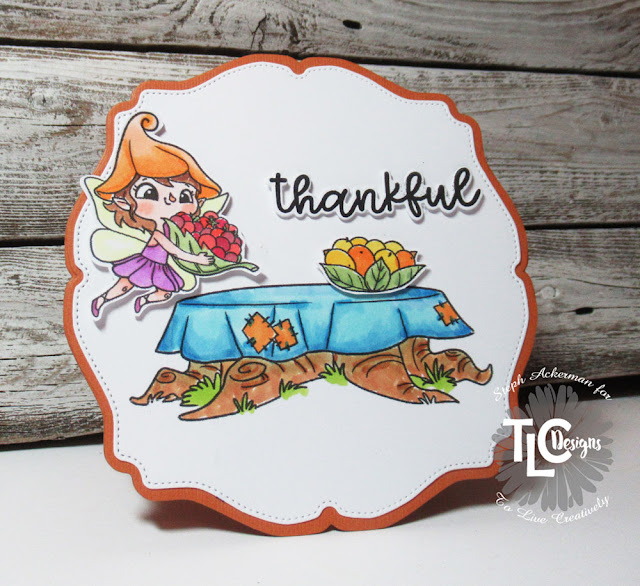
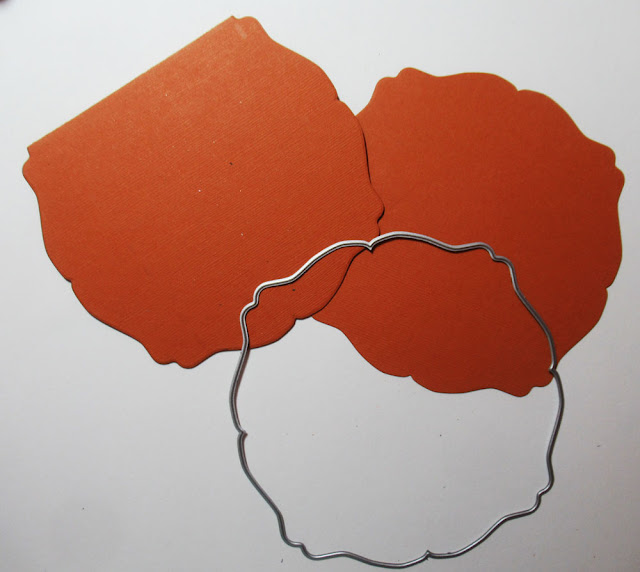
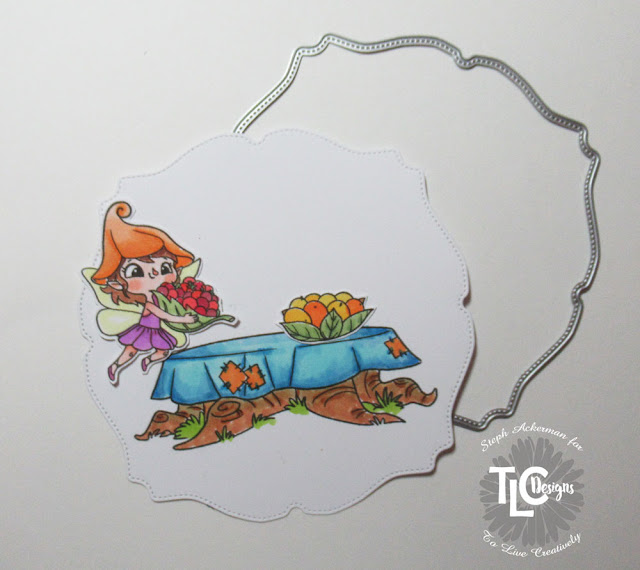
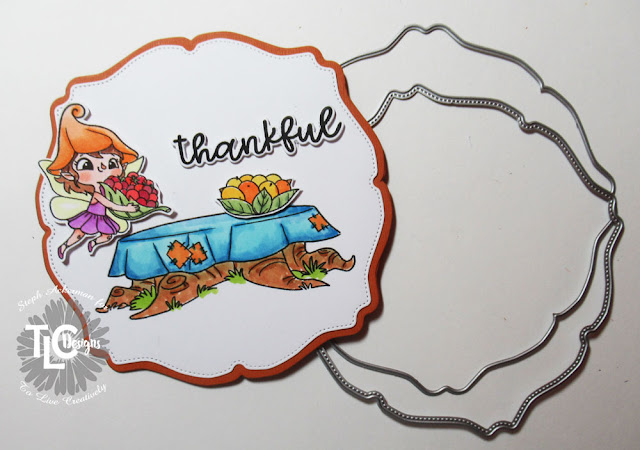
 Hi everyone, I'm on the TLC Designs blog with this sweet thankful card.

I've used the Apple a Day Die to create the card. I love creating shaped cards this die created a beautiful card.  To create the card, I scored cardstock in half and placed the die over the fold so it would remain intact.  Then I die one full die from cardstock to place on top to complete the card.


The next die has a beautiful stitched design.  Printing the table from the Foraging Fairies Digital Stamp set, I used the die to die cut the panel.  I also printed, colored and fussy cut the fairy and bowl of fruit. 


The panel was then added to the card and the fairy and bowl of fruit were added with foam adhesives for dimension.  Finally I added thankful to fill in the open space.


Thanks for stopping by.

Steph

10/27/21

Fairy Hugs Sneak Peak

 Hi everyone, it's sneak time from Fairy Hugs and I have another Fairy Stamper project to share.  


I've used the Tree of Knowledge and Kira.

Thanks for stopping by.

10/23/21

Beautiful Peacock

 Hi everyone, I have another Fairy Stamper project to share.  


The Peacock was stamped and embossed in gold - how regal does he look?   


Using Distress Oxide Inks and torn paper, I created the background.


Finally, I stamped Mini Dancing Mushrooms and Dandelions and grass about the card. Then I lightly stamped  Fairy Life  over the stamped images.

To finish I added several Robin's Nest Dew Drops.

Thanks for stopping by.


10/22/21

Poetic Pixies

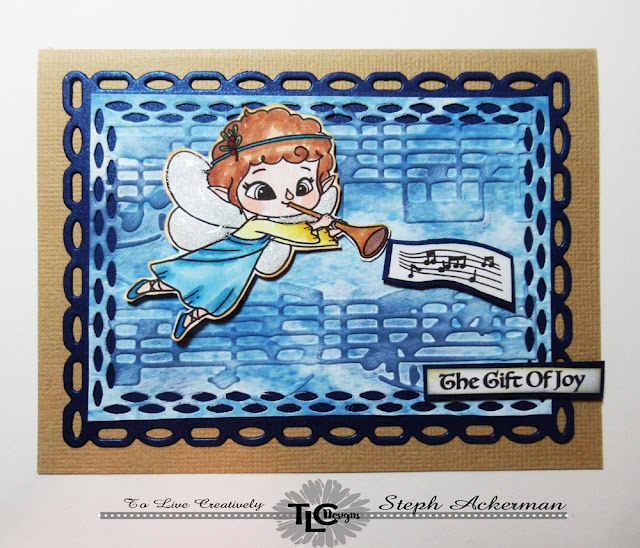
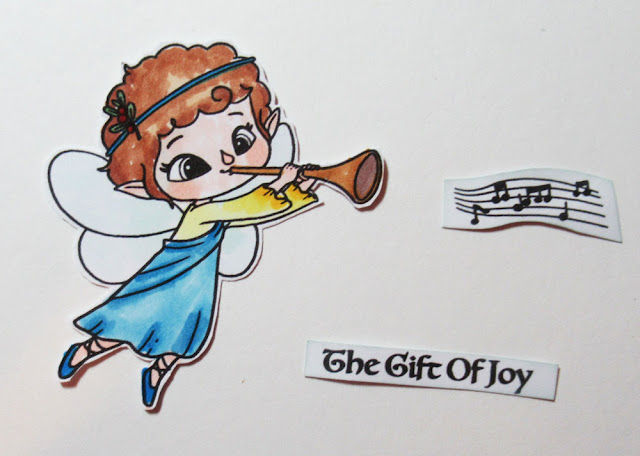
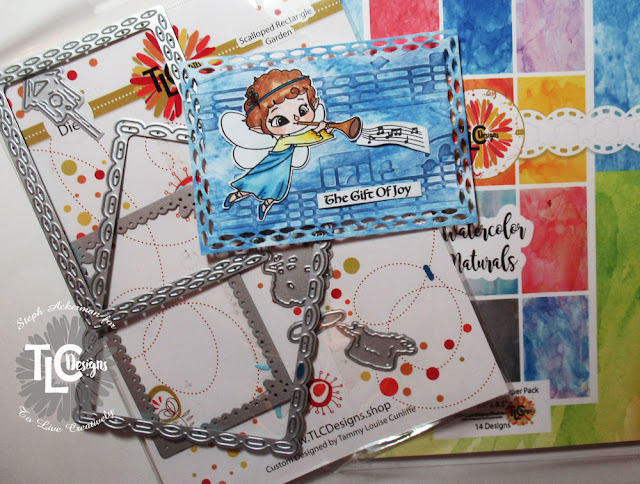
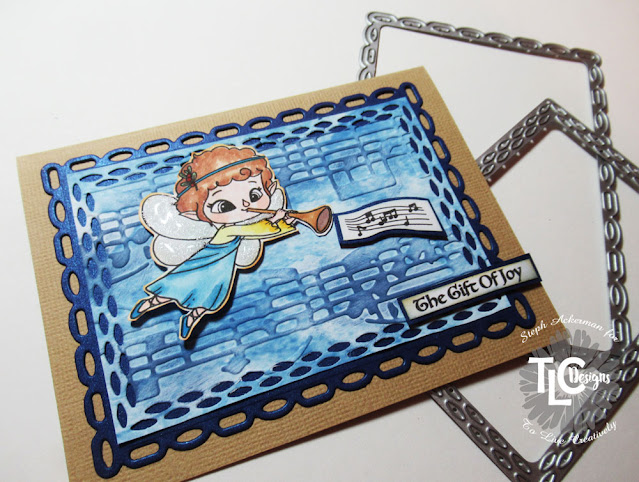
Hi everyone, I'm on the TLC Designs blog with this sweet Pixie card.

I've used the Poetic Pixies Digital Stamps, coloring them with Copic Markers.  They were fussy cut and then added to a background created with Scalloped Rectangle Garden Dies.


The die cut panel was placed atop a panel cut from the Watercolor Naturals Paper Pack which was inked with blue ink.


The images were added to the card with foam adhesives for dimension.  Stickles were added to his wings for a little glimmer.


Thanks for stopping by.

Steph
 

10/21/21

Magic Happens with Etchall

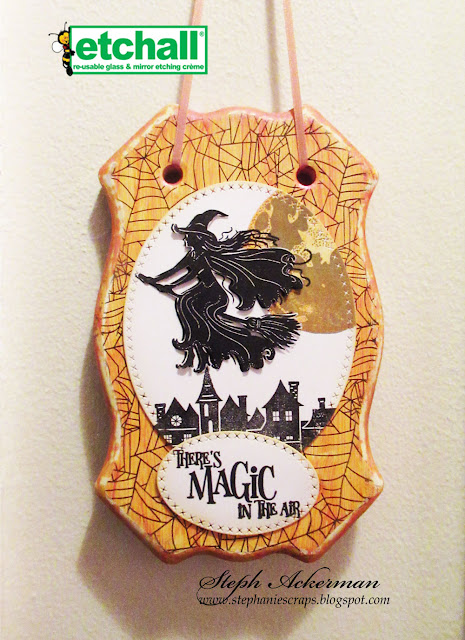
Hi everyone, can you feel the magic in the air?  Halloween is coming and I've created a new piece of Halloween decor for my home.


I found a porcelain sign in a local store and knew it would make a great Halloween project.  Since porcelain does not take paint and inks well, I placed the sign in etchallⓇ dip 'n etch and let it sit for 15 minutes.  


Etchall gives the porcelain some "tooth" which allows the paints and inks to adhere.  As dip 'n etch is reusable, I poured it back into the original container so it  can be used on other projects.


I painted the panel orange and, once dry, I sanded the edges to give it a grungy effect.


Using Fairy Hugs Web Background, I stamped it in black ink on the panel, then repeated until the panel was covered.  


Next, I stamped Fairy Hugs Spooky Moons and Fairy Hugs Rooftops on a white panel which was then die cut into an oval.  Next I stamped  Fairy Hugs Lucinda over the Fairy Hugs moon.  To get a slight shadow, I stamped Lucinda again, fussy cut her then placed her on foam adhesives.  I also stamped and die cut Fairy Hugs Magic In The Air


Lucinda was added to the panel and the die cut Fairy Hugs Magic In The Air was added to finish my panel.  Then I added some ribbon to use as the hanger.

What do you think?

Thanks for stopping by.

Steph

10/20/21

Happy Halloween Treats

  Hi everyone and Happy Halloween.  I'm using some amazing stamps  Blank Page Muse.


Create the toppers using TLC Designs Zinnia Slimline dies.
Stamp and fussy cut the witches, coloring them with Copic Markers.  Adhere the witches to the toppers, slipping the word underneath.

How about creating a bunch of these to give out this Halloween?

Thanks for stopping by.

Steph

Looking for more Inspiration? Click the links below!
The Blank Page Muse Shop https://blankpagemuse.com/

Save 15% of your Blank Page Muse orders with discount code:  BPMSteph

10/16/21

Happy Halloween

 Hi everyone, I have another Fairy Stamper project to share.  Happy Halloween


These stamps are from the new release:  Lucinda and Halloween Hello.

This is a fairly simple card, but incorporates lots of different layers.

Thanks for stopping by.


10/15/21

Gift of Joy from TLC Designs

Today is NEW release day at TLC Designs.  


There are new stamps and papers for all your holiday creations.


I've used the Gift of Joy stamp set, fussy cutting each piece and coloring with Copic Markers.


Using the Watercolor Naturals Slimline Cardstock, I die cut with the middle die from the Scalloped Rectangle Garden Die Set.  This panel was then embossed with a Cuttlebug Embossing Folder and then lightly inked.


Using the largest die from the Scalloped Rectangle Garden Die Set, I die cut navy cardstock and adhered the smaller panel on top.  The panel was then added to the card.


The elements were then added to the card and the angel was added with pop dots for dimension.

To see the full release stop by my instagram account and follow along for your chance to win a gift card to TLC Designs.

Thanks for stopping by.

Steph


10/14/21

Grafix Mixed Media Journal

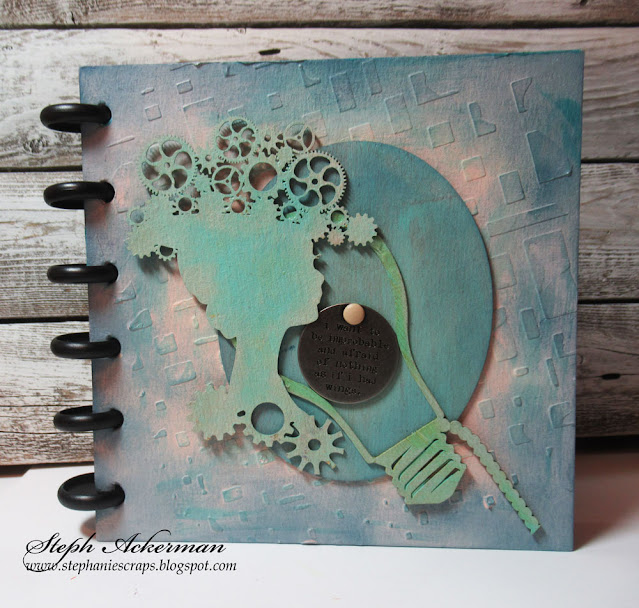
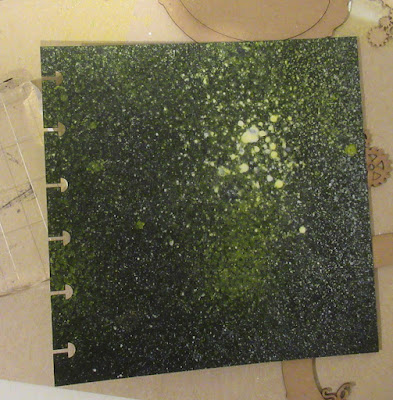
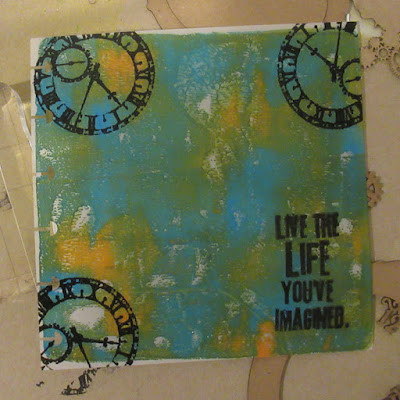
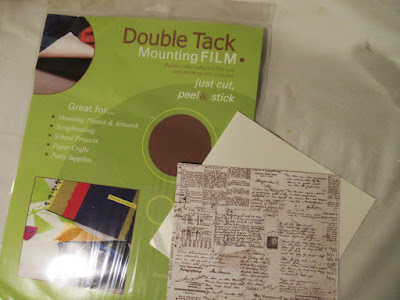
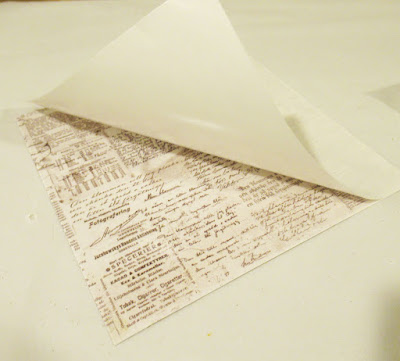
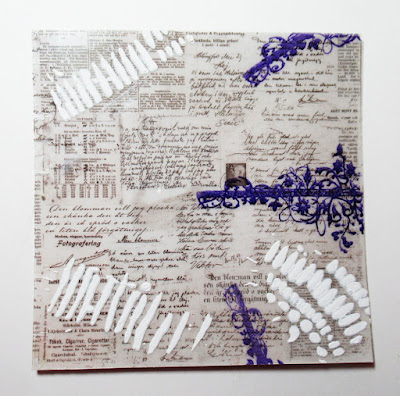
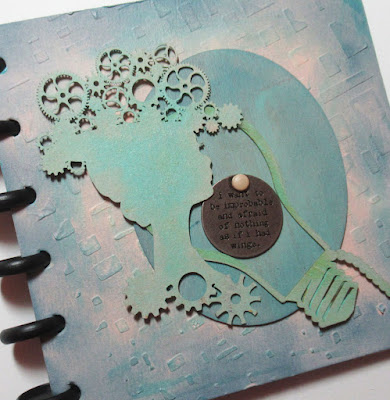
Hi everyone,  I'm participating in the Designer Crafts Connection blog hop, and this month we are partnering with Grafix.


Grafix has a lot of different products for all types of projects.  I received the Mixed Media Journal which has an assortment of different materials to work with.


The covers are chipboard so I used modeling paste, a stencil, paints and inks.  Once dried, I added an assortment of elements to the cover.  I wanted to experiment with the panels so I used a variety of different products on each panel.


I used spray inks on the Opaque Black Dura-Bright panel.


I used paints and a Gel Press on the Opaque White Dura-Bright panel, then stamped images on the panel once it dried.


I also received Double Tack Mounting Film which is amazing for adding papers to the clear panels.


Removing the film from one side of the mounting film, I adhere it to the pattern paper.   Removing the film from the opposite side, I adhered it to the  Clear Dura-Lar panel.


Then I used modeling paste and inks to decorate the clear panel.


This is a great mixed media journal to work with as it gives you a chance to create with an assortment of different panels.

Please stop by the Designer Crafts Connection blog to see what the designers have created this month with products from Grafix.

Thanks for stopping by.

T

Steph


10/9/21

Holiday Sparkle

 Hi everyone, I have another Fairy Stamper project to share.  


 The FH Doe and Fawn were stamped on the card and the Doe was masked off before stamping FH Ania's Tree on the left side,  stamping it slightly off the card.   Then I used torn paper and blue ink to create the snow mounds.


The phrase is FH Holiday Sparkle which I die cut and added to the card.  FH Moon Dust completed the card.


Thanks for stopping by.


10/8/21

Happy Halloween with TLC Designs

Hi everyone, I'm on the TLC Designs blog today with some sweet Halloween cards to share.


I started by using the largest die in the Zinnia Slimline Dies to create the card bases.  For the second layer, I die cut the Creeping It Real Digital Papers with the Tiny Vine Oval Die.


The phrases were die cut with the Celebrate Frame Die.


I just love the images from the Creeping It Real Digital Stamp set.  Each was colored with Copic Markers, then fussy cut.  Aren't they sweet!!!!


The elements were then added to the card with foam adhesives for dimension.

Thanks for stopping by.

Steph

10/6/21

May Your Day Be Special

 Hi everyone, I'm using some lovely stamps and stencils from Blank Page Muse.


Create the background with the cloud stencil and 2 shades of blue inks.
Mat the panel with blue cardstock, then stamp the phrase directly on the panel 


Stamp and fussy cut the butterfly, coloring it with Copic Markers.  Adhere the body to the card, letting the wings fly free.

Thanks for stopping by.

Steph

Looking for more Inspiration? Click the links below!
The Blank Page Muse Shop https://blankpagemuse.com/

Save 15% of your Blank Page Muse orders with discount code:  BPMSteph