Sharing a card using Fairy Hugs stamps available at Fairy Stamper.
2/24/24
Fairy Hugs - You are my Treasure
Fairy Hugs Stencil: Sticks
Create a card from kraft cardstock.
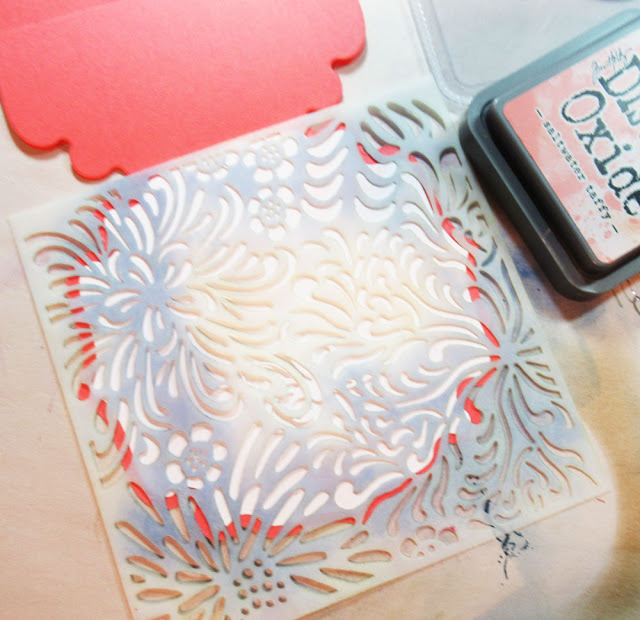
Place the stencil on top and ink with walnut ink.
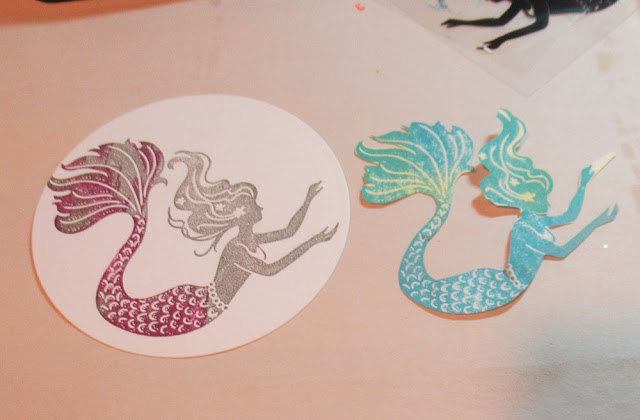
Stamp Marina in gray and purple ink.
Create a mask as that will be needed in the next photo.
Place the mask on Marina and stamp Wiggles in blue ink.
Ink the panel with walnut ink.
Mat the panel with another die cut panel.
Wrap the card with twine and adhere the panel with foam adhesives for dimension.
Add a panel of pink inside the card.
Add the sentiment.
Thanks for stopping by.
Steph
2/22/24
BPM - Brrrrrrrrrr.......
Hi everyone, I'm using some amazing stamps and papers from Blank Page Muse.
Blank Page Muse Papers: Frosty Night
Check out the new digital papers available at Blank Page Muse.
Selecting one of the winter papers, I stamped the fence in brown ink.
Next, I fussy cut some coordinating tags and added them to the card.
The sentiment was added to the tag with a brad.
Pearls were scattered around the card.
Thanks for stopping by.
Steph
Looking for more Inspiration? Click the links below!
The Blank Page Muse Shop https://blankpagemuse.com/
FB Fan Page https://www.facebook.com/groups/bla...
Instagram - Shop https://www.instagram.com/blankpage...
Instagram - Blog https://www.instagram.com/blankpage...
Pinterest https://www.pinterest.com/blankpage...
Save 15% of your Blank Page Muse orders with discount code: BPMSteph
2/21/24
Fairy Hugs Enjoy Life
Sharing a card using Fairy Hugs stamps available at Fairy Stamper.
Fairy Hugs Stamps: Enjoy Life
Fairy Hugs Stencil: Fairy Florals
Create a card from peach cardstock.
Add white panel inside the card.
Place the stencil on the white panel and ink lightly.
Folded, the card fits a standard 6x6 envelope.
Thanks for stopping by.
Steph
Labels:
crafters companion,
Fairy Hugs Stamps,
Fairy Stamper
2/17/24
Fairy Hugs Happy Birthday
Sharing a card using Fairy Hugs stamps available at Fairy Stamper.
Fairy Hugs Stamps: Fairy Words, Angie
Fairy Hugs Dies: Forest Vines
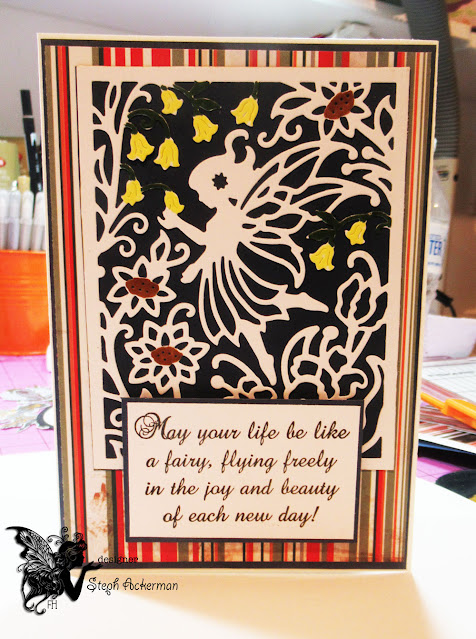
Stamp, color and fussy cut Angie.
Create a card from yellow cardstock.
Cut and emboss white cardstock with a Cuttlebug embossing folder.
Mat with black cardstock.
Add the die cut vines along the left edge.
Add Angie with foam adhesives for dimension.
Stamp and mat the phrase, adding to the card with foam adhesives for dimension.
Thanks for stopping by.
Steph
Labels:
birthday,
cuttlebug,
Fairy Hugs Stamps,
Fairy Stamper
2/11/24
Etchall Hanging Sign
Hi everyone, time to get creative for the month of Love!
Using etchallⓇ etching creme, I created this love sign.
Take apart the frames and remove the glass.
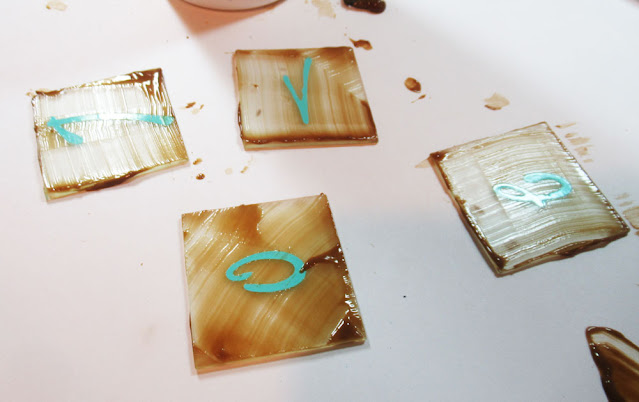
Die cut the letters and place each on the glass panels.
Cover each panel of glass with etching creme.
Allow to sit for 15 minutes.
After 15 minutes, remove the etching creme.
Since it is reusable, place it back in the original container.
Rinse each panel and dry off.
Place the glass panels back in their frames.
Add pink cardstock behind each letter.
Decorate the frames with stones.
Adhere each frame along a strip of ribbon.
Create a bow using the Bowdabra and tie to the ribbon creating a loop at the top.
Thanks for stopping by.
Steph
2/10/24
Fairy Hugs Snowflake
Sharing a card using Fairy Hugs stamps available at Fairy Stamper.
I found a wood snowflake and thought it would make a wonderful backdrop for these stamps.
Once painted white, I added modeling paste along the edges.
When dry, I stamped the fairy poem randomly about the center.
Next, I stamped ice cubes on 3 edges.
Icelyn was stamped and her wings colored with shades of gray Copic Markers.
She was die cut and the phrase was stamped to the right and ice cubes off stamped to the left.
She was matted with gray cardstock and added to the center of the snowflake.
Creating a bow with the Bowdabra, I finished the panel.
Thanks for stopping by.
Steph
Labels:
bowdabra,
copics,
Fairy Hugs Stamps,
Fairy Stamper
2/7/24
Fairy Hugs Be My Valentine
Sharing a card using Fairy Hugs stamps available at Fairy Stamper.
Fairy Hugs Stamp: Entangled Hearts
Using a Cuttlebug embossing folder, ink it first then place white cardstock inside.
Emboss and the ink is embedded in the cardstock.
Mat with cardstock.
Stamp the hearts and color with assorted Copic Markers.
Fussy cut and adhere to the card with foam adhesives.
Die cut the Lawn Fawn phrase.
Cut it apart and adhere to the card.
Thanks for stopping by.
Steph
Labels:
cuttlebug,
Fairy Hugs Stamps,
Fairy Stamper
2/3/24
Fairy Hugs Lantana's Garden
Sharing a card using Fairy Hugs stamps available at Fairy Stamper.
Fairy Hugs Stamps: Fairy Life
Fairy Hugs Die: Lantana's Garden
Die cut Lantana from white cardstock.
Mat with blue cardstock.
Use markers to color several elements about the panel.
Create a navy card and add a striped background.
Adhere the die in place, then place the phrase with foam adhesives for dimension.
Thanks for stopping by.
Steph
BPM - Hello Friend
Hi everyone, I'm using some amazing stamps and papers from I Brake for Stamps.
Supplies: I Brake for Stamps: Kisses Cammy
Hello Friend
I colored her with Copic Markers as I wanted to create a Valentine's Day themed card.
Creating a pink card, I added the doodled paper next.
Circles were added and then a strip of hearts down the side were added to define the card.
Thanks for stopping by.
Steph
Looking for more Inspiration? Click the links below!
The Blank Page Muse Shop https://blankpagemuse.com/
FB Fan Page https://www.facebook.com/groups/bla...
Instagram - Shop https://www.instagram.com/blankpage...
Instagram - Blog https://www.instagram.com/blankpage...
Pinterest https://www.pinterest.com/blankpage...
Save 15% of your Blank Page Muse orders with discount code: BPMSteph
Labels:
Blank Page Muse,
friend,
spellbinders. copics,
Valentine's Day
2/2/24
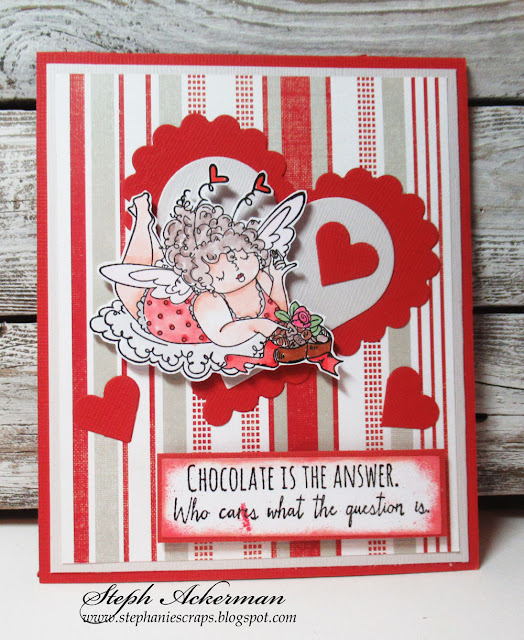
Happy Valentine's Day
Hi everyone, if you love chocolate, then this card is for you.
I've used an older Stamping Bella stamp and fussy cut her.
She was added to a heart base with foam adhesives before being added to a striped card.
The sentiment was stamped and inked, then added to the card.
Thanks for stopping by.
Steph
Labels:
copics,
spellbinders. bazzill,
stampingbella,
Valentine's Day
2/1/24
Scor-Pal - Heart Gift Boxes
Happy February. Valentine's Day will be here shortly and what better way to show the love than by creating these sweet gift boxes.
Supplies: Scor-Buddy
Spellbinders Dies
Lawn Fawn Dies
Ribbon
To create the box shape, cut cardstock 3 1/2" x 7".
With the 7" length at the top, score at 3 1/2".
Rotate the paper and score at 1" and 2 1/2".
Fold along the scored lines.
At the center line, cut as shown for ease of assembly.
Place Scor-Tape along the edges.
Pulling up the Scor-Tape, fold into shape.
Leave the remaining tape in place while preparing the hearts.
Die cut 2 large scalloped hearts from white cardstock to be used as the base.
Die cut 2 smaller hearts from pattern paper and adhere to each base.
Remove the Scor-Tape and adhere the hearts to each side of the box.
Add die cut hearts inside the box.
Punch holes and thread ribbon through the holes.
Place Scor-Tape on the ends of the ribbon and adhere to the inside of the box.
Die cut phrases or words and adhere to each box.
Thanks for stopping by.
Steph
Labels:
lawn fawn,
scor-pal,
scor-tape,
spellbinders. bazzill,
Valentine's Day
Subscribe to:
Posts (Atom)


