2/27/19

Time to Travel with Just For Fun Rubber Stamps

Hi everyone I'm on the Just for Fun Rubber Stamps Blog sharing some great stamps that are available from the store.


It's the start of a new year and time to think about traveling and new destinations!  This Destination Background stamp is amazing with the different cities, countries and fonts.  At 4 1/2" x 5 1/2", it's perfect for the focal point of your card.


Using a pattern paper scrap, I covered it with a light layer of Gold Creative Medium.  Once dry, I stamped the Destination Background on top with VersaFine Onyx Black ink.  


I matted the panel with red cardstock and wrapped red ribbon around the panel before adding it to a black card.  I added an Eifel Tower chipboard embellishment atop the ribbon.   Not all..... was stamped in Onyx Black ink and placed on top.

Thanks for stopping by.

Steph


2/25/19

Clearscraps Mini Pallet

Hi everyone, I'm on the Clear Scraps blog using one of the new pallets - Circle Medium DIY Pallet and Love Chipboard Word Title.


At approximately 8", the Medium Circle Pallet has lots of room to create a wonderful wall hanging.  I started by painting it black as I wanted my decorative elements to pop.


I cut Rinea Fuschia/Gold Glossy Foiled Paper smaller than the pallet then distressed the edges before adhering it to the panel.


Next, I die cut butterflies from Rinea Gold/Gold Glossy Foiled Paper and adhered them to the Fuschia Foiled Paper to serve as the base of my project.


Then I adhered a selection of items from my stash - tickets, flowers, and envelopes.


Additional butterflies were added along with Princess Sequins representing the butterfly trails.


Finally, I inked Love and adhered it across the pallet.

Thanks for stopping by.


Steph


2/24/19

Believe Altered Bottle with Makin's Clay

Hi everyone, I'm on the Makin's Clay blog with a new mixed media project.

When I think of mixed media projects, my thoughts turn to canvas and wood because they are definitely fun bases to work with.  But have you ever thought of using a bottle as the base of your project?

 
Supplies:
Makin's ProfessionalⓇ Cutting Mat
Makin'sⓇ Clay Texture Sheets - Set A, Floral A
​Beacon  Adhesive 


Starting with a base of clay, the possibilities are endless.  You can use any size or style of bottle for this project, just let your imagination flow.   Simply adjust the amount of clay needed for the bottle you are using.  I used a 4.2 oz package for my 16 oz bottle.


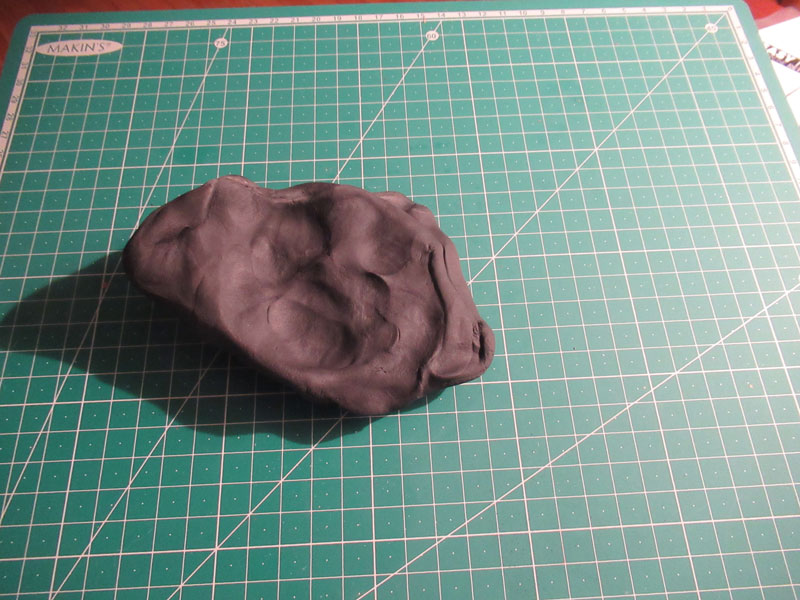
Condition the clay by rolling it on the craft mat, stretching the clay as you roll it.


Starting at the bottom of the jar, place the clay on the bottle and force it around the bottle with your fingers.  I found one 4.2 oz packet was enough for my bottle, but if you desire a thicker layer, a portion of a 2nd package will be required.  Where the edges meet, push the clay together.  While still damp, Makin's Clay does not need adhesive to seal.


Continue forcing the clay around the bottle until the bottle is completely covered.  You will have finger prints in the clay, but that only adds to the final overall effect!


Using several texture sheets add designs randomly around the bottle.  Since the clay is still soft, simply wrap the texture sheets around the bottle and rub on the texture sheet alternating pressure with your fingers.  Using the different pressures allows for lighter and deeper impressions in the clay.   I used Texture Sheet Set A and Texture Sheet Floral A.


I let the bottle dry 24 hours before continuing, but you can continue as you see fit.  I actually taught this project recently and, since time was limited, my students painted the bottle right away and they turned out wonderful.


Using assorted Prima Art Alchemy acrylic paints, add the colors randomly - don't be precise - the idea is to play around, mixing colors and textures. 


I also used Prima art Alchemy Metallique wax to add additional color  The wax really added some amazing color on the black clay.


I glued some mesh  randomly around the bottom of the jar for some additional dimension (after first painting it with black gesso).  While the glue was still wet, I added some Prima Art Stones.


 Finally, I selected an assortment of embellishments from my stash and added them to the bottle.  Some I glued in place and some were allowed to hang free.
 
 
I hope you give this a try.  It's a great way to use empty bottle and all kinds and types of embellishments in your stash.
 
 
Thanks for stopping by.

Steph


2/20/19

Imagine Heart Plaque with Proxxon Tools

Hi everyone, I'm on the Proxxon blog today with a new mixed media sign.

Now that Valentine's Day has ended, that doesn't mean that hearts now are out of season.  Hearts symbolize weddings, anniversaries and even ordinary events.  So I've created a fun mixed media sign.


Begin by drawing a heart on a piece of wood.


Use the 2 Speed Scroll Saw to cut out the heart.  The Scroll Saw makes quick work of cutting wood projects. 


Use the Delta Sander to sand the heart.  


Paint the heart with black gesso.


Use assorted Crafter's Workshop stencils with molding paste to add dimension.  Allow to dry then add color with Fireworks! Shimmery Craft Sprays.  I used Desert Sandy, Lilac Posies, Pear Tart and Potter's Clay.


I then used Prima Art Alchemy waxes to add different effects to the black gesso.


Along the right side I added chipboard elements, then placed tiny hearts created with Makin's Clay and a Mod Podge mold on top.


Along the left side, I added gauze.  Flowers, labels and tiny rocks were added to the gauze to complete my design.


A wood word was nestled amongst the flowers and a tag was added with a clip.

What do you think?

Thanks for stopping by.

Steph

2/17/19

Floral Cards with Rinea Foils

Hi everyone, I'm on the Rinea blog using their Pastels Foiled Paper Variety Pack and some lovely stamps from SoSuzy/Crackerbox Stamps.


Cut Lavender/Gold Glossy Foiled Paper and Turquoise/Gold Glossy Foiled Paper to 4" x 5 1/4".  Using stamps from SoSuzy/Crackerbox Stamps, stamp the Wispy Chrysanthemum Outline on Lavender/Gold Glossy Foiled Paper and stamp the Wispy Chrysanthemum Solid on Turquoise/Gold Glossy Foiled Paper with VersaFine Black Ink.


Mat the Turquoise panel with white cardstock and adhere to a black card.


Add some dew drops to the flower centers.  Stamp the phrase on a scrap of foil, matting with white and black cardstock.  Wrap twine around the panel and adhere to the card with foam adhesives for dimension.


Mat the Lavender panel with white cardstock and wrap with purple ribbon.  Adhere to a black card. 


Stamp the phrase on a scrap of foil, matting with white and black cardstock.  Adhere the phrase along the right side of the card with foam adhesive for dimensions.  Tie twine to the ribbon.


 What do you think?


Thanks for stopping by.

Steph


2/15/19

Easy Etched Vase with Etchall

Have you tried etching yet?  EtchallⓇ has etching products that make etching your glass items fun and easy.


Place a vase in a container and fill with dip 'n etch liquid.  Be sure to add weights to the vase so the vase does not float in the container.  Allow the vase to sit 15 minutes.


Remove the vase and pour the dip 'n etch back into it's container.  As it is reusable, there is absolutely no waste!  Rinse off the vase and dry.  You can see how dip 'n etch created a frosty appearance on the vase while leaving the top portion clear.  This result came about because the top portion of the vase was not exposed to the dip 'n etch.   Had I wanted the entire vase to be etched, I would have used a taller container and additional dip 'n etch.


Using the Bowdabra, I created a beautiful bow and tied it to my vase.


Then I placed some simple daisies in the vase.  Change up the bow you add to the vase and you can have a vase for every season.


You can see another way I've used my vase here.

Thanks for stopping by.

Steph


2/14/19

Love You More Banner and Instagram Hop


Hi everyone, check out the Instagram hop with the Clear Scraps design team.  You will see some amazing projects from each team member.

Here is the hop list:
1. Clear Scraps  -  @clearscraps
2. Leah -  @leahscraftylife
3. Steph  - @steph.ackerman
4. Connie - @cameyer71
5. Christine  - @crafty_mercer
6. Laura  -  @ scrapaddict4life
7. Nancy - @thenickelnook
8. Jennifer  -  @jhaggerty72

Be sure to follow along and follow the rules for a chance to win a prize from Clear Scraps.

This is my post and I've used an acrylic banner panel using one of the new wood quotes - Love you More XL Script Wood Quote.


Begin by removing the film from one side of the banner  and then painting it with white acrylic paint. Allow to dry before removing the film from the opposite side, as the film protects the panel from paint leakage.  Cut pattern paper to fit the reverse side and adhere. I wanted a hint of pattern paper to show and the paint provided a nice hazy effect. 


Using red ink, ink around the edges of the panel.  Glue pom pom ribbon to the edge.  Once dry, glue metallic trim on top.


Spritz wood quote with Fireworks! Angel Pink Shimmery Craft Spray.   Add additional color with Rocket Red ink pad around the edges.  Assemble a fabric flower with a pretty brad and glue to the "O" in You.


Adhere the quote with foam adhesives for dimension.


Add 2 additional flowers to the banner with brads.  Run ribbon through the holes to use as a hanger.

Thanks for stopping by.

Steph

2/13/19

Floral Trio with JFF stamps

Hi everyone I'm on the Just For Fun Rubber Stamps Blog sharing new cards using some great stamps available from the store to create my cards.  


Using one sheet of pattern paper and one sheet of cardstock, I created 3 different floral cards.


The floral paper is double sided with solid green on the reverse side.  To pick up the pink tones, I used a hot pink cardstock.  


I used the following stamps:  Single Flower, If Nothing Changed.., and May Flowers...

While they use the same papers, each card is very different.

Thanks for stopping by.

Steph


2/12/19

With Love with Rinea's Woodland Pack

Did you know that Rinea has amazing packs of coordinating foiled papers?  The newest release is the Woodlands Foiled Paper Variety Pack which contains 2 sheets each of 6 different papers.


To create the background, I used a patchwork die from Lawn Fawn, and die cut Jade Green/Gold Glossy Foiled Paper.  I then matted the panel on brown cardstock.


I die cut the jar, lid and tag from Mocha/Gold Glossy Foiled Paper.


Flowers were die cut from Fuschia Starstruck Foiled Paper and then formed with a stylus.


The jar was added to the card on an angle and the gold strip added across the jar.  Flowers were added around the top and leaves, die cut from Emerald/Gold Glossy Foiled Papers, were added around the flowers.   The tag was inserted under the flowers.


With Love, was stamped, punched and added atop the tag. 


Finally, using a craft pick, I created spirals and inserted them under the flowers.


Thanks for stopping by.

Steph