10/31/23

Happy Halloween Witch

 Hi everyone, Happy Halloween.


I have always loved this Whimsy stamp.


I colored her with Copic Markers, then fussy cut her.


I matted her on a die cut circle embossed with a webbing embossing folder.


I mixed and matched assorted papers for a fun Halloween card.

Thanks for stopping by.

Steph

10/28/23

Fairy Hugs Skating Arabella

 Sharing a card using Fairy Hugs stamps available at Fairy Stamper.


Fairy Hugs Stamps:  
Fairy Hugs Stencil: Fairy Snowflake


Place the stencil on black cardstock, ink with white ink and emboss.


Use the same stencil on a background panel, add white embossing powder and heat set.


Place a snowflake die cut on the panel.
Stamp, emboss and color Arabella before fussy cutting her.
Add her to the card with foam adhesives.


Mat the panel and add to the black cardstock.
Stamp Hello and punch it, placing it on the card with foam adhesives.

Thanks for stopping by.

Steph

10/23/23

Happy Halloween Witch

 Hi everyone, sharing a sweet non traditionally colored Halloween card.


Supplies:  Magnolia Stamp
Joy Clair Stamp
Copic Markers
Lawn Fawn Dies


I love this Magnolia witch.  It's always been a favorite.
I chose to color her in shades of blue.
She was die cut with Lawn Fawn dies.
Happy Halloween is from Joy Clair.

Thanks for stopping by.

Steph

10/22/23

BPM - Fall Pumpkin

 Hi everyone, I'm using some amazing stamps from Blank Page Muse.


Blank Page Muse Stamps: Fall WordPumpkin


Ink the stamp with orange, green and black inks.
Die cut and ink edges.


Create card, adding assorted cardstock and pattern papers.
Die cut a panel of Rinea Jade/Gold Foiled Paper and add to the card.
Mat the image and add to the card.
Stamp and die cut Fall.  
Mat with cardstock and add to the card with foam adhesives for dimension.

Thanks for stopping by.


Steph


Looking for more Inspiration? Click the links below!
The Blank Page Muse Shop https://blankpagemuse.com/

Save 15% of your Blank Page Muse orders with discount code:  BPMSteph

10/21/23

Fairy Hugs Gift Card Holder

   Sharing a card using Fairy Hugs stamps available at Fairy Stamper.


Fairy Hugs Stamps:  Twas the Night
Dies:  Spellbinders


Stamp and emboss the Poinsettias.
Color with Copic Markers, then fussy cut.


Create a 5 1/2" x 6" card from cream cardstock.
Add a striped panel to the card and create a pocket using Spellbinders dies.
Create a tag, add ribbon and twine.
Place a phrase on the tag.


Decorate the reverse side of the tag and create a pocket to hold a gift card.


Adhere the poinsettia to the front panel, then place the tag inside.

Thanks for stopping by.

Steph

10/18/23

Fairy Hugs Winter Chalet

  Sharing a card using Fairy Hugs stamps available at Fairy Stamper.


Fairy Hugs Stamps: 


Make the winter chalet the focal point of your card by combining it with a winter pattern paper.
Add color with Copic Markers and place Liquid Pearls on the fence posts.
Die cut the panel and ink with oxide inks.
Mat the stamped panel with cardstock and add it to the card.

Thanks for stopping by.

Steph

10/14/23

Fairy Hugs Joy Wings

  Sharing a card using Fairy Hugs stamps available at Fairy Stamper.


Fairy Hugs Stamps:  Joy Wings


These new smaller stamps are perfect for this slim line card.
I simply stamped the hydrangea to show through two of the hearts and joy in the center using a variety of inks.


These stamps are perfect for this type of card.

Thanks for stopping by.

Steph

10/11/23

Fairy Hugs Merry Christmas Jayla

 Sharing a card using Fairy Hugs stamps available at Fairy Stamper.


Fairy Hugs Stamps:  Jayla


Stamp Jayla in blank ink and emboss.
Align the Festive Branch above Jayla, leaving room for her to hold an ornament.


Using Distress Oxide Inks, add color to the background.
Stamp and emboss the sentiment.


Mat Jayla with blue cardstock and add to a brown card.
Add the sentiment to the left with foam adhesives for dimension.
Add Stickles to Jayla.

Thanks for stopping by.

Steph

10/8/23

Etchall - Candy Corn Jars

 Hi everyone, I've etched a bunch of mini jars using  EtchallⓇ etching creme.


I had some deserts that came in these cute little jars with lids, so I decided to etch them.


Using mini Halloween stencils, I cut them apart and adhered them around the jars.


Next, I added painter's tape around the images, masking off any areas I did not want etched.


Using a spoon, I added the etching creme around the jars.


Waiting 15 minutes, I removed the etching creme.
Since the etching creme is reusable, I scraped it off and put it back in its original container.


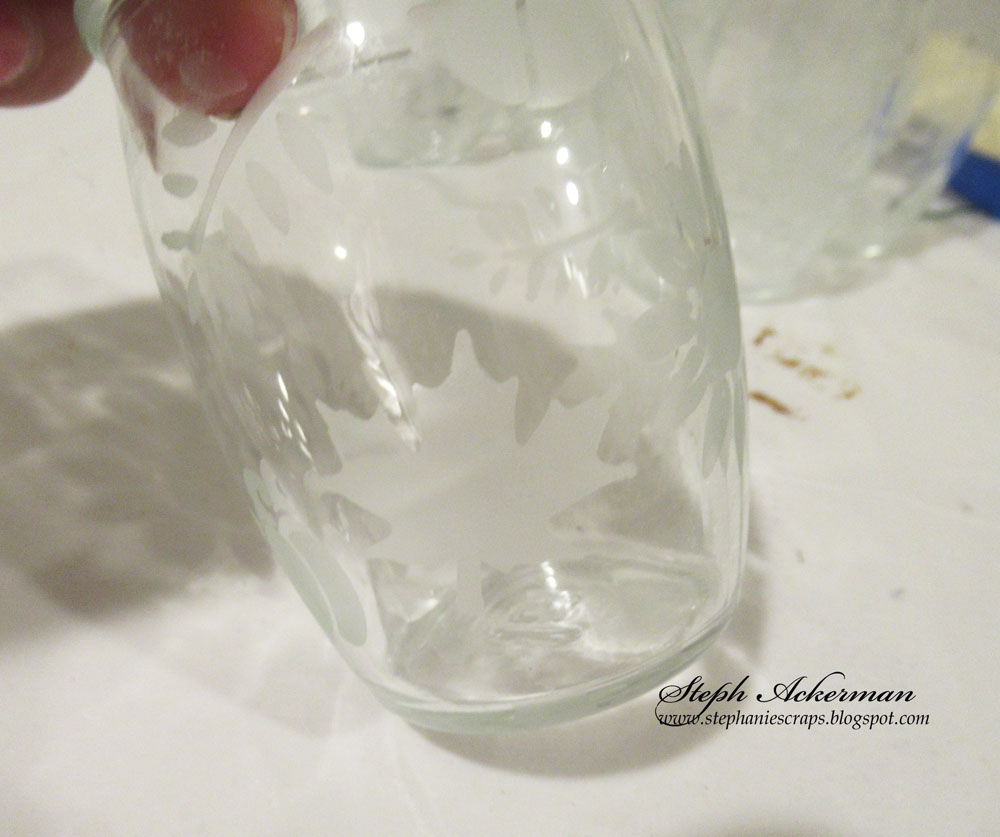
Next, I rinsed off the jars and removed the stencils and tape.
Using a baby wipe, I removed any lingering creme to reveal the design.


These are perfect little jars for creating spooky treats for Halloween.
I filled them with candy corn for family and friends.

Thanks for stopping by.

Steph

10/7/23

Fairy Hugs Dancing Joy

 Sharing a card using Fairy Hugs stamps available at Fairy Stamper. This is one of the scene stamps from their newest collection.


Fairy Hugs Stamps:  Dancing Joy
Fairy Hugs Cardstock: Fairy Scapes - Sticks


Determine the placement of the scene stamp.


Die cut cardstock to use as a mat and tape in place.


Ink the stamp and place over the mat.


Remove the mat and emboss the image.


Stamp piano flowers about the cardstock, and stamp the phrase in the corner.


Mat the panel with cardstock and adhere to a white card.

Thanks for stopping by.

Steph

10/4/23

Fairy Hugs With Love Roses

   Sharing a card using Fairy Hugs stamps available at Fairy Stamper.


Fairy Hugs Stamps: Fairy Poem
Fairy Hugs cardstock: Tanglewhisper


Using a second generation stamping technique, stamp the Fairy Poem over the background.


Stamp, emboss and fussy cut the roses.


Using a masking technique, ink the stamp.
Remove the mask.
Stamp, emboss and die cut the sentiment.


Add a window panel to the card.
Place the roses on top with foam adhesives.
Slip the die cut sentiment behind the roses.


Thanks for stopping by.

Steph

10/3/23

BPM - Flower Fairy Fantasyland

 Hi everyone, I'm using some amazing stamps from Blank Page Muse and I Brake for Stamps.

Blank Page Muse Stamps: Fairy Sitting in Flowers Fantasy
I Brake for Stamps:  Old Friends


Stamp and emboss the fairy.
Color with Copic Markers, then die cut her.


Create a card from green cardstock.
Cut a sheet of pattern paper to fit.
Mat the fairy with green cardstock.
Stamp and die cut the sentiment, mat with cardstock.


Add all the elements to the card, using foam adhesives for dimension.

Thanks for stopping by.

Steph


Looking for more Inspiration? Click the links below!
The Blank Page Muse Shop https://blankpagemuse.com/

Save 15% of your Blank Page Muse orders with discount code:  BPMSteph