7/31/23

Masculine Birthday Card

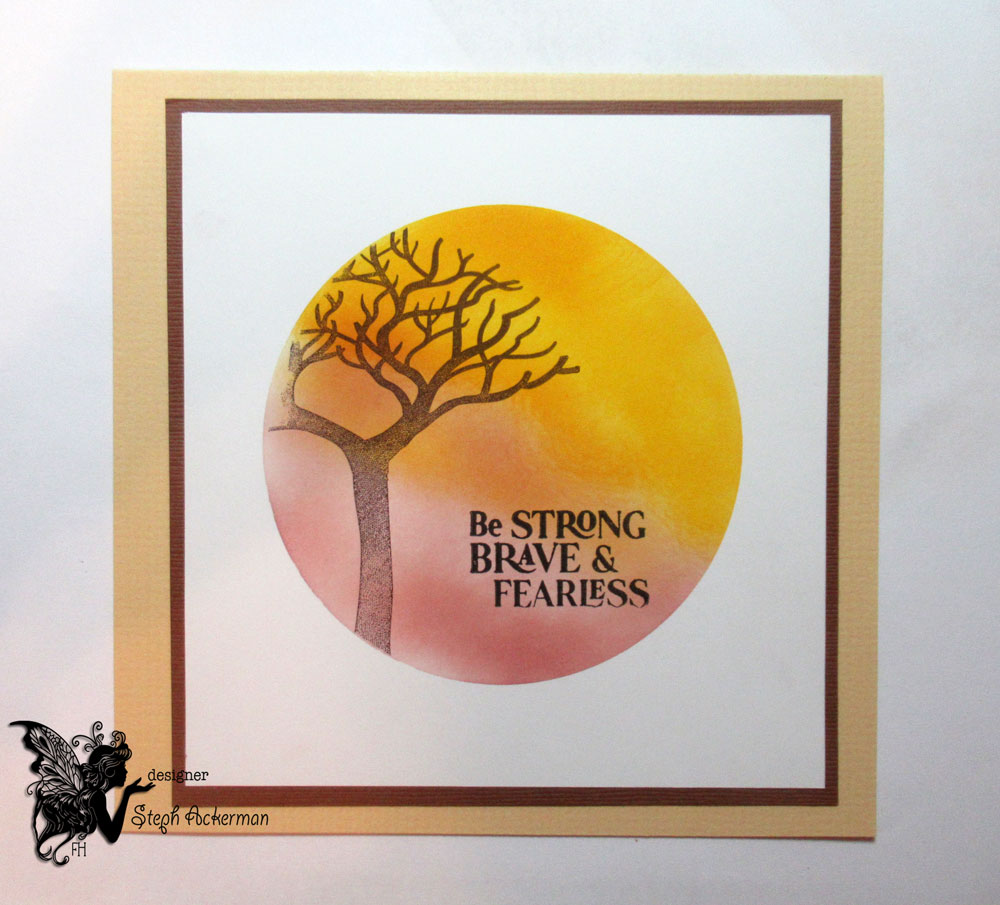
 Hi everyone, need a masculine birthday card?  Then, I've got one to share.


Stamps:  Heartfelt Creations
Inks: Oxide Inks Blue Jeans,Tea Dye, Hickory Smoke


Stamp the barn on a panel of white using black ink.
Add color to the sky with Blue Jeans and Hickory Smoke.
Add color to the ground using Tea Dye.
Mat the panel with black cardstock and adhere to a brown card.

Stamp Happy Birthday and ink with Blue Jeans.
Mat with black cardstock and add to the card.

Thanks for stopping by.

Steph

7/29/23

Fairy Hugs New Chapter

  Sharing a card using Fairy Hugs stamps available at Fairy Stamper.


Stamp the carriage in the center of the panel.
Stamp Ania's Tree to the left side.
Then stamp the Enchanted Branch around the tree.
Add color to the bottom of the panel.


Stamp the phrase in the upper corner then mat the panel before adding to the card.

Thanks for stopping by.

Steph

7/26/23

Fairy Hugs Love Shack

   Sharing a card using Fairy Hugs stamps available at Fairy Stamper.


Fairy Hugs stamps: Love Shack


Stamp the Shack.
Mas the Shack and stamp the pathway and Ania's Tree.


Add color to create the grass.
Stamp the mushrooms behind the grass using a mask.
Stamp several birds about the shack.
Add color to the sky using several shades of blue.


Mat the panel with light blue cardstock and adhere to a black card.
Add color with Copic Markers.


Thanks for stopping by.

Steph

7/25/23

Merry Christmas Lantern

 Hi everyone, it's time to celebrate Christmas in July.


Using a wordy background, ink with red and green oxide inks.
Mat the panel with red cardstock.
Adhere to a green card.


Die cut lantern from Rinea Foiled Paper - Ebony/Gold Glossy.
Flip over the die cut panels so the gold is available for the windows.
Die cut poinsettia from Rinea Foiled Papers in Ruby/Gold Glossy.
Die cut the leaves from Emerald/Gold Glossy.
Die cut mistletoe from Jade Starstruck.

Die cut Merry Christmas from Ebony/Gold Glossy.

Thank you for stopping by.

Steph

7/23/23

Etchall Etched Frame

  Hi everyone, I've used EtchallⓇ etching creme on the glass for this frame.


It is difficult to stamp directly on glass because it smears.  But using etchallⓇ etching creme on the glass first gives the glass "teeth" so you can stamp on it without smearing.


Begin by covering the glass with a liberal amount of etching creme.
Allow it to sit on the glass for approximately 15 minutes.
Since the creme is reusable, after 15 minutes, scrape it off and put it back in it's original container.  The creme is now available for your next projects.

Rinse off the glass and dry.


I used a Fairy Hugs stamp - Songs of Love - stamping it in black ink on the glass.
Use even pressure over the stamp.
Remove the stamp and this amazing look appears.


Replace the glass in the frame and display.

Think of all the amazing phrases you can place inside a frame.

Thanks for stopping by.

Steph

7/22/23

Fairy Hugs Cinderella's Shoe

   Sharing a card using Fairy Hugs stamps available at Fairy Stamper.


Fairy Hugs stamps:  Glass Slipper
Fairy Hugs Stencil: Sticks


A bit of masking today - stamp the shoe on a white panel.
Then stamp it again on scrap paper and fussy cut.


With the mask in place, stamp the pillow.


Stamp Fearless to the left of the image.


Using pink ink, ink the stencil.
Be sure to leave the area around the pillow free of the stencil.


Mat with pink cardstock and adhere to a black card.


Add a bit of color with Copic Markers.

Thanks for stopping by.

Steph

BPM Gift Card Holder

 Hi everyone, I'm using some amazing stamps from Blank Page Muse to create a gift card holder.


Blank Page Muse Stamps: Mostly Phrases


It's that time of year where gift cards are given to teachers and coaches.
Finding this sports paper in my stash, I decided to create a gift card holder.


Stamp the phrase on the gift bag and insert a gift card.

Thanks for stopping by.

Steph


Looking for more Inspiration? Click the links below!
The Blank Page Muse Shop https://blankpagemuse.com/

Save 15% of your Blank Page Muse orders with discount code:  BPMSteph

7/19/23

Fairy Hugs Fairy Tale

   Sharing a card using Fairy Hugs stamps available at Fairy Stamper.


Fairy Hugs Stamps:
Magic Wheelbarrow    
Garden Gnomes
Fairy Tale
Ania's Tree
Wind Gust

Create an amazing scene using a variety of Fairy Hugs stamps.

Thanks for stopping by.

Steph

7/18/23

Let's Fly with TLC Designs

 Hi everyone, I'm sharing a sweet interactive card using supplies from TLC Designs.


TLC Supplies:


Using the 2 dies, die cut blue cardstock and pattern paper.
Place the slider mechanism on the panel and die cut.


Following the directions on the package, create the moving mechanism.  
Use foam tape to give the panel height, leaving room for the mechanism to work.
Then assemble the card.


Create a card from white cardstock and place the panel on top.


Die cut the grass and mushrooms, adding to the bottom of the card.  
Stamp and color the images with Copic Markers and fussy cut.  
Add them to the mechanism with foam adhesives.  
Add inked clouds to the left side of the card.


Turn the dial of the mechanism so that Peter and Wendy appear to fly.

Thanks for stopping by.

Steph

7/15/23

Fairy Hugs Story Time

   Sharing a card using Fairy Hugs stamps available at Fairy Stamper.


Fairy Hugs Stamps: 


Fairy Hugs has a storybook theme collection and I've paired some of those stamps with some older stamps like Once Upon a Time.  
Using Heartfelt Creations dies, I created a book themed card.
Layering different sized pages I created a book.


Look at the 2nd page peaking out from page one.
I've stamped the Twig House and Fairy Dictionary.

Thanks for stopping by.

Steph

7/14/23

You're in my thoughts

Hi everyone, sympathy cards are difficult to create and not something I enjoy creating.  But using assorted dies and stamps, you can create a beautiful sympathy card to share.


Create a 7" x 6"card from cardstock.
Using dies from Anna Griffin, die cut pattern paper using the intricate die.
Die cut the base from navy cardstock and adhere the layers to the card.

Stamp and die cut sentiment.
Die cut again from navy cardstock and adhere to the card.
Add the sentiment on foam adhesives for dimension.


Stamp the phrase inside the card.
Stamp some leaves about the panel.
Mat with cardstock then adhere inside the card.


Thanks for stopping by.

Steph

7/12/23

Fairy Hugs Be Fearless

 Sharing a card using Fairy Hugs stamps available at Fairy Stamper.


Fairy Hugs Stamps:   


Cut cardstock 5 1/2" square.
Die cut a circle in the center of scrap paper.
Place the scrap paper on top of the cardstock.
Add color using Distress Oxide Inks in Aged Mahogany and Mustard Seed.
Blend the colors.


With the scrap paper still in place, stamp the tree to the left side.


Stamp the sentiment and mat the panel with brown cardstock.
Adhere to a yellow card.

Thanks for stopping by.

Steph

7/8/23

Fairy hugs Enchantment

  Sharing a card using Fairy Hugs stamps available at Fairy Stamper.


Fairy Hugs Stamps:
Fairy Hugs Paper:  Tanglewhisper


Using Tanglewhisper paper, stamp the bridge.
Using a masking technique, stamp the stone path to the right side.


Keeping the mask in place, stamp the rugged pines on the right side and Ania's Tree on the left.
Stamp the pumpkin carriage so it appears to be heading towards the bridge on the starry pathway.


Add color to the bricks and place on the fairies above the bridge.

Mat the panel with blue cardstock and add to a pink card.

Thanks for stopping by.

Steph

7/5/23

Fairy Hugs Teacup Condo

   Sharing a card using Fairy Hugs stamps available at Fairy Stamper.


Fairy Hugs Stamps: 
Fairy Hugs Paper:  Tanglewhisper


Stamp the Condo on the Tanglewhisper paper in black ink and emboss.
Using grey ink, stamp the Collage over the image.


Stamp Fairy Princesses around the Condo.
Stamp Nigel in brown ink and fussy cut him.
Add Nigel to the card with foam adhesives for dimension.
Add to a brown card.

Thanks for stopping by.

Steph