Showing posts with label gel press. Show all posts

3/26/23

Etchall - Floral Fairy Bottle

Hi everyone, I've created a sweet Floral Fairy Bottle using  EtchallⓇ.


Place a glass bottle in etchallⓇ dip 'n etch.
Allow it to sit in the liquid at least 15 minutes.
Remove, rinse and dry off.


Using a Gel Press, I added some pretty spring colors on it - red, yellow, blue.


Using a brayer, I mixed the colors.


Place each side of the bottle on the gel plate, picking up the paint.
Add more paint to the gel plate, if necessary.
Repeat until the bottle is covered.


Allow to dry thoroughly before continuing.


Selecting assorted stamps, create designs on each side of the bottle.


Etchall gives the bottle "teeth" which allows you to stamp images without smudging or slipping.


To finish, I added some ribbon around the top.

Thanks for stopping by.

Steph

3/26/22

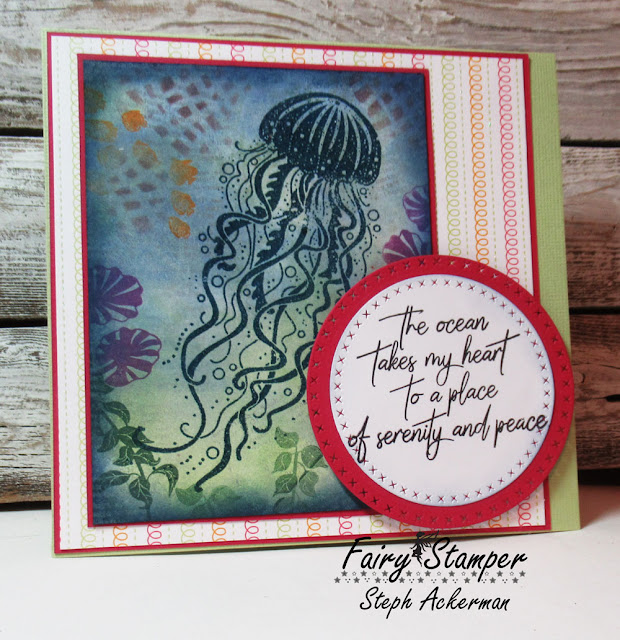
Serenity and Peace

  Hi everyone, I have another Fairy Stamper project to share.  


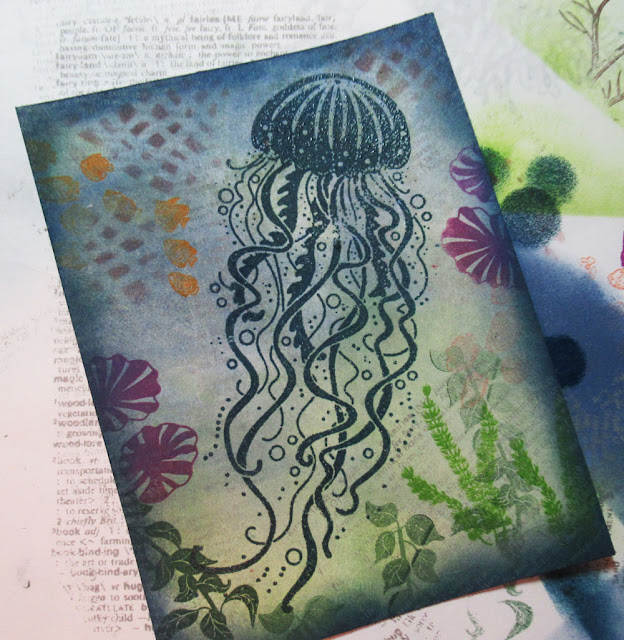
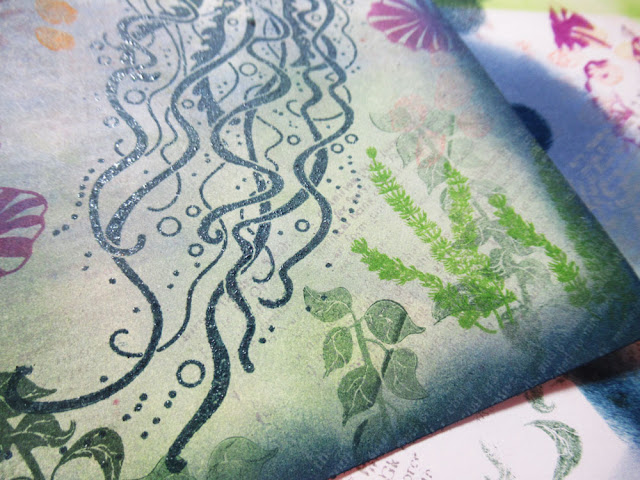
I used a Gel Press with acrylic paints to create the background.  Then I had fun using lots of stamps and stencils to create my card.


If you look closely, you can see the Fairy Dictionary stamp in the lower right corner.  I first stamped it on scrap paper, then stamped on the background for a very subtle effect.


Fairy Hugs Stamps:  Wiggles, Ivy Seaweed, Fan Plants, 

Fairy Hugs Stencil:  Net


2/9/22

Sunrise and Sunset

 Hi everyone, I have another Fairy Stamper project to share.  


I created the background using acrylic paint with a Gel Press.


I wasn't sure I like the print I pulled, so I let it sit overnight.  Then I began pulling out a stencil and stamps and love the result.

Fairy Hugs Stencil:  Flow


2/2/22

Doria's Treasures

 Hi everyone, I have another Fairy Stamper project to share.  


I created the background using acrylic paints and a Gel Press.  Didn't like it at first, so I put it aside.  When I picked it up the next morning, I realized it would work for a great under the sea background.


10/30/21

Happy Halloween with Fairy Hugs

Hi everyone, I have another Fairy Stamper project to share.  Happy Halloween!


I created a background with inks and gel press then used Fairy Hugs stamps:

Thanks for stopping by.


6/20/19

Sweet Mushrooms Card

Hi everyone, it's time for the next challenge at Lavinia World Challenges.  Please check it out and join in the fun.


Lavinia World has some really sweet stamps and I used Mushrooms as the focal image of my card.  It  was stamped with Versafine Clair Pinecone Ink and embossed with clear embossing powder on a background created with paints and stencils using a Gel Press.  


The panel was matted with green cardstock and a 1" strip was added across the panel and wrapped with twine before being added to the card.


Would love to see what you create for Challenge #3.  The winner of the challenge will receive a $15 gift certificate to Lavinia World to shop for more goodies.   Remember there is a new challenge every other Thursday.  Can't wait to see what you create.

Thanks for stopping by.


5/27/19

Stenciled Hello Spring Cards

Hi everyone, I'm on the Clear Scraps blog with some spring cards using the Hello Spring Stencil.


I created an assortment of backgrounds using gelli printing.  I had lots I put aside for future projects.


I taped the stencil to one of the backgrounds, taping off the flowers as I did not want them for this project.  I used a pallete knife and Gold Creative Medium to cover the words.


The results are stunning.


I wrapped this panel with twine before adding it to the card.


And I added flowers to this panel before adding it to the card.


Thanks for stopping by.

Steph


5/23/19

Never Let Go Of Your Dreams

Hi everyone, it's time for the first challenge at Lavinia World Challenges.  Please check it out and join in the fun.

Lavinia World has some really sweet stamps and I used Daydreaming Silhouette as the focal image of my card.  She was stamped and embossed on a background created with paints and stencils using a Gel Press.  I wanted the background to be as whimsical as the stamp.


Surrounding the image, I stamped and embossed a row of Toadstool Miniatures.  Never Let Go is a set of 6 individual stamps that can be stamped as one phrase or as separate words.  I matted each and arranged them on the card.


Would love to see what you create for Challenge #1.  The winner of the challenge will receive a $15 gift certificate to Lavinia World to shop for more goodies.   Remember there is a new challenge every other Thursday.  Can't wait to see what you create.
 
 
Thanks for stopping by.
 

Steph


10/8/17

World Cardmaking Day with Joy Clair

Hi everyone, did you know that we are celebrating World Card Making Day on the Joy Clair blog with lots of challenges?  Pop on by the blog and see all the challenges.


My challenge is to pick 1 item from each column and create a card.

For my Technique I chose inking.  For the trend I chose paint.  For the theme I chose Christmas.

I used a Gel Press with assorted colors of paints to create a variety of backgrounds.


Once I had the background I wanted, I dry embossed it then added the panel to my card.


I used the MISTI to align the images stamping in an assortment of colors.


I wrapped a pattern panel with Whisker Graphics twine and added it to the card with foam adhesives.  Then I die cut the sweater panel, adding it on top.


The phrase is from Joyful Wishes and was added to the right corner.


Stop by the Joy Clair blog to see all the challenges today.

Thanks for stopping by.

Steph

7/1/17

Just for Fun July challenge

Hi everyone, it's time for a new challenge at Just For Fun Rubber Stamps and this month it's all about weddings.


The background was created using the Gel Press and pulling prints from the plate.  I used a combination of silver, red and pink acrylic paints and ended up with this fabulous print.  I then randomly stamped the Postal Hearts on the final print in black ink.


I matted the panel on pink and red cardstock then wrapped the panel with ribbon.


Next, I placed the panel on a  black card.  I stamped congratulations from the Sentiments 1 stamp set, matted it the same as the card and added it to the ribbon using a paper tagger.


Thanks for stopping by today.

Steph

2/23/17

Backgrounds with Gel Press

Hi everyone, it's a beautiful day and I'd love to share some cards I created with the Gel Press.

Have you tried using the Gel Press Monoprinting plates?  Gel Press plates come in a variety of sizes and you have the ability to create amazing designs.


Using the Gel plate and one stencil, I was able to create 2 different backgrounds.


I began by adding paint to the 6" x 6" plate.  Using a brayer, I spread the paint across the plate.  Then I placed a Prima stencil in the wet paint.  Placing white cardstock on top and using a clean brayer, I pulled this amazing print.

After cutting it to fit, I matted it with Bazzill cardstock then adhered May Arts ribbonaround the panel before adding it to the card.


The Memory Box Butterfly was die cut twice for dimension.  Hang in there, from Heartfelt Creations, finished off the card and was die cut with Spellbinders dies.


Since I still had paint on my Gel plate, I placed another piece of cardstock on top and again used the brayer to remove the remaining paint.  The negative print is just as pretty as the original.


I cut the panel to 5" x 5", then placed it onto a card created from Bazzill cardstock.


The owls are from Heartfelt Creation's Sugar Hollow stamp set and were stamped with brown ink on a large tag.  A little color was added with Zig markers.

Thinking of you is from Stamping Bella's Winnie Peeking out the Window.  Scrapbook Adhesives 3D squares were used to add dimension on the card.

I hope I've inspired you to try a Gel plate today.

Thank you for stopping by today.

Steph
10/20/16

Framed Skull Card with Amazing Casting Products

Hi everyone, I am participating in the Designer Crafts Connection blog hop this month.  This month we are working with Amazing Casting Products. 

Amasting Casting Products was kind enough to send me a selection of their products. to work with.


As we are hearing Halloween, it's the perfect time to create some Halloween cards for family and friends.  I used Amasting Casting Products to create the frame and the skull.


I began by creating the frame.  Using equal parts of the mold putties, I combined them until I had a solid color with no streaks.

 
Next, I formed the base for the frame that I wanted to create.  I placed the frame on the mold putty and pushed until the design was embedded in the putty.  I left the frame in place for about an hour. 


And this is the result - a beautifully detailed mold.  Some of the color from my frame became embedded in the mold, but that did not affect the final piece.

 
The next step was to prepare the resin according to the manufacturers instructions, then pour it into the mold I created.  Allow the resin to cure per the manufacturer's instructions - 24-48 hours.  Since I had some left over resin, I poured it into a silicone skull mold.  And these are the results.


I painted the resin elements with red and blue paints to coordinate with the background papers.


To create the card, I used a print I pulled from my work with Gel Press last month. I embossed the print with a Cuttlebug embossing folder, then used Distress Ink across the embossed portions.    Since I wanted the skull to stand out, I die cut an oval to place behind the frame and painted it to match the card.  Then I adhered the resin elements to the card with Beacon Adhesives.


 I stamped a So Suzy sentiment inside the card.


I love how this turned out.


Please stop by the DCC blog to see projects from all the designers.
 
Please leave me a comment, I'd love to know what you think! 
 
Thanks for stopping by today.
 
 Steph