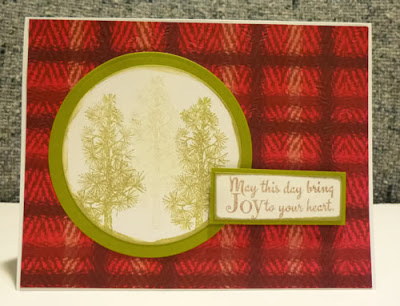
Hi everyone. I am so excited to be participating in the
Spellbinders Platinum Party blog hop. Be sure to start at the
Spellbinders blog to see all the participants for each day. Remember, you must visit all the participating blogs to be eligible for the grand prize.
I received some new dies from
Spellbinders and some wonderful stamps from
The Stamp Doctor. Did you know that The Stamp Doctor creates many of their stamps to work with Spellbinders dies? And did you know that Spellbinders creates The Stamp Doctor dies? Check out what I've been able to do with products from these wonderful companies.
I used the Spellbinders
2013 Heirloom Ornament die. It's the perfect die to create cards with. Just line up the largest die on the folded edge of the cardstock and run it through your Grand Calibur. A perfectly shaped card has been created in no time.
Die cut the next layer from red cardstock, then stamp the
sentiment - it fits perfectly around the edge of the ornament! Cut the next size die from red cardstock and adhere to the larger ornament. Die cut a
reindeer and ink it before removing it from the die (love this effect). Add to the top ornament with Glue Dots so that it is slightly raised from the surface. Now die cut the
Holly Twigs and Leaves, inking them before removing them from their dies. Add them to the side with foam adhesives for dimension.
Tie a ribbon to the largest ornament and add this piece to the card front.
Die cut the 3rd die from white cardstock and add to the interior of the card. Stamp a
sentiment from The Stamp Doctor inside and adhere.
Keep Your Spirit Bright
This next card uses my Scor-Buddy to create a gate fold card. Simply cut cardstock to 5 1/2" x 11" and score at 2 3/4". Rotate the card and score again at 2 3/4". Fold inward.
Add assorted pattern papers to the front, inking first with ColorBox Warm Red Chalk Ink. Die cut a red and smaller white ornament from the
2013 Heirloom Ornament die using the 2nd and 3rd dies, stamping the StampDoctor
sentiment on the white one. Adhere together. Tie ribbon to the top ornament and adhere to the left side of the card only.
Die cut the 2 wreaths and bows from Spellbinders' new
Holly Wreath die and be sure to emboss the top layer. Using a dauber, ink all the pieces with ColorBox Guacamole Chalk Ink, then assemble the wreath, offsetting it slightly so you can see both layers.
Using Glue Dots, center the wreath on top of the stamped ornament.
Add some bling with the Best Glue Ever to create the berries on the wreath.
Here is today's list of participants:
Richard Garay -
http://www.myfunstampersjourney.com/
Allie Gower My Card Party -
http://mycardparty.com/2013/11/20/sb-holiday-blog-hop/
(for Want2Scrap)
Eva Dobilas -
http://evafromca.blogspot.com/ (for JustRite)
Kathy Roney -
www.joyfullymadedesigns.blogspot.com (for Heartfelt Creations)
Emily Lanham -
http://createserendipity.blogspot.com/ (for Tsukineko)
Steph Ackerman -
http://stephaniescraps.blogspot.com/ (for The Stamp Doctor)
HERE
Thanks for stopping by today. Enjoy the hop and be sure to click
here for your entry into the Grand Prize drawing.
Supplies:
Cardstock: Bazzill, Papertemptress.com
Pattern paper: Teresa Collins
Dies: Spellbinders
Stamps: TheStampDoctor
Ink: Clearsnap
Dew Drops: The Robin's Nest
Scoring Tool: Scor-Pal
Adhesive: Glue Dots, ScraPerfect


