7/31/21

Fairy Stamper Slimline Card

 Hi everyone, I have another Fairy Stamper project to share.  


I love the Fairy Scapes Slimline backdrops.  I used Moon Light Night, then stamped the Fairy Hugs Fairy Bridge in brown ink.  Fairy Hugs Raphael was off stamped along the bottom edge in green ink.


Flying Owls were then stamped around the moon.

Thanks for stopping by.


7/26/21

Cactus Slimline Card

Hi everyone, Steph Ackerman here with a slimline card today using stamps from Blank Page Muse.


Supplies:

Blank Page Muse Stamps - Set of 3 Potted Cactus & SucculentFlower & Bird Sketches
Blank Page Muse Stencil - Eyes Stencil
Cardstock
Lawn Fawn Die
Ink


Stamp the images and color with Copic Markers.


Die cut green cardstock to create the card flap.  Fit the stamped images behind the flaps.  Mat with black cardstock and add to a white card.  Using the stencil, ,place it over the green panel and ink wit brown ink.  Move the stencil around the panel until it's inked.  Reminds me of the rings a flower pot creates.

Add a phrase in the lower corner.

Thanks for stopping by.

Steph

7/24/21

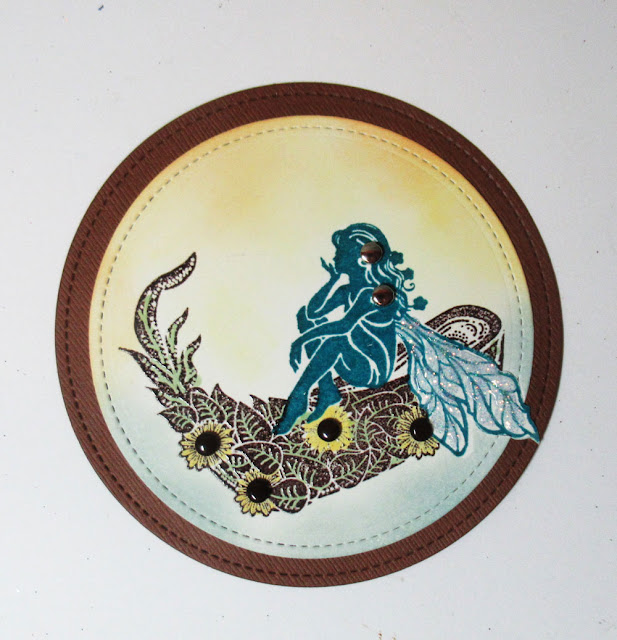
Fairy Hugs Leafy Canoe with Azalea

 Hi everyone, I have another Fairy Stamper project to share.  


The Fairy Hugs Leafy Canoe is perfect for any number of projects.  I stamped it with brown ink, then colored the flowers yellow.  For dimension, I added brown brads to the flower centers.  Fairy Hugs Azalea was stamped in blue ink and, using a masking technique, I placed her in the canoe.


After inking around the stamped images, I die cut the image and matted with a larger die.


I created a card from green cardstock, then stamped the Fairy Hugs Ivy Corner across the card using first and second generation stamping.


I added the stamped panel to the card with foam adhesives.  Finally, I added some stickles to Azalea's wings.

Thanks for stopping by.


Clear Scraps Autograph Album

Hi everyone, I'm on the Clear Scraps blog with a mini album today.

.
I used the Mouse Wood Card, choosing to turn it into an autograph album.  With the world finally opening up, how fun would it be to gather signatures of your favorite characters at Disney in this Disney specific album.


I inked the covers with yellow ink because it was handy.  But I could also have painted the covers.


I cut about a dozen pages to fit inside and then punched holes.

Placing the 6" Dandelion Wind stencil on the front cover, I inked portions with brown ink.


To finish I placed several metal word titles from my stash on the cover.

Thanks for stopping by.

Steph

7/23/21

Gratitude with Rinea Foiled Papers

Hi everyone, I'm on the Rinea blog today with a set of fall themed cards.  It's never too early to create for fall right?


I used a wonderful set of dies from Sizzix.  It includes all you need to create these cards.  Die cutting the diamond shapes gives you the possibility of using the full shape or the exterior frame.


Die cutting the frame from Silver/Gold Glossy Foiled Paper, I adhered the pinecones and leaves to one corner.  The pinecones are beautifully details and that really shows with the Mocha/Gold Glossy Foiled Paper.  Assorted leaves were die cut from Emerald/Gold Glossy Foiled Paper, Jade/Gold Glossy Foiled Paper and Marigold/Gold Glossy Foiled Paper.


I used the same elements on the next die cut panel and added them in the bottom corner.


Creating a card from black cardstock, I die cut a panel of Emerald/Gold Glossy Foiled Paper and adhered the panel on top.  The phrase was stamped on white cardstock and matted with Emerald/Gold Glossy Foiled Paper before adding it to the card.


The other panel was adhered directly to a black card and the phrase was matted with Marigold Starstruck before being added to the card.


Thanks for stopping by.

Steph


7/21/21

Happy Summer with Blank Page Muse

Happy Summer with fun stamps from Blank Page Muse.


Supplies:

Blank Page Must Stamps - Happy Stars, Whimsical Trio
Cardstock
Lawn Fawn Die
Ink


Create a card from red cardstock.
Stamp the happy stars in various poses on a panel of white cardstock.


 Add some color to the "cheeks", then ink around the panel and mat with cardstock.


Add to the card, then die cut happy summer and adhere across the card.

Thanks for stopping by.

Steph


7/17/21

Pretty in Purple

 Hi everyone, I have another Fairy Stamper project to share.


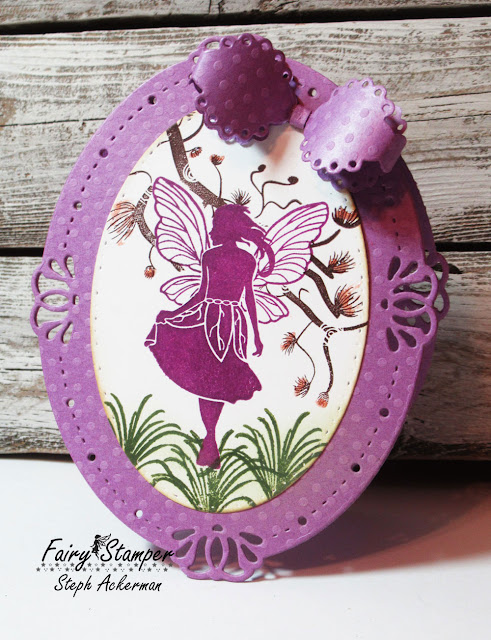
I wanted to focus on FH EstrellaEstrella, so I stamped her in purple on white cardstock.  I masked her then stamped the FH Pine Branch in brown ink.  FH Grass was stamped along the bottom edge.


The card was created using TLC Designs Oval Lily Frame.  Cardstock was folded in half and the die was placed over the fold so a card could be created.  A separate frame was die cut and adhered to the front creating the full card.

The stamped panel was die cut with the included oval frame, then added to the card.  A bow was created using the included bow die, then adhered to the top of the card.


Nuvo Drops were added to the Pine Branches for dimension.

Thank you for stopping by.


7/16/21

Whale Friends with TLC Designs.

 Hi everyone, I've got a new card to share using assorted products from  TLC Designs.

Did you know that TLC Designs has a lot of digital images in additional to the photopolymer stamps and dies?  If you haven't, go check them out. 


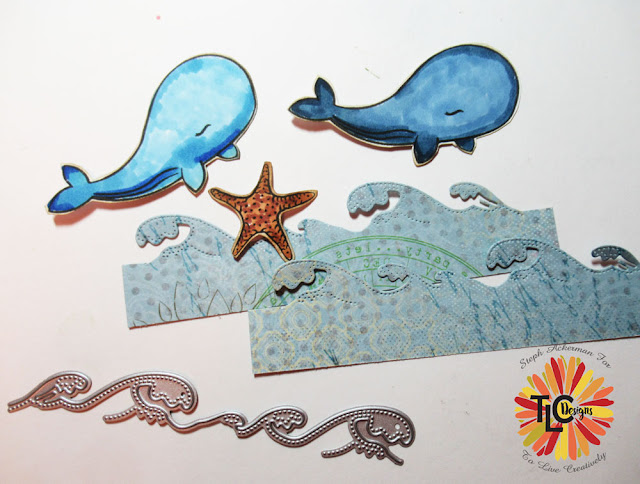
I've used images from these sets:  Seahorse Sam Digital Stamp set and Fancy Fin Digital Stamp set along with paper from the Simply Sweet Digital Paper Pack.


All the elements were colored and fussy cut.  To create the waves, I used the die from the Land and Seas Dies, cutting it twice, and layering them together.


I used the Tiny Vine Oval Die to die cut blue cardstock, then as I wanted to cut the waves with the same edging, I taped the die in place, then recut the layers.


I used stamps from Hopping Friends, arranging them above the whales.

Thanks for stopping by.

Steph

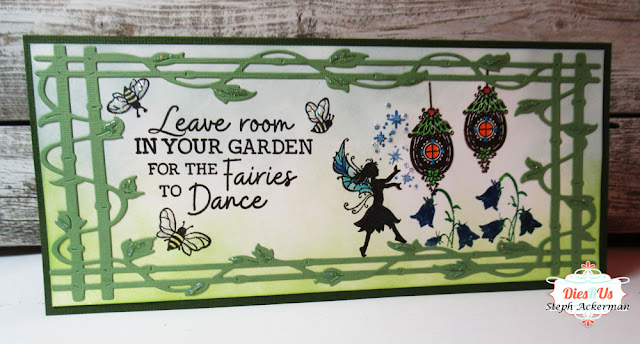
My Fairy Garden

 Hi everyone, I'm on the Dies R Us blog today.


Please stop by the Dies R Us Store for all the supplies I've used today.

Thanks for stopping by.


Steph

7/15/21

TLC Designs New Product Blog Hop


Hello and welcome to the TLC Design's new release blog hop!!  Some of the design team is hopping with loads of inspiration featuring the amazingly adorable designs released in the TLC shop today.  There are a total of 3 new beautiful digital paper sets, 4 new adorable digital stamp sets, and 1 new whimsical photopolymer stamp set all available starting TODAY!

Be sure to visit and comment on all of the blog posts today for a chance to win a digital stamp AND digital paper set of YOUR choice from the new release!  A winner will be announced on the TLC Designs Blog on 7/22/21.


The Koala Kindness Digital Stamp set  is one of the newest digital stamp sets available and I thought he would be cute to use for a birthday card.


I colored the Koala and balloons with Copic Markers, fussy cut them, then inked the edges with brown ink.  I cut the Koala's paw so he'd be able to hold the balloons.


I used paper from the Sweet As Cake Digi Papers.  Just make a wish is from the Celebrate Sentiments Stamp set  which I die cut it with  one of the dies from the Cherry On Top Die and matted it with a die form the Apple A Day Die set.


Also, Tammy Louise, the owner and magic behind TLC Designs, will be going LIVE on YouTube and Facebook tonight, July 15th, at 8pm EST.  Be sure to turn in to see her finish part 2 of here adorable project featuring items from the new release.


Thanks for stopping by.

Steph

Clear Scraps Adventure Album

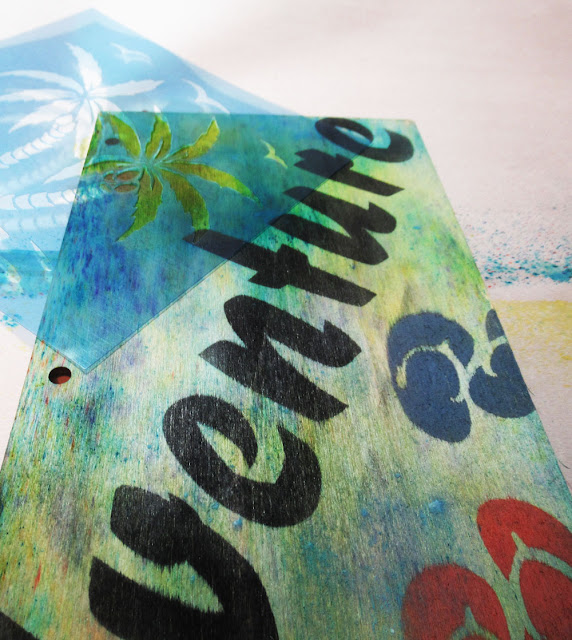
Hi everyone, I'm on the Clear Scraps blog using one of their newest Slimline Albums - The Wood Regular Slimline.


I started by spritzing the covers with water, then adding assorted colors of Brusho Color Crystals.


I wanted some of the wood grain to show so I spritzed additional water to allow the colors to spread.


Once dry, I taped the Adventure Stencil on an angle on the front cover and started inking the stencil with black ink. 


I continued inking and re-inking the stencil until adventure was dark enough.


Remove the stencil to see the fabulous result.  The slimline albums are the perfect size for the 12" stencils.


Place the 6" Beach Fun Stencil on the front cover and ink the flip flops with different colors of ink.   Next, place the 6" Summer Palms Stencil in the upper corner and ink with green and brown inks.


Add large rings and tie mesh ribbon to each ring.  I can't wait to fill this album with all the things we can finally do this summer.


Thanks for stopping by.

Steph

7/12/21

Wedding Card with Rinea Foiled Papers

Hi everyone, I'm on the Rinea blog with this wedding card.


Starting with Blush/Gold Glossy Foiled Paper, I used an intricate die to cut the main design.  Then I used Silver/Gold Glossy Foiled Paper to cut the smaller element.


I placed the larger filigree panel on Silver/Gold Glossy in keeping with the design on the top layer.


Next, I created a shimmery bow and added it to the card slightly off center.


I created a card from brown cardstock and adhered the filigree panel on top.  A wedding phrase was stamped on white cardstock, matted with Blush/Gold Glossy Foiled Paper and added to the card with foam adhesives for dimension.


Isn't it pretty?

Thanks for stopping by.

Steph