11/25/23

Fairy Hugs Frosty Angel

 Sharing a card using Fairy Hugs stamps available at Fairy Stamper


Fairy Hugs Stamps: Frosty Angel
Fairy Hugs Background:  Tumbleshine


Using a panel from the Tumbleshine pack, stamp the angel in the center.
Off stamp the Fairy Poem in gray ink and then stamp around the angel.
I wanted a very subtle background text.


With Love at Christmas was stamped in black ink on a white panel.
Mat with black ink.
Adhere to the panel with brads.
Add a brad to her wand.

Adhere the panel to the card with foam adhesives for dimension.

Thanks for stopping by.

Steph

11/23/23

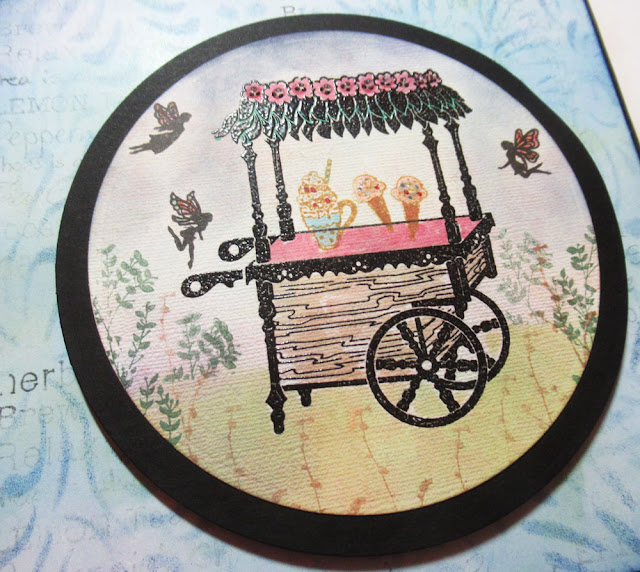
Fairy Hugs Tea Cart

Sharing a card using Fairy Hugs stamps available at Fairy Stamper


Fairy Hugs Stamps: Tea Word Collage
Fairy Hugs Stencil:  Fairy Florals
Fairy Hugs Paper:   Tanglewhisper


Using a Tanglewhisper background, place the stencil on the panel and ink.


Using the Tea Word Collage, ink with black ink.
Off stamp and lightly stamp on the background.


Stamp the tea cart and create the grass underneath.
Stamp the fairies and forest flowers around the tea cart.
Die cut the image and mat with a larger die.


Stamp the sentiment, mat with a black panel.


Cut a panel of white and ink with the floral stencil for the interior of the card.


Adhere the panel inside then adhere the sentiment.

Thanks for stopping by.

Steph

11/22/23

BPM - Fall Gnome

 Hi everyone, I'm using some amazing stamps from Blank Page Muse.


Blank Page Muse Stamps:  Guardian of Autumn Gnome


Stamp the Gnome and color with Copic Markers.
Mat with cardstock then add to a card.
Stamp and emboss the sentiment, adding to the card with foam adhesives for dimension.


Thanks for stopping by.

Steph


Looking for more Inspiration? Click the links below!
The Blank Page Muse Shop https://blankpagemuse.com/

Save 15% of your Blank Page Muse orders with discount code:  BPMSteph

11/19/23

Etchall Thankful Jar

 Hi everyone, I've etched a bottle using  EtchallⓇ Eching Creme and Stencil Spray.


Spray the stencil with Etchall Stencil Spray.


Adhere the stencil around the jar.
Be sure to use the Squeegee to help aid the stencil to adhere to the jar.


I added painter's tape to the areas I did not want to etch.
Using a spoon, put etching creme around the jar.


Allow to sit 15 minutes, then remove the etching creme and place it back in the original container.
Since it's reusable, the etching creme can be used on other projects.
Rinse the jar under running water and dry off.


Thanks for stopping by.

Steph

11/18/23

Fairy Hugs Seaside Living

Sharing a card using Fairy Hugs stamps available at Fairy Stamper. This is one of the scene stamps from their newest collection.


Supplies:  Fairy Hugs stamps:  Seaside Living
Background:  Tumbleshine


Die cut a circle from scrap paper and place atop the background.
Tape in place.


Stamp Seaside Living in black ink.


Remove the scrap paper.


Mat the panel with brown cardstock.
Adhere to a cream card.

I will add a sentiment when I determine who the recipient will be.

Thanks for stopping by.

Steph

11/11/23

Fairy Hugs Cottage Wishes

 Sharing a card using Fairy Hugs stamps available at Fairy Stamper.


Fairy Hugs Stamps: Wreath Builder
Fairy Hugs Die:  Garden Cottage
Fairy Hugs Cardstock:  Tumbleshine


Die cut the cottage in brown, pink and white cardstocks.


On the white cottage, ink the vine and leaves with green ink.


Cut away the greenery from the brown and pink cottages.
Place the brown cottage on the white and the pink on the brown.
Fussy cut the pink flowers and adhere them to the greenery.


Following the circle in the cardstock, stamp vines from the Wreath Builder set in several shades of green ink.  Overlap the images where necessary.  Stamp the berries last.


Mat the cottage on 2 layers and adhere to the card.
Stamp the sentiment and add to the corner.

Thanks for stopping by.

Steph

11/8/23

Fairy Hugs Moose Christmas

 Sharing a card using Fairy Hugs stamps available at Fairy Stamper.


Fairy Hugs Stamps:  Moose Set
Fairy Hugs Background: Tanglewhisper


Using a background panel, stamp and emboss the Moose in brown ink.  
Create snow mounds under the Moose.


Stamp Ania's Tree off the left side and hand some of the ornaments from the tree and the Moose antlers.
Stamp Santa's Sleigh in the distance.
Stamp some pine trees in the distance.


Mat the panel with cardstock and add to a card.
Stamp the sentiment, mat and add to card with foam adhesives.

Thanks for stopping by.

Steph

11/7/23

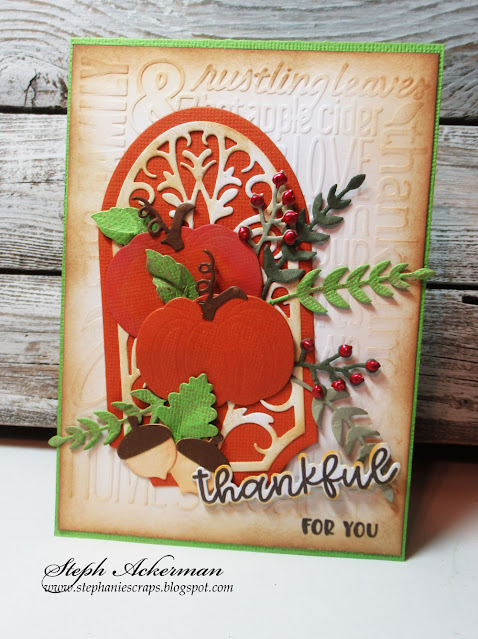
Thankful for You

 Hi everyone, as fall continues its journey, I've created a wonderful card to share.


Supplies:  Spellbinders Dies
Cuttlebug Embossing Folder


Mix older products with newer ones.
The Cuttlebug embossing folder is at least 20 years old, but is still wonderful for creating backgrounds.
The Spellbinders dies are new (to me).


Thankful For You was die cut and stamped as a finisher.
Then I added some liquid pearls to the berries.

Thanks for stopping by.

Steph

11/6/23

Winter Lantern

 Hi everyone, I love this lantern and have created one for each season.  So today, I'm sharing a winter version.


Using a Cuttlebug embossing folder, I embossed cardstock with snowflakes and lightly inked them before adding the panel to the card.


The I die cut the lantern from Rinea Foiled Paper - Ebony/Gold Glossy.
Then I flipped over the die cut panels so the gold is available for the windows.
Die cut the leaves from Emerald/Gold Glossy.
Die cut mistletoe from Jade Starstruck.
Die cut the pinecones from 

Adhere the lantern to the card, then surround with leaves and pinecones.

Thanks for stopping by.

Steph

11/4/23

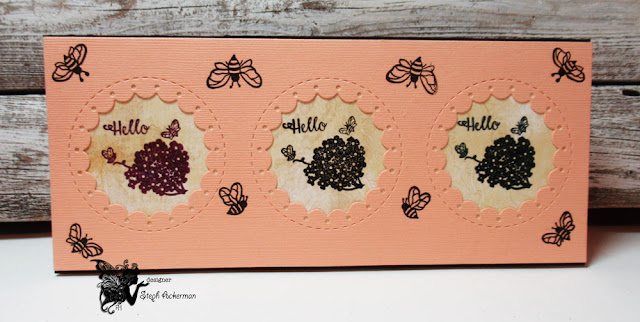
Fairy Hugs Hello Hydrangea

    Sharing a card using Fairy Hugs stamps available at Fairy Stamper.


Fairy Hugs Supplies:  Hello Hydrangea


The smaller stamps are wonderful for filling in smaller spaces.
This lovely die was perfect.
Once the hydrangeas were stamped in several colors of ink, the die cut panel was added on top.
Then I surrounded them with Bees.

Thanks for stopping by.

Steph

11/3/23

BPM- Fall Scarecrow

 Hi everyone, I'm using some amazing stamps from Blank Page Muse and I Brake for Stamps.


Blank Page Muse Stamps: Fall Word Rubber Stamp
I Brake for Stamps:  LeavesBlessings, Fall Half Sheet


Stamp and emboss the scarecrow before die cutting.


Stamp the leaves around the panel.


Color the scarecrow with Copic markers.
Assemble the card.


For the interior, stamp the leaves around the panel.
Add sentiment.


Stamp and emboss Fall.
Add to the card.


Thanks for stopping by.

Steph


Looking for more Inspiration? Click the links below!
The Blank Page Muse Shop https://blankpagemuse.com/

Save 15% of your Blank Page Muse orders with discount code:  BPMSteph

11/1/23

Fairy Hugs Enjoy Life

   Sharing a card using Fairy Hugs stamps available at Fairy Stamper.


Fairy Hugs Stamps:  Melia
Fairy Hugs Stencil:  Woody
Fairy Hugs cardstock:   Tanglewhisper


Select the background paper then stamp the Mushroom Table in black ink.
Mask off the table and place the Woody stencil on top.


Ink through the stencil with tea dye ink.
Remove the stencil and the mask, then create some grass mounds.


Stamp, emboss, color and fussy cut Melia.  
Place her leaning on the table.
Stamp some florals in first and second generation inking.
Stamp bees flying to Melia.

Stamp and die cut the sentiment.
Adhere to the top corner.

Thanks for stopping by.
Steph