12/10/22

Fairy Hugs Magic

 Hi everyone, I have another Fairy Stamper project to share.


Fairy Hugs Stamps: Awyn, Little Magic, Special as you Are
Fairy Hugs Stencil:  Sticks


Stamp Awyn on the panel.
Create a mask and stamp the trees around her.
Stamp several mountains.
Create the ground and use the tree tops as grass.


Stamp the berries with red ink and the flowers with purple ink.
Add them around the panel as needed.
Add color to the background incorporating the Sticks stencil.
Add color to Awyn's wings.
Stamp the sentiment and add to the card with foam adhesives.

Thanks for stopping by.

Steph

12/3/22

Fairy Hugs Fairy Christmas

  Hi everyone, I have another Fairy Stamper project to share.  


I love combining stamps.
Since I had most of these stamps on my desk, I decided to see what would come up with.  


Thanks for stopping by.


BPM - Believe in the Magic of Christmas

 Hi everyone, I'm using some amazing stamps from Blank Page Muse and I Brake for Stamps.

With Christmas on the horizon, it's time to start thinking of creating Christmas cards.


I've Used Pretty Winter Friends, which is a delightful image, perfect for holiday creations.


I stamped and embossed her then colored her with Copic Markers.  Because I wanted her to be prominent, I fussy cut her.


Selecting Christmas papers, I created the card, then slipped a sentiment from the Country Vintage Chrismas Stamp Sheet behind her.


Thanks for stopping by.

Steph


Looking for more Inspiration? Click the links below!
The Blank Page Muse Shop https://blankpagemuse.com/

Save 15% of your Blank Page Muse orders with discount code:  BPMSteph

12/1/22

Poinsettia Christmas Card

Hi everyone, it's a new month and the challenge on the Scor-Pal blog is to create anything you want, just be sure it includes more than one score.

This month has flown by hasn't it?  I have a fun fold card to share today.


Using 12"x12" cardstock, score at 4" and 8".
Score from the top of the score to the bottom edge creating the angle.
Score again from the point 4" down on the angle.


Fold along the scored lines to create the card.


Cut 4"x12" pattern paper panels.
Cut to fit the exterior panels following the directions above.


Cut the panels slightly to fit each scored area.
Ink each panel with red ink before adhering.


Die cut white cardstock to fit the center panel.
Die cut 2 circles for the front of the card.


Cut additional pattern paper for the exterior of the card.


Die cut a poinsettia, assemble and add to the circle with a large brad before adhering the circle to the card.


Add a special note inside.

Thanks for stopping by.

Steph

11/29/22

TLC Designs - Just for Joy

Hi everyone, it's time to check out TLC Designs new release.  Stop by their instagram account and see all the samples.  Plus, follow along for a chance to win a GC to the store.


TLC Designs Supplies: Warm & Fuzzy Stamps


Stamp the unicorn and color with Copic Markers. 
Die cut with the oval from the Loving Petals Square, then ink with Distress Inks.


Die cut the Daisy Frame Die from coordinating paper in the pack.


Create 4 1/4" x 5 1/2" card from black cardstock.
Cut pattern paper to fit the card base.
Add brads to the panels and place on the card with foam adhesives for dimension.


Add the same paper inside the card.

Stamp a sentiment using the same stamp set.

Thanks for stopping by.

Steph

11/28/22

Delicate Christmas Ornaments

 Hi everyone, now that we have passed Thanksgiving, it's time to start thinking about finalizing those Christmas cards.


This lovely Gemini Die is perfect for Christmas cards.  The die cuts the edge of a card and then I die cut Rinea Emerald/Gold Glossy Foiled Paper to decorate.


Along the left edge, I added Rinea Ruby/Gold Glossy Foiled Paper which had been embossed with a Cuttlebug embossing folder.  To finish the edging a strip of ribbon was added.


Inside the card, I placed a panel of Rinea Silver Starstruck Foiled Paper - see how it peeks out from behind the ornaments.  


I also used Rinea Ruby/Gold Glossy Foiled Paper to complete the ornaments inside the card.


Add a sentiment to the font using foam adhesives for dimension.

Thanks for stopping by.

Steph

11/26/22

Fairy Hugs Winter Fun Magic

  Hi everyone, I have another Fairy Stamper project to share.


Fairy Hugs Stamps: Jack, Elsa, Northern Lights, Icebergs, Fairy Whispers
Fairy Hugs Stencil:  Winter Twigs, Fairy Rainfall


Create a background with distress Inks.
Stamp 2 icebergs in different sizes.
Stamp the Northern Lights, then added assorted colors of inks.
Use the Fairy Rainfall Stencil around the Icebergs.
Mat the panel with black cardstock.


Use the Winter Twigs Stencil on the card.
Add the panel to the card.
Stamp and fussy cut Jack and Elsa, placing them on the icebergs.
Add the sentiment.

Thanks for stopping by.

Steph

11/23/22

Fairy Hugs Hello

 Hi everyone, sending a Fairy Hello with Fairy Hugs stamps.


Fairy Hugs Supplies:  Estrella


I began by stamping the Toadstool first, then masked it to stamp the Dotted Mushrooms.
After creating the grass, I used the Fan Coral to create the floral clusters.
The Condo Dwellers surrounded Estrella.


After stamping the Flower Vines along the top, I placed the Magical Mushroom Stencil on top, lightly inking it with orange ink before placing the Flutter Dust along the bottom.

Thanks for stopping by.

Steph

11/22/22

Thankful Gnomes

Thanksgiving is coming.  Are you ready?


I've used this adorable stamp set and coordinating die set from Trinity Stamps.

The gnomes are absolutely adorable and are a perfect fall themed card.

Using assorted papers from my stash I created this card.

After stamping and die cutting the gnomes, I colored them with Copic Markers.

Included in the die set is the coordinating thankful die - which is amazing.  No fussy cutting required.

This is a perfect way to use papers from your stash.

Thanks for stopping by.

Steph

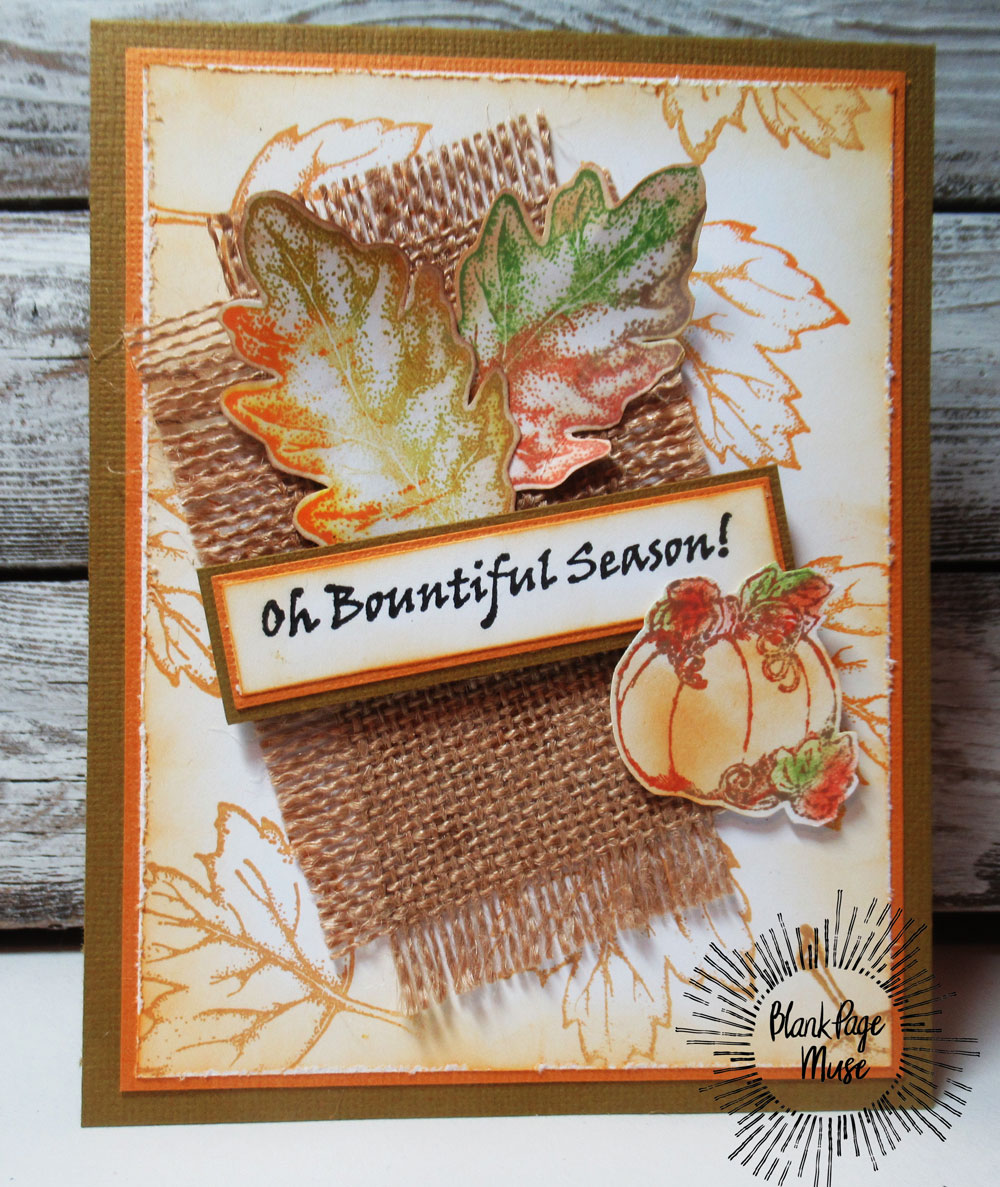
BPM - Bountiful and Beautiful Season

 Hi everyone, I'm using some amazing stamps from Blank Page Muse and I Brake for Stamps.


Supplies:  Fall Half Sheet


Stamp one of the leaves randomly about a white panel.
Distress the edges before matting with orange cardstock.


Stamp the pumpkin in several colors and fussy cut.


Stamp and fussy cut 2 additional leaves.
Adhere the panel to a gold card.
Add a piece of burlap and arrange the elements on top.

Thanks for stopping by.

Steph


Looking for more Inspiration? Click the links below!
The Blank Page Muse Shop https://blankpagemuse.com/

Save 15% of your Blank Page Muse orders with discount code:  BPMSteph

11/21/22

TLC Designs - Merry Christmas

 Hi everyone, I'm on the TLC Designs blog today.


Die cut an oval from white cardstock using the Tiny Vine Oval Die.
Tape the panel down to another panel of white.
Create the scene by stamping images so they overlap both panels.
Color with Copic Markers.


Create masks of the images and add color within the oval with several colors of distress inks.


Remove the top layer to reveal the images in the oval.
Using the snowflakes from the Snowy and Evergreen Stencil, lightly ink the snowflakes with light 
blue ink.


Create a card from red cardstock and add a checked panel from the Chilly Fun paper pack.
Mat the Christmas Tree panel with black cardstock and wrap with ribbon.
Assemble the card.
Mat the stamped panel with black cardstock and add it to the card with foam adhesives for dimension. 


Sweet, isn't it?

Thanks for stopping by.

Steph

11/19/22

Fairy Hugs Ornament

  Hi everyone, I have another Fairy Stamper project to share.


Paper:  Frostylashes


Die cut a circle in cardstock and place atop the pattern paper.
Tape to the desk.


Stamp the large Polar Bear on the right side, overlapping the mat.
Stamp the trees along the left side.


Stamp the smaller Polar Bear on the left side.
Stamp the Winter Strings across the top.
Before removing the top panel, use a pen to create the ornament.
Add an ornament topper.


Lightly stamp the Fairy Poem over the entire panel.
Die cut joy and add to the right side.

Mat the panel with lavender cardstock and add to a black card.

Thanks for stopping by.

Steph

11/17/22

Fairy Hugs - Water Fountain

 Fairy Hugs will be on Create & Craft November 18.  The theme is "favorites".


Fairy Hugs Stamps:  Sheldon

The Water Fountain was stamped first and colored with Copic Markers.
Sheldon was stamped and fussy cut 'cause he wanted to dip his toes in the fountain!
Ovrad is just flying by to say Hello.

Thanks for stopping by.

Steph