Showing posts with label birthday. Show all posts

7/1/25

ScorPal Double Pocket Birthday Card

Hi everyone, it's time for a new Scor-Pal challenge.  Just create a project with more than one score.  I've created a double pocket birthday card.


Supplies: ScorPal
ScorTape
Pattern Paper
Stamps

Card base:  White cardstock 8 1/2" x 11"
Score at 4 1/4"; rotate and score at 5 1/2".


Open the cardstock and cut away the lower left panel.


Mark 1 1/2" from the cut edge and fold on the diagonal.
Place adhesive along the exterior edges ONLY.
Fold left side corner on the diagonal to meet the center score line.
Place adhesive along the side and corner edges.


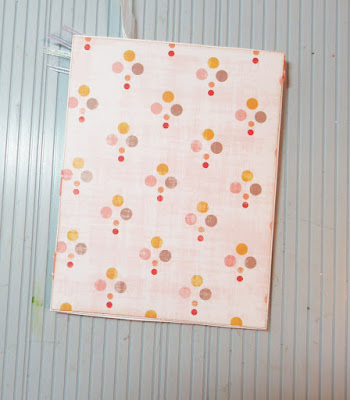
Cut pattern paper to fit front of card.
Ink edges before adhering.

Place ScorTape on ribbon and adhere to the edge of each pocket.


Wrap the ribbon on the bottom pocket toward the back of the card.


Cut pattern paper to fit the back of the card which helps cover the ribbon.


Add a large wood package to the front.

Decorate tags to fit each pocket, adding a gift card to one.

Thanks for stopping by.

Steph

3/2/24

Fairy Hugs Masculine Birthday Card

    Sharing a card using Fairy Hugs stamps available at Fairy Stamper.


Fairy Hugs Stamps:  Fairy Words, Teeny Ocean Icons
Spellbinders dies
Cuttlebug embossing folder

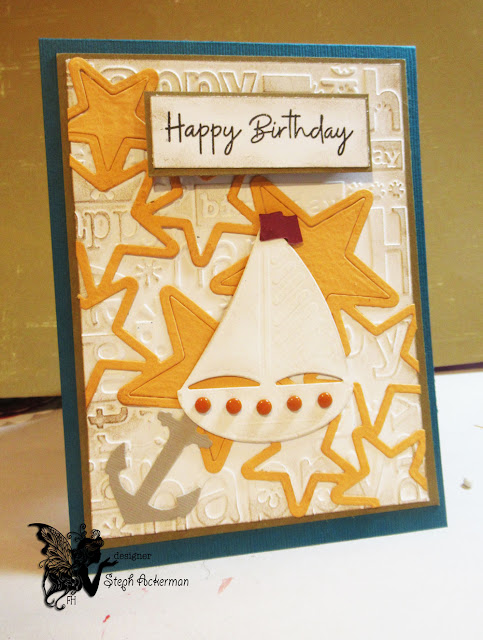
Use a Cuttlebug embossing folder as the base, inking with walnut ink.
Mat the panel with cardstock and adhere to the card.
Die cut the star spray, boat and anchor.


Inside the card, add a panel of white and stamp with the ocean icons in a variety of colors.


Adhere the star spray to the card, filling in several of the stars.
Add the boat and anchor.
Stamp the phrase and add to card with foam adhesives.

Thanks for stopping by.

Steph
2/17/24

Fairy Hugs Happy Birthday

    Sharing a card using Fairy Hugs stamps available at Fairy Stamper.


Fairy Hugs Stamps:  Fairy Words, Angie
Fairy Hugs Dies:  Forest Vines


Stamp, color and fussy cut Angie.
Create a card from yellow cardstock.
Cut and emboss white cardstock with a Cuttlebug embossing folder.
Mat with black cardstock.


Add the die cut vines along the left edge.
Add Angie with foam adhesives for dimension.
Stamp and mat the phrase, adding to the card with foam adhesives for dimension.

Thanks for stopping by.

Steph

9/26/23

Masculine Happy Birthday Card

Hi everyone, sharing a masculine birthday card today.


It can be somewhat stressful creating masculine cards.
I've used Heartfelt Creations stamps and Distress Oxide Inks.
The barn was stamped in black ink and embossed.
Distress Oxide Inks created the background.


Mat with black cardstock and add to a kraft card.

Thanks for stopping by.

Steph
7/31/23

Masculine Birthday Card

 Hi everyone, need a masculine birthday card?  Then, I've got one to share.


Stamps:  Heartfelt Creations
Inks: Oxide Inks Blue Jeans,Tea Dye, Hickory Smoke


Stamp the barn on a panel of white using black ink.
Add color to the sky with Blue Jeans and Hickory Smoke.
Add color to the ground using Tea Dye.
Mat the panel with black cardstock and adhere to a brown card.

Stamp Happy Birthday and ink with Blue Jeans.
Mat with black cardstock and add to the card.

Thanks for stopping by.

Steph

9/15/22

TLC Designs Celebrate Card

Hi everyone, did you know that TLC Designs is celebrating this month with an Instagram Hop.


Cupcake Digital Image
Sprinkles


Die cut the panels from the Celebrated Times Paper Pack.
Print the cupcake and color with Copic Markers


Assemble the card layers, inking the center frame to coordinate with the colors in the papers.  
Adhere the cupcake to the frame, then add assorted Sprinkles about the card.


Thanks for stopping by.

Steph

3/1/19

Happy Birthday Flowers

Hi everyone, it's a new month and the challenge on the ScorPal blog is to create anything as long as you use more than one score.


Using Rinea Blush/Gold Glossy Foiled Paper, I cut it to a 5" square.  Placing the panel on the ScorPal, I scored the panel every 1/4".  The foil scores beautifully with the ScorPal.


Rotating the panel, I scored again every 1/4" creating a fun background.


The panel was matted with white cardstock and wrapped with sheer ribbon.  I die cut  and embossed a jar and small tag from Silver/Gold Glossy Foiled Paper.   The tag was tied to the ribbon and happy birthday from Joy Clair's Let's Celebrate stamp set was stamped, embossed and punched out.


I had some silk flowers that I thought would look lovely in the jar so I placed the jar over the flowers with foam adhesives for dimension.


Thanks for stopping by.

Steph

4/5/18

Happy Birthday with ExpressionsCrafts

Happy Birthday everyone.  I've got some new cards on the ExpressionsCrafts blog.


How cute are these cards using stamps from ExpressionsCrafts?  The backgrounds of each card is a Cuttlebug birthday embossing folder.  To create the pink card, once I embossed the white cardstock, I lightly inked it with Rose Delicata Ink.  The panel was matted with light pink cardstock and adhered to a dark pink card.


I inked the next panel with Brilliance Sky Blue ink.  The panel was matted with light blue cardstock and then adhered to a dark blue card.


The cupcakes were stamped in black ink and colored with Memento Markers.  The cupcake panels were then matted with the same cardstock and added to the card.   I used the Happy Birthday stamp, stamping it in Memento Tuxedo Black ink. 


Now I have birthday cards available when I need them.

Thanks for stopping by.

Steph