11/16/22

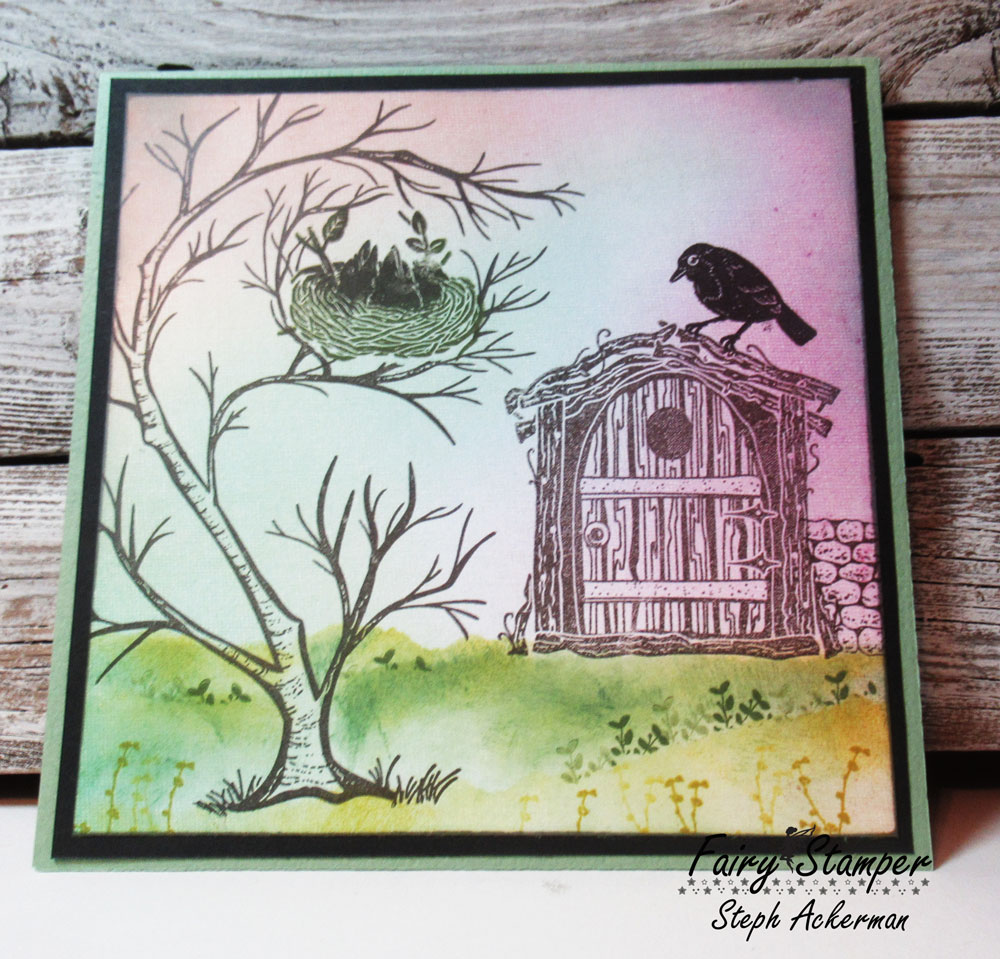
Fairy Hugs Woodland Door

Fairy Hugs will be on Create & Craft November 18.  The theme is "favorites".


Fairy Hugs Supplies: Ania's Tree
Bird Nest
Forest Flowers
 Fancy Birds
Woodland Door
Mini Stone Wall
Tanglewhisper Paper

The Woodland Door, along with one of the Fancy Birds is the centerpiece and can be used along with an assortment of stamps.


Ania's Tree is a perfect addition with the bird nest sitting nestled inside.


Thanks for stopping by.

Steph

11/15/22

Etchall - Fall Themed Jar

Hi everyone, I love decorating jars - with so many sitting on my shelves, I love to see how each can be decorated differently.  This month, as we are heading towards Thanksgiving, I thought a fall themed jar would be a fun addition to fall decorating.


Place jar in etchallⓇ dip 'n etch and allow it to set for 15 minutes.


Remove the jars, rinse and pat dry.
Pour the dip 'n etch back into the original container since it is reusable.


Once dry, it's time to decorate.
Paint with Plaid Copper Metallic paint.


Decorate in a fall theme.
Wrap burlap around the jar.
Add a second layer of burlap in a second color.


For the final layer, adhere a pumpkin ribbon.
Wrap twine around the top edge.


Create a bow using the Bowdabra and add to the jar.

Thanks for stopping by.

Steph

Fairy Hugs Stream Scene

Get ready for Fairy Hugs to be on Create & Craft November 18.  The theme is "favorites".

I have always loved this Fairy Hugs stamps - the Stream Scene has so many options.


Fairy Hugs Supplies:  Stream Scene


Thanks for stopping by.

Steph

11/14/22

TLC Designs - Snail Slimline Card

 Hi everyone, I'm on the TLC Designs blog today.


Print the snails vertically and color with Copic Markers.
Die cut the snail panel and coordinating papers from the Snowy Skies collection using the 
Zinnia Slimline Dies.


Use the tag from the Cherry On Top Die to die cut the phrase.


Create a card from coordinating cardstock using the largest die from the Zinnia Slimline Die.
Die cut one panel completely.
Die cut the second panel, stopping just before the end of the die.
Score the second panel and adhere the panels together to create the card.


Assemble the layers on the card.
Add ribbon to the tag and place it on the card with foam adhesives for dimension.

Thanks for stopping by.

Steph

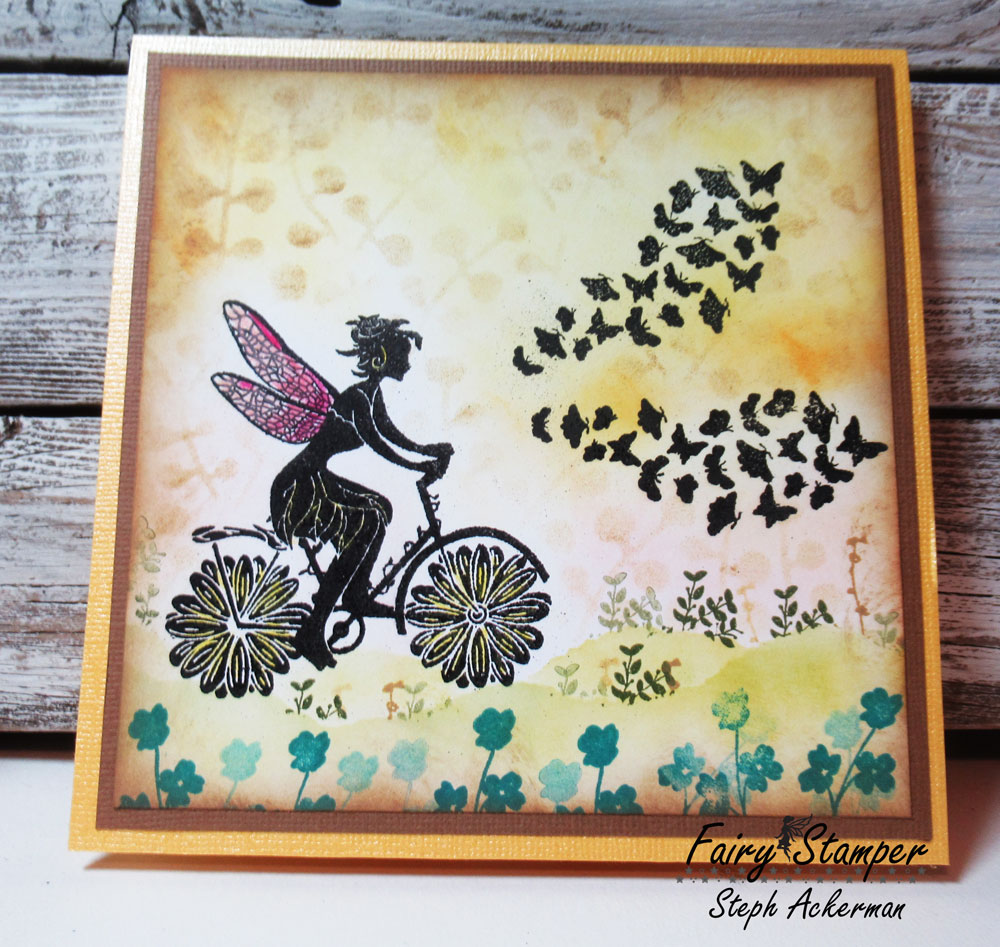
Fairy Hugs - Zippy

Fairy Hugs will be on Create & Craft on November 18.  The theme is "Favorites".


Fairy Hugs Supplies: Zippy


Zippy is happily cycling along the grass while chasing the butterflies.  
I've mixed several colors of Distress Inks to create the background.


The Fairy Bud Stencil adds a really fun effect to the background.


I've finished with some Forest Flowers.

Thanks for stopping by.

Steph

BPM - Happy Thanksgiving

 Hi everyone, I'm using some amazing stamps from Blank Page Muse and I Break for Stamps.


Supplies: Fall Half Sheet


To achieve different colors on the leaves, ink the leaf first with Terra Cotta, then tap with Mushroom before stamping on white cardstock.  Repeat until the panel is covered.
Stamp Happy Thanksgiving.


Ink around the panel before adding it to a card base.
Wrap the card with twine.
Mat Happy Thanksgiving and add to card.


Add drops of liquid pearls about the card for dimension.

Thanks for stopping by.

Steph


Looking for more Inspiration? Click the links below!
The Blank Page Muse Shop https://blankpagemuse.com/

Save 15% of your Blank Page Muse orders with discount code:  BPMSteph

11/12/22

Fairy Hugs Winter Wonderland

Hi everyone, I have another Fairy Stamper project to share.

Do you have pattern paper that you won't use?  Well, why not change it?  I've used an old winter pattern paper and created a beautiful card using tons of Fairy Hugs stamps.


Cut cardstock 12 x 8 1/2" - score at 3", 6" and 9".
Cut pattern paper the same and cut 1/4" off the bottom.


Cut the interior panels 2 3/4" in width.
Line them together and start designing.
Stamp the Ice Cave along the edge of the tallest panel.
Stamp the icicles form the Ice Cave along the top.
Use the Fairy Rainfall stencil on the tallest panel, and a portion of the 2nd panel.
Create a water's edge.


Align the other 2 panels and continue the water's edge.
Stamp the Icebergs on the large panel, overlapping the 3rd panel.
Stamp the Rugged Pines 3 times on the smallest panel.
Stamp the Winter Strings in 2 shades of blue ink overlapping both panels
Stamp and fussy cut Jack and Elsa.


Stamp the Northern Lights on the 2 largest panels.
Add colors using distress oxide inks.
Stamp Icelyn so her wings overlap the panels.
Ink the Fairy Poem in gray ink - stamp it on scrap paper and stamp on the panels.
I wanted a light effect, so the off stamping worked.


Stamp the Polar Bears so the larger one overlaps panels 2 and 3.
Stamp portions of the florals from the Thank You set.
Use the Winter Sticks Stencil on the first 2 panels.

Create a belly band - cut cardstock 2" x 7".
Wrap around the card, scoring at 2", 2 1/8", 5 1/8", 5 1/4".
Fold on the score lines and adhere together.
Cut pattern paper 2 3/4" x 1 3/4"; ink and stamp the phrase in the center.

Thanks for stopping by.

Steph

11/7/22

TLC Designs - Let's Celebrate

 Hi everyone, I'm on the TLC Designs blog today.   It's time to celebrate the change in seasons.


Create a card from white cardstock.
For the background, use the blue paper from the paper pack.
Die cut green cardstock with the grass die.  This die creates 2 layers.
Separate them and ink with green ink and layer on the blue panel.
Add to the card.


Die cut assorted elements from the Scalloped Garden Die set and the Aztec Sunshine Die set.
Ink each die cut and assemble on the card.
.

Stamp and color the dancing fairy.
Fussy cut her and add her to the card with foam adhesives.
She appears to be jumping from one tree stump to another.
Stamp celebrate directly on the card.


Add stickles to her wings for a little sparkle.

Thanks for stopping by.

Steph

11/5/22

Fairy Hugs - Every day is amazing

 Hi everyone, I have another Fairy Stamper project to share.


Nothing screams fall more than pumpkins, right?

Fairy Hugs stamps:  Pumpkin Stack, Amazing, Fairy Poem


Cut 2 piece of cardstock 4" x 5 1/4".
Using TLC Designs Tiny Vine Oval Die, die cut the oval from one panel.
Tape the panels to your desktop.
Ink the Pumpkin Stack and place it slightly over the die cut.
Using a masking technique, stamp the fences.


With the mask still in place, stamp the Wheat Stalks and the Slanted Tree.


Use Distress Inks within the oval, then stamp the sentiment.
Remove the top layer.


Lightly stamp the Fairy Poem around the panel.


Mat the panel, then adhere to a card.

Thanks for stopping by.

Steph

11/3/22

BPM - Winter Guardian Tag

 Hi everyone, I'm using some amazing stamps from Blank Page Muse.


Stamps:  Winter Guardian


I began by stamping the Winter Guardian.
This is a beautiful stamp - she is very detailed.  
I chose to color her with Copic Markers in various shades of purple.


Next, I inked a large tag with various shades of purple inks.
Once dry, I stamped the Large Script Background across the tag, as well as on the purple oval.  It really creates some great dimension.


Assembling the tag, I placed several items from the Masquerade Ephemera Pack under the image.


To finish I added some die cut words and ribbon with sweet bow using the Bowdabra.

Thanks for stopping by.

Steph


Looking for more Inspiration? Click the links below!
The Blank Page Muse Shop https://blankpagemuse.com/

Save 15% of your Blank Page Muse orders with discount code:  BPMSteph

11/1/22

Scor Pal Candy Pouches

Hi everyone, it's a new month and the challenge on the Scor-Pal blog is to create anything you want, just be sure it includes more than one score.


I have lots of 6"x6" pads of papers, so I thought I'd create some Thanksgiving candy pouches.


Add the Scor-Envie to the Scor-Pal.
Score at 4 1/4", 4 1/2", 7 1/2", 7 3/4".
Rotate and score at 3 1/2", 8 1/4" x 8 1/2".


Cut and remove the small triangles created with the intersecting score lines.
Fold on each score line.


Add Scor-Tape to the center panel and add pattern paper.


Alternatively, you could use double sided pattern paper to achieve the same results.


Add Scor-Tape as shown to create the envelope.
Place a candy bar inside so the envelope can be sealed.


I needed 5 envelopes, so I used assorted 6"x6" papers to make them.
They are the perfectly sized for a regular sized Kit Kat bar and Reeses bar.


Using a leaf die, I die cut assorted colors of Rinea Foiled Papers.
Placing strips of burlap across the envelope, I scrunched the leaf and added it on top.
Grateful was stamped and die cut from Lawn Fawn stamps and dies.


Thanks for stopping by.

Steph