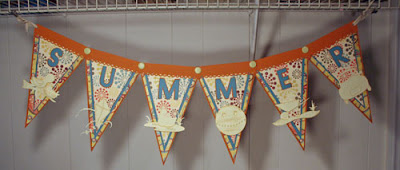
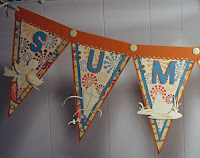
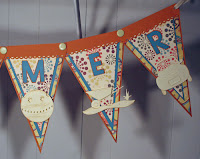
Here's a really fun banner that uses the Sports Mania Cricut Cartridge and Nate's ABCs Cricut Cartridge. If you don't have the Sports Mania Cartridge, no worries - there are many cartridges that have a flag/banner cut which could be substituted, so you have a lot of possibilities. While you may not want to hang a paper banner outdoors, how fun would this be to hang in a hallway or across a mantle!!
 Layer 1
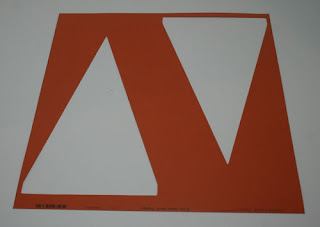
Using Sports Mania Cartridge, cut the Flag 6 times at 5 3/4" from Navel Cardstock using shadow + blackout features. As only one Flag will cut, flip the mat around to cut a second Flag.
 Layer 2
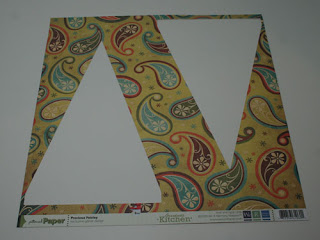
Using Sports Mania Cartridge, cut the Flag 6 times at 5 3/4" from Precious Paisley pattern paper using the black out feature. As only one Flag will cut, flip the mat around to cut a second Flag.
 Layer 3
Using Sports Mania Cartridge, cut the Flag 6 times from Rain Cardstock at 5" using the black out feature. Two Flags will cut. To cut two more Flags, flip the mat around.
Layer 4
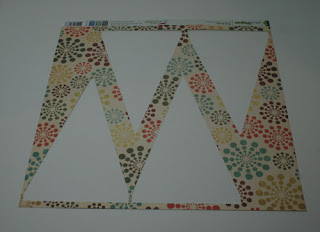
Using Sports Mania Cartridge, cut the Flag 6 times from Busy Bursts at 4 3/4" using the black out feature. To cut two more Flags, flip the mat around.
Die cut SUMMER from Nate's ABCs at 2" using Font Shadow Feature and Navel Cardstock. Die cut SUMMER again at 2" using the Font Feature and Rain Cardstock. Emboss the top layer with the Cuttlebug Swiss Dots Embossing Folder. Adhere the letters together.
Die cut the following elements from Nate's ABCs at 3" :
Ball, Birdnest, Car#1, Duck, Kite, and Wheelbarrow.
Using the layer features, cut the elements of your choice to fit. Since I wanted the focus to be on the banner, I chose to cut just a few elements. I used cream cardstock for the elements and brown ink for definition.
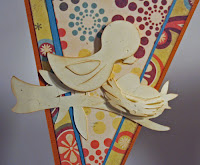
 Bird
Bird: I wanted the bird to stand out, so I die cut the top layer using shift + bird. To cut the nest, I used shift + bird + layer 2.
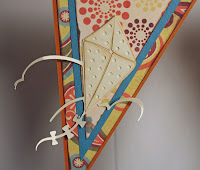
Kite: Cut kite + layer 1 and shift + kite + layer 1 for the kite elements.
Ball: Using shift + ball, I cut the top layer and adhered it with foam adhesives.
Duck: Using shift + duck, I cut the water, then added the duck (shift + layer 1) so it appears the duck is floating on the water.
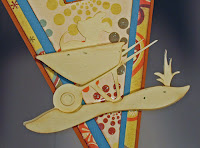
 Wheelbarrow
: Cut the bucket using shift + wheelbarrow. Cut the dirt patch using wheelbarrow + layer 1. Cut the grass patch using wheelbarrow + shift + layer 1. Cut the wheel using wheelbarrow + layer 2.
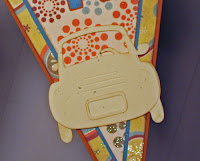
Car: Cut car using shift + car1. Cut the license plate using car1 + layer 2.
To assemble:
Ink all banner layers (except Layer 1) with brown ink.
Adhere the four banner layers together.
Cut a 2" wide strip of Navel Cardstock.
Using the Fiskars punch, punch along one edge, then add the strip to the top of each banner, cutting to fit.
Using the Crop-a-dile, punch holes in the edges of each banner and insert large brads. Not only do the brads anchor the banner pieces, they also add a nice decorative touch.
Add ribbons to the outer edges so the banner can be hung up anywhere.
Thanks for stopping by today.
Supplies:
Die cut Machine: Cricut Expression
Cricut Cartridges: Sports Mania, Nate's ABCs
Embossing: Cuttlebug Swiss Dots Embossing Folder
Punch: Fiskars Threading Water Punch; WERMemories Crop-a-dile
Ink: Clearsnap Chestnut Roan Ink
Cardstock: Bazzil - Rain, Navel; Stampin Up - Cream
Ribbon: Stampin Up
Brads: American Crafts
Pattern paper: WERMemories Pattern paper - Grandma's Kitchen
Adhesive: Scotch ATG; Scor-Tape; Glue Pen



