10/31/22

Trick or Treat with TLC Designs

 Happy Halloween everyone.  


Supplies: TLC Designs Creeping it Real Digital Stamp Set

These cuties are so excited to be celebrating Halloween.

I created the card and used the sentiment as the center focus, surrounding it with Little Drake and Frankie-Pie, all from the stamp set.  I colored them with Copic Markers.  They are just so excited to be filling their candy buckets!

Thanks for stopping by.

Steph

Happy Halloween with Fairy Hugs

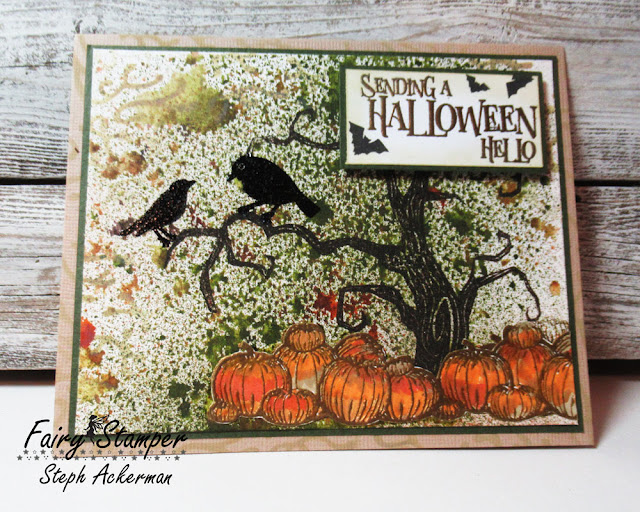
 Hi everyone, I have another Fairy Stamper project to share.  It's a spooky Happy Halloween card.


Supplies:  Fairy Hugs Stamps -
Fairy Hugs Stencil - Flow


The background was created with spray inks.
The stencil was used around the edges.
The tree was stamped in dark brown ink and embossed.
The pumpkins were stamped with black ink and embossed with gold embossing powder, then fussy cut.


Kinda spooky isn't it?

Thanks for stopping by.

Steph

10/29/22

Fairy Stamper - Wizard Search

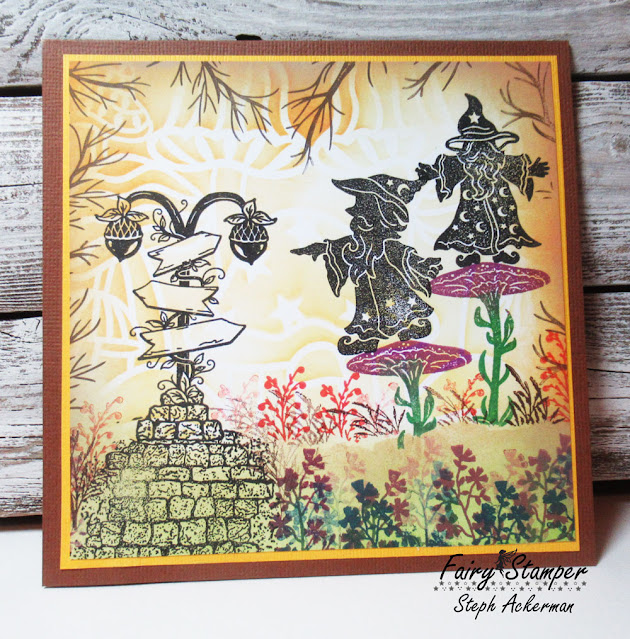
 Hi everyone, I have another Fairy Stamper project to share. 


Fairy Hugs Stencil - Magical Mushrooms


Place the stencil on white cardstock and lightly ink with orange ink.
Add green ink along the bottom of the panel.


Stamp Ania's Tree around the card.
Stamp the sign post in black ink and the Mushrooms in 2 colors.  Place the wizards on top of the mushrooms.


Stamp the Stone Fortress Texture under the sign post and finish by stamping assorted floral elements about the card.

Thanks for stopping by.

Steph

Cat Lover's Hop with Blank Page Muse Stamps


Blank Page Muse is sponsoring 2022 Cat Lovers Hop - Oct. 24- 29
Blank Page Muse's special day is October 29.
Join the Cat Lovers Hop and win prizes!
Link to the blog and instructions: Cat Lovers Hop


I've used Cat Nap rubber stamp.

Love how the cats have snuggled with the sleeping child.

Thanks for stopping by.

Steph

10/27/22

Cat Lovers Hop - Fairy Hugs - Ed and Nala


Fairy Hugs is sponsoring 2022 Cat Lovers Hop - Oct. 24- 29
Fairy Hugs special day is Oct. 27
Fairy Hugs Prize is the two cat stamps Ed and Nala.
Fairy Hugs is offering a special 15% off discount during this hop. www.fairyhugs.com
Code CATHOP - it's valid on Oct. 27 ends Nov. 6.
Join the Cat Lovers Hop and win prizes!
Link to the blog and instructions: Cat Lovers Hop


Pumpkin Stack, Stacked Mushrooms, Spiders and Web, Pumpkin House, Ed
Fairy Hugs Die:  Magical Hollow


Die cut a large circle and stamp Ed in black ink.
Mask Ed and stamp the Pumpkin Stack in orange ink so Ed appears to be sitting on the pumpkins.


Stamp the Stacked Mushrooms and offset around the panel.
Ink the leaves on the Pumpkin House and stamp in the open areas.


Stamp several spiders around the panel.
Color in the images in fall colors.


Create the card and add the Magical Hollow die next.
Add the stamped panel to the card with foam adhesives for dimension.

Thanks for stopping by.

Steph

10/25/22

TLC Design's Merry Christmas Card

Hi everyone, it's time to check out TLC Designs new release.  Stop by their instagram account and see all the samples.  Plus, follow along for a chance to win a GC to the store.


Die cut 2 pattern papers using both dies from the Zinnia Slimeline Die.


Using dies from the Slimline Multi Slide, die cut the top panel.


Ink the "slider" and the panel.  Stamp PULL on the edge of the slider.


Use foam adhesives on the back of the panel, leaving space for the slider to move along the card.


Print and color the images from the Jingle Time Digi stamps.
Assemble the card, placing Santa on the slider so he moves back and forth.


Add Sprinkles to the Christmas Tree.

Thanks for stopping by.

Steph

10/24/22

Etchall - Happy Halloween Candles

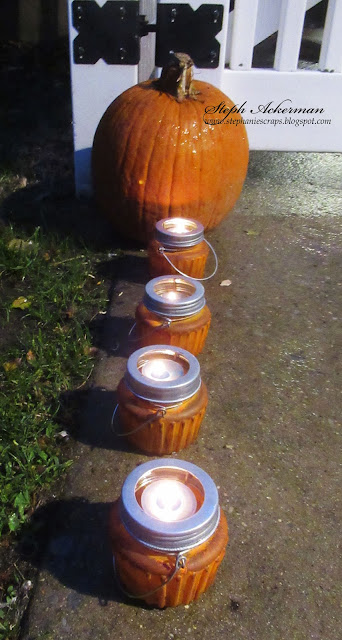
Hi everyone, as we are heading towards Halloween, I thought Halloween candle jars would be a fun addition to Halloween decorations.  Use etchallⓇ products to etch the glass.

Place the candles around the pumpkins and light them up at night.


Place the jars in etchall dip 'n etchⓇ.
Weigh them down with mini rocks and let them sit for 15 minutes.


Remove the jars from the liquid, rinse off and dry.


Paint the jars with orange paint.
The dip 'n etch allows the paint to adhere to the glass.


Use a sponge to add brown paint around the jars, giving them a grungy effect.


Place candles in the jars.
Leave them unlit during the day, but light them up in the evening.

Thanks for stopping by.

Steph

TLC Designs - With Love.....

 Hi everyone, I'm on the TLC Designs Blog today.


Supplies:
Twine


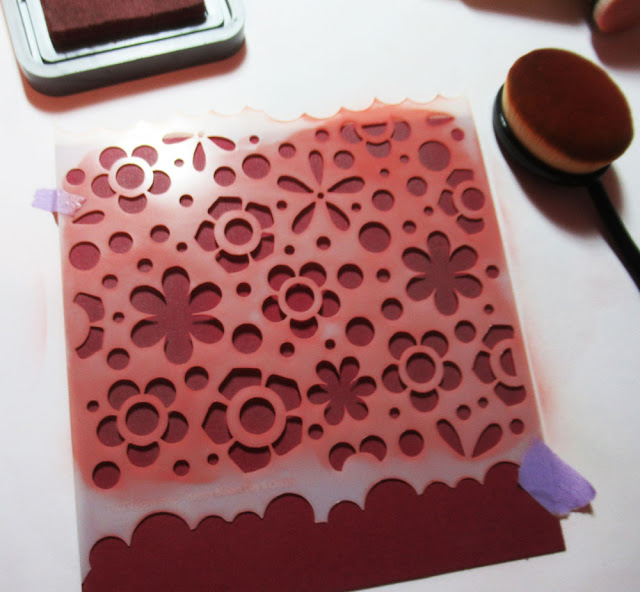
Create a tone-on-tone effect by placing the stencil on the card and inking with Distress Oxide Ink.  Move the stencil as necessary to finish the background.


The tone-on-tone effect is gorgeous.


Use the Hearts stencil on white cardstock.
Stamp the mouse on white cardstock and color with Copic Markers.
Die cut with the Happy Dragonfly Circle Die and mat with larger Aztec Circle Die.


Mat the heart panel with black cardstock.
Wrap the panel with ribbon and tie with twine.


Add a phrase to the upper corner.

Thanks for stopping by.

Steph

10/22/22

Fairy Hugs - Magic in the Air

 Hi everyone, I have another Fairy Stamper project to share.  


Supplies: Fairy Hugs Stamps

Halloween is on it's way - and there is magic in the air.

Thanks for stopping by.

Steph

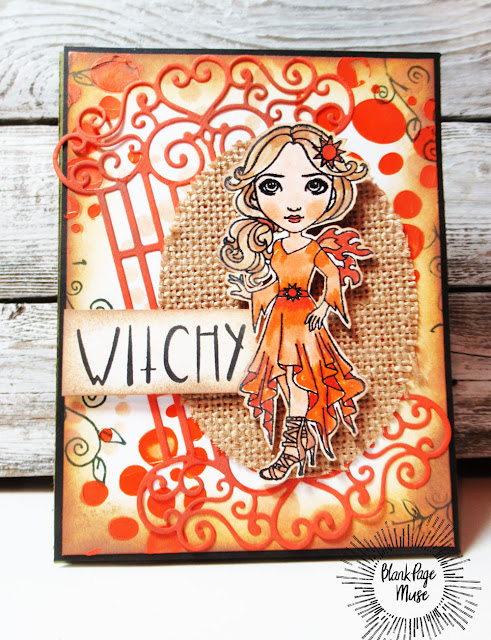
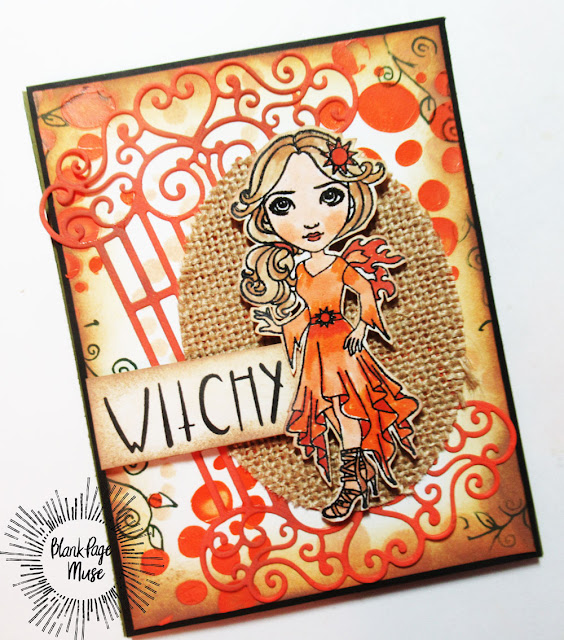
BPM - Witchy Halloween

 Hi everyone, I'm using some amazing stamps from Blank Page Muse and I Break for Stamps.


Use Marigold Stencil Butter with the Butterfly Trails  Stencil.
Place the Pebbles Stencil on the panel and ink with brown ink.


Stamp and emboss the image.
Color with Copic Markers, then fussy cut.


Stamp the vine stamp around the panel.
Add a trellis and burlap oval on the card.
Ink the card with dark ink and mat with black cardstock.


Create a card from green cardstock.
Add the image with foam adhesives for dimension.

Thanks for stopping by.

Steph


Looking for more Inspiration? Click the links below!
The Blank Page Muse Shop https://blankpagemuse.com/

Save 15% of your Blank Page Muse orders with discount code:  BPMSteph

10/21/22

Happy Halloween Treat Bags

 I'm on the Bowdabra blog with these sweet Halloween treat bags.


Supplies:

Mini Bowdabra
Bow Wire
Ribbon
TLC Designs Stamps and dies
Treat Bags

Start by placing the Bow Wire in the Bowdabra and place it underneath while creating the bow. 
Place a 12″ strip of both ribbons in the Bowdabra. 
Holding both ribbons together, leave a 4″ length and place the ribbons in the Bowdabra.

Continue holding both ribbons together and create the bow loops.
Use the bow wand to push the ribbon into the Bowdabra.


Pull up on the bow wire and tie off.


Create as many bows as needed and fluff out each one.


Decorate the front of each treat bag using digital stamps from TLC Designs Say Boo and Scary On.  Color each with Copic Markers and die cut using the TLC Designs Daisy Frame Die.


Punch holes in the tops of the treat bags and slip the bow wire through and tie off.  
Push the bow wire back through the holes to the front of the treat bags. 
Use a craft pick to twirl the bow wire.
Fill with treats and hand them out to family and friends.

Thanks for stopping by.

Steph

10/17/22

TLC Designs - Let's Chill

Hi everyone, I'm on the TLC Designs blog sharing a winter themed card.


Create a card from blue cardstock.
Using the stencil with an ink dauber, ink just the snowflakes with distress ink around the card.
Use varying pressure to create different colors of snowflakes.


Use the hill from the Land and Seas Dies, create the hills at the bottom of the card.
Die cutting once you can get 2 layers by realigning the 2 pieces.


Stamp the trees on green cardstock and fussy cut them.
Stamp and color the boys, then also fussy cut then place the trees in the background.
Die cut several clouds to cover a "mistake" amongst the snowflakes.


Stamp and place Let's Chill along the bottom of the card
Add liquid "snow" to the snowflake centers, the tress and the ground.

Thanks for stopping by.

Steph