Showing posts with label makin's clay. Show all posts

7/8/20

Hello Summer!!!!!

Hi everyone, Steph Ackerman here today with showing you how to create a Summer plaque.


Draw a shell pattern on a piece of plywood.  Use the Scroll Saw to cut around the design.  


Use the Disc Sander to sand the edges of the panel.   Then use the Delta Sander to sand any remaining edges.


Paint the panel with Plaid paint.   Allow to dry then randomly dry brush on some white paint.  Decorate with mesh and assorted shells created from Makin's Clay.


Stamp a script stamp with black ink randomly about the edges of the panel.


Die cut 2 palm trees and Hello Summer from Rinea Foiled Papers using Emerald Starstruck and Gold/Gold Glossy.


Finish by adding a stamped and fussy cut Prima doll to the panel.


Thanks for stopping by.


6/16/20

Life Is Good with Clear Scraps

Hi everyone, I'm on the ClearScraps blog with a summer themed Pallet.


Using the Circle Medium DIY Pallet, I painted each slat representing a beach theme.


Placing glue along the bottom edge, I added mini art stones representing sand.


Using the Life is Good Chipboard word title, I painted it with red paint and spritzed with a pearl spray ink. 


I also painted the Beach Chair chipboard embellishment with brown paint and the umbrella with beige paint.   I used glue to create veins on the umbrella and sprinkled on gold glitter.  The chipboard pieces were adhered to the pallet.


To finish, I created shells from Makin's Clay, painted them with gold ink and adhered them to the panel.

Thanks for stopping by.

Steph


4/4/20

Quick and Pretty Cards with Makin's Clay

Hi everyone, I've got some quick and easy cards today that have been accented with Makin'sⓇ Clay elements.


Supplies:
Mod Podge clay mold
Prima Art Alchemy Paints
Rinea Foiled Paper
Joy Clair Stamps
EKSuccess Punches

Using several silicone molds, I placed white clay in each then used the Roller to push the clay into the molds and smooth the top.


Remove the molds and cut away any excess clay.  Allow to dry thoroughly before painting.


Once dry, I painted each item with assorted colors of  Prima Art Alchemy Acrylic Paints.


After the pink paint dried on the medallion, I accented the rose with red and green paints using my finger tips.


Creating a card from pink and brown cardstock, the rose was a perfect embellishment for the little paper sack into which I placed a gift card to the recipient's favorite store. A wood-type frame was die cut from Rinea foiled paper and placed around the medallion.   Congratulations was stamped, punched and placed above the frame.


The clay frame was painted with teal paint.  Look at all those details.


A floral panel was added behind the frame which was adhered to a small paper sack.  A fussy cut butterfly was adhered to the corner.


Creating a card from brown cardstock and a script print, the frame was a perfect embellishment for the little paper sack into which I placed another gift card to the recipient's favorite store. I added another butterfly to the sack.   Congratulations was stamped and die cut and placed above the frame.


These cards look very pretty with the clay elements.  They provide great dimension but very little additional weight to the cards.

Thanks for stopping by.


Steph

3/24/20

Welcome Home

I'm on the Clearscraps blog with some of the new products soon to be available.  This wonderful house puzzle has many possibilities.


Start by separating the house puzzle pieces and then paint with light brown and dark brown paints.


Tape the 6" Shiplap Stencil to the chimney and add modeling paste.


Stamp paw prints in black ink around the light brown panels.


Stamp the paw prints at the top of the house.  Use stickers to spell out welcome across the top.


Run twine across the top, then "hang" acrylic Small Pennants banner pieces that were painted with pink paint.   Add stickers spelling home.


 Add photos.  Since we just adopted a new puppy, I wanted to welcome her to her new home.

Thanks for stopping by.

Steph


3/6/20

Jewelry Box with Makin's Clay

Hi everyone, I've created a  jewelry box with Makin'sⓇ Clay accents.


Supplies:
Makin's ClayⓇ - White
Makin's ProfessionalⓇ Cutting Mat
Makin'sⓇ Roller and Cutters Set
Prima Molds
Imagine Crafts Ink, Fireworks Sprays
Beacon Adhesive
Wood Box
Modeling Paste
Nuvo Drops

Place white clay in the molds and use the Roller to roll the clay smoothly in the mold.


Paint a wood box with your favorite color.  I used light pink.


Use a stencil with modeling paste about the box.  Once dry, spritz the box with Fireworks! Shimmery Craft Sprays in Lilac Posies and Bamboo Leaves.


Adhere the clay elements to the box with Beacon 3-in-1 Adhesive.  Use an art dauber to ink the clay elements with VersaFine Clair inks in Purple Delight and Green Oasis.


Place Nuvo Drops around the top of the box and in the center of the clay element for dimension.


Create a clay button and add to the drawer.  


It's a cute little jewelry box for all your trinkets.


Steph


2/9/20

Valentine Wishes

Hi everyone, I am on the Bowdabra blog with a sweet Valentine's Day card.


Please stop by the blog for more details.

Thanks for stopping by.

Steph


2/7/20

Happy Valentine's Day with Makin's Clay

Hi everyone, I have a new post for Makin's Clay.


Supplies:
Makin's ClayⓇ - Red
Makin's ProfessionalⓇ Cutting Mat
Makin'sⓇ Roller and Cutters Set
Makin's Texture Sheet - Set C
Prima Molds and Waxes
Want-2-Scrap Pearls


Using the Roller, place red clay on the Cutting Mat and roll out to the thickness of choice.  I rolled it out to about 1/4" in thickness.

 
Next, place the Eyelet Texture Sheet on the clay and use the Roller to roll over the sheet to impress the design into the clay.


Use the Cutter to cut a heart shape from the clay.

 
To add some color to the heart, rub Art Alchemy waxes over the heart.
 
 
Create a card from pattern paper and cardstock.  Use Beacon 3-in-1 Adhesive to adhere the heart panel to the card. 


Add a string of pearls around the heart.  Die cut Love from 2 layers of cardstock and adhere in the corner.
 
 
Thanks for stopping by.
 
Steph
 

1/17/20

Loving You Panel

Hi everyone, I've got a new post for Clear Scraps using some new products that will be available soon.


I loved the wood finish and did not want to take away from it's beauty so I simply inked the edges with red ink.


I placed an inked panel of sheet music as the next layer.


Then I proceeded by adding an assortment of elements from tags to flowers and a wood heart which I painted with red paint.  A pearl heart was added on top of the wood heart.


I used a Crop-A-Dile to punch holes in the panel and tied ribbon in place.  Additional tags were added on top of the heart.


A clay corner accent was inked and then added across from the flowers.


Thanks for stopping by.

Steph

1/4/20

Love card with Makin's Clay

Hi everyone, today I'm using Makin's Clay as the focal point of a card.  With Christmas now in the past, it's time to turn our thoughts towards Valentine's Day.


Supplies:
Clear Scraps Stencil
Memento Ink
Sizzix Die
Crafter's Companion die


Begin by conditioning the white clay, then place it in the clay machine at the highest setting.  Reduce the setting on each pass until you have the thickness you need for your project.


I wanted the clay to be rather thin so I continued until I had this this smooth panel.


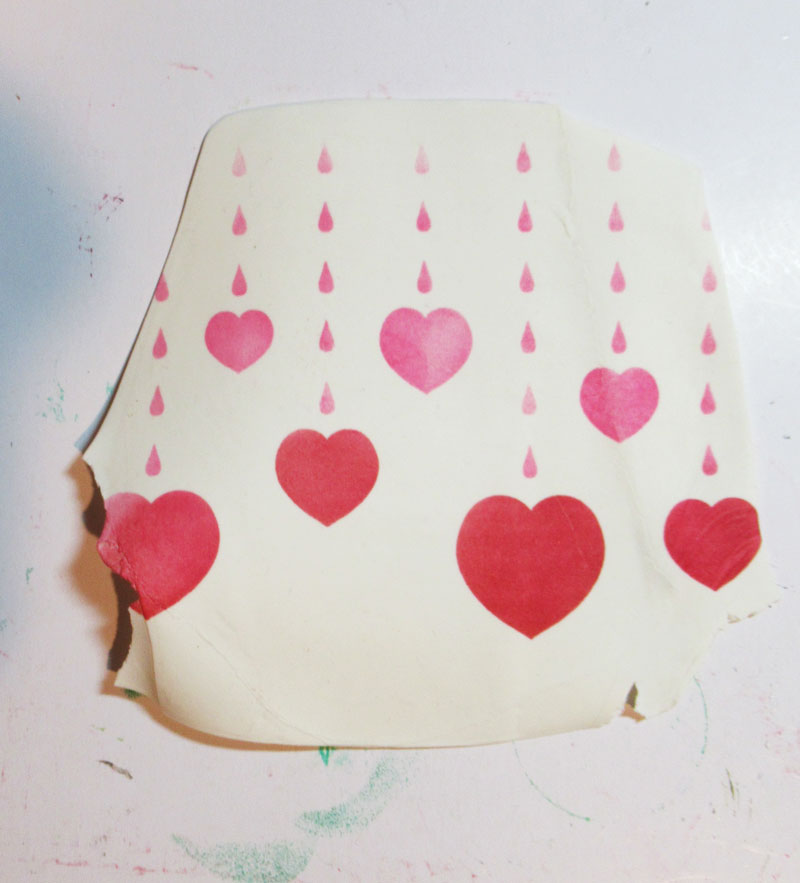
Using a Clear Scraps Heart Stencil, I placed it on the clay and inked  it with two different colors of ink using art daubers. 


Using a large Sizzix die, I die cut the clay panel and placed it aside to dry overnight.  I also die cut cardstock to use as a backing then adhered them with Beacon 3-in-1 Adhesive.


Creating my card, I wrapped ribbon around the pattern panel before adding it to my card.  The clay panel was then added to the card with foam adhesives for dimension.


Love was die cut from cardstock using a Crafter's Companion die and adhered to the clay panel


You could also use this card for a wedding or anniversary.

Thanks for stopping by.

Steph