Showing posts with label misti. Show all posts

12/3/20

Lavinia World Challenge #41

Hi everyone, it's time for the next challenge at Lavinia World Challenges.  Please check it out and join in the fun.


I created background created using an assortment of Brusho Inks.  The colors are amazing and you never know what you'll be creating.

Place Tree Goddess Luna on MISTI and stamp her with VersaFine Clair Nocturne Ink.  I reinked and restamped as needed for a good impression.


Stamp around Luna with Fairy Words using Nocturne Ink.  Place an acrylic die cut circle on Luna and sponge around her with Nocturne Ink for definition.  Use a Quickie Glue Roller Pen along the circle and pour Fairy Hugs Glitter Powder in Silver Lightening on top.


Mat the stamped panel with white cardstock and add to a red card.  Stamp the Time to Reflect phrase on a scrap of the background cardstock, then add to the card with foam adhesives for dimension.


Would love to see what you create for Challenge #41.  The winner of the challenge will receive a
$15 gift certificate to Lavinia World to shop for more goodies.   Remember there is a new challenge every other Thursday.  

Thanks for stopping by.


Like us on Facebook
Follow us on Instagram: LaviniaWorldStore
Join our NEW Anything Lavinia Facebook Group here
 Don't forget to include #laviniaworldstore on your projects and tag us at @laviniaworldstore so we can be sure to see and comment on your Lavinia projects!
Sign up to receive our Lavinia World Challenges and all the amazing inspiration from our Designers sent directly to your emails.

Please note that although we carry the full Lavinia range, we are not part of any other entity or Facebook group that carries Lavinia stamps. ONLY the cards posted to Lavinia World Challenges will be entered into the drawing for the Lavinia World prize.  Also note that the gift certificates are ONLY valid at the Lavinia World website.

Can't wait to see what you create.


11/21/20

Everything is Accomplished

Hi everyone, I love the changing seasons don't you?  


I began by placing my stamp on the MISTI, then inking separately with 3 colors of VersaFine Clair Inks to get the different colors of the season.


Next, I used Distress Oxide Ins in Lemonade, Marigold and Speckled Egg to create the background effect - I worked backwards but love the effect!!


I had an unmounted rubber stamp so I applied TapeRunner adhesive to the back, attached it to an acrylic block and stamped my phrase  perfectly.


The trees were matted with green and brown cardstock before being added to the card.  I die cut the phrase, matted it with brown cardstock and added to the lower corner.


Nature can be so pretty!!

Thanks for stopping by.

Steph


5/7/20

Lavinia World Challenge #26

Hi everyone, it's time for the next challenge at Lavinia World Challenges.  Please check it out and join in the fun.


Start by placing Aria on the MISTI.  Add colors using assorted Brilliance and Memento Inks.  I wanted a bit more drying time for her body so I used Brilliance Ink.  The Memento Inks dry faster and provide a more crisper image which is what I wanted for her wings and hair.


Once Aria has been inked, place a mask on top, then add shades of blue inks around Aria using art daubers.


Stamp Luna Lights around the top of the panel using Versafine Pinecone Ink, then stamp the Mushroom Lantern along the bottom edge, also using Pinecone Ink.  Tear the bottom edge, then mat the panel with dark blue cardstock, and also tear the bottom edges.  Finally, add the panel to a light blue card.


Stamp Secrets from the Secrets Are Hidden stamp by masking the stamp so only Secrets is inked.  Then punch it out and mat with a larger punch, addingit to the card with foam adhesives for dimension.  Finally, add some Liquid Pearls to her wings.


Would love to see what you create for Challenge #26.  The winner of the challenge will receive a
$15 gift certificate to Lavinia World to shop for more goodies.   Remember there is a new challenge every other Thursday.  Can't wait to see what you create.

Thanks for stopping by.


3/26/20

Lavinia World Challenge # 23

Hi everyone, it's time for the next challenge at Lavinia World Challenges.  Please check it out and join in the fun.


I started by placing the Moon Fairy on the MISTI.  I first inked the image with VersaFine Clair Cheerful, then reinked portions of the stamp with Purple Delight, then reinked portions of the stamp with Blue Bell.  Using the MISTI makes this process very easy and creates an amazing result.


Isn't she gorgeous?


Next, using a background created with spray inks, I inked the Fairy Bridge with VersaFine Clair in Pinecone and stamped it on the background.


Die cutting the panel, I matted it with brown cardstock, white cardstock and brown cardstock before adding it to the card.


The stamped image was die cut, inked and matted with a larger die, then added to the card with foam adhesives for dimension.


The phrase is Every Dream and it was added across the width of the card with foam adhesives for dimension.

Would love to see what you create for Challenge #23.  The winner of the challenge will receive a
$15 gift certificate to Lavinia World to shop for more goodies.   Remember there is a new challenge every other Thursday.  Can't wait to see what you create.

Thanks for stopping by.


12/19/19

Lavina World Challenge #16

Hi everyone, it's time for the next challenge at Lavinia World Challenges.  Please check it out and join in the fun. 


I'm using the Christmas Eve stamp today.  Because I wanted to add assorted colors, I placed the stamp on my MISTI and inked portions of the image in the colors I wanted.


Once inked, I die cut the image with a Spellbinders die.  While the image was still within the die, I inked around it with light blue ink.

The effect is a  nice white border where the die was sitting.


The stamped image was matted with a larger green die and then added to a card created with assorted layers of pattern papers.

I also created another card using a different die.  To finish I added gold stickles to the trees and the Fairy Merry Christmas phrase.


Would love to see what you create for Challenge #16.  The winner of the challenge will receive a

$15 gift certificate to Lavinia World to shop for more goodies.   Remember there is a new challenge every other Thursday.  Can't wait to see what you create.

Thanks for stopping by.


5/5/18

Think Spring with Creative Vision Stamps

Hi everyone, I am desperate for Spring, aren't you?  Check out a new card I've created using stamps from Creative Vision Stamps.


Using my MISTI, I placed the stamps on the panel then inked them.


The MISTI allows you to re-add inks so you can restamp the images perfectly.


I matted the panel with pink scalloped cardstock then adhered the panel to navy cardstock.  I restamped Think Spring and die cut it.  Then I matted it with a pink circle before adding to the card.  3 were added across the top.


You can shop at www.creativevisionstamps.com using my code (Steph10) to receive 10% off your next order of $20.00 or more.  Simply enter my code at checkout.  It's valid on regular priced items only, does not count toward shipping and taxes and cannot be used with the custom stamp service.

Thanks for stopping by.

Steph

3/23/18

Butterfly cards with Expressions Crafts

Hi everyone, I'm on the Expressions Crafts blog with a set of cards today using the Happy Fly stamp set.  I love butterflies and this set includes 7 butterflies along with 5 sentiments.


 Using the MISTI, I placed a sheet of cardstock inside, then arranged the butterflies about the panel, leaving room for the sentiment in the corner.


Next, I inked the butterflies in assorted colors of Brilliance Inks.


I repeated the inking until I had these amazing butterflies.  The sentiment was added in the corner with black ink.


After inking the panel with yellow ink, I matted the panel with black cardstock and added it to my card.  Finally, I scattered some gems around the card.


For my second card, I arranged the butterflies around the sentiment.


I inked the butterflies with Sky Blue ink.


Then I inked them with Sunflower Yellow and Rocket Red inks.


I inked the panel with blue ink, matted it with black cardstock and added it to my card.  Finally, I stamped the sentiment in Graphite Black ink and die cut it.  After adding it to a larger circle, I adhered it to the card and added gems.


Thank you for stopping by today.


Steph

10/3/17

Creating with Joy Clair stamps

Hi everyone, I'm on the Joy Clair blog today with 2 different stamp set.

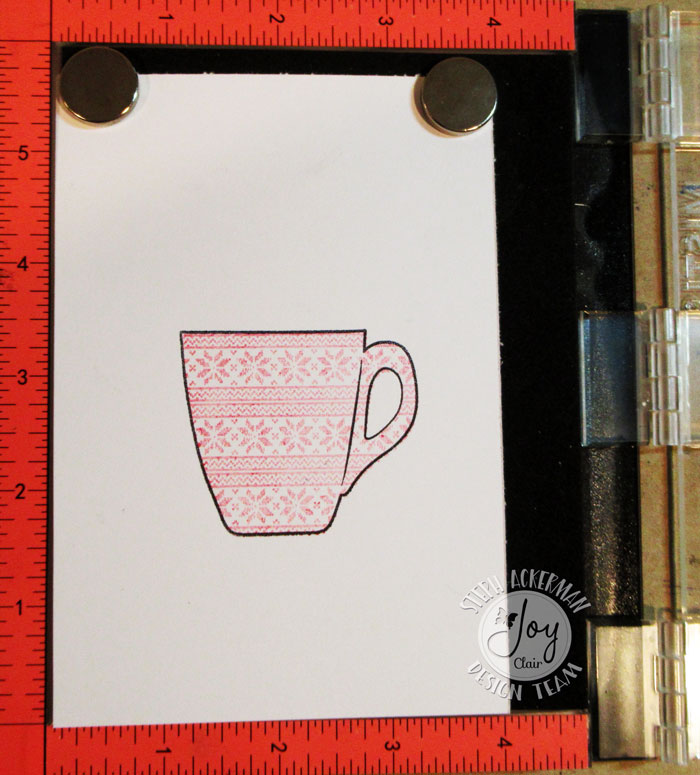
I've used the Christmas Coffee stamp set, creating 2 different cards.


The MISTI really helps when aligning images.  I first stamped the pattern in gray ink, then stamped the mug outline on top.


I created a card from green cardstock and pattern papers.  The top panel was wrapped with Whisker Graphics twine and added to the card with foam adhesives.  This cup was die cut and matted with a larger die cut.  The sentiment was added to the corner and stamped leaves underneath.


Using the MISTI again, I stamped the pattern in red ink and placed the mug outline on top with gray ink. 


The card was created by adding the stamped panel on layers of black and red cardstock.   The sentiment was stamped, matted and added to the card with foam adhesives.  The leaves were stamped, colored and fussy cut.  I ended by adding pearls to the mug.


I also created another card using the Out of this World stamp set.


I used Fireworks spray with a stencil creating both positive and negative images which I used on my card.  The negative image was achieved by placing another sheet of cardstock on top of the spritzed stencil.


Each panel was matted with cardstock and added to the card.


The spaceship and world were fussy cut, colored and then matted with cardstock.


Thanks for stopping by.

Steph