
Showing posts with label ann butler designs. Show all posts

8/12/21

Ann Butler and DCC Blog Hop

Hi everyone,  I'm participating in the Designer Crafts Connection blog hop, and this month we are partnering with Ann Butler Designs.


I received the  Black and White Toner Sampler Package and several colors of Deco Foil. Using the rose pattern with blue foil, I created several cards.  


The Toner sheets easily pass through a foiling machine and the color easily embeds itself in the Toner sheet.  Remember to save the foil and use it for another project.


I cut the panel in half, I using one panel as it was foiled and the other I added color with Copic Markers.  Both have a wonderful effect.  


 Sentiments are perfect for using your foil scraps.


Add a foiled sentiment to the cards with foam adhesives for dimension.


I also created another card using the leaf panel and green foil.  After foiling, I die cut the panel and then wrapped it with ribbon before adding it to a card.


Please stop by the Designer Crafts Connection blog to see what the designers have created this month with Ann Butler Designs.


Thanks for stopping by.


12/24/17

Quick and Easy Gift Ideas - Day 10

Hi everyone.  Christmas will be here before we know it.  The last three years I've blogged about last minute Christmas ideas you could make in under 60 minutes.  Well, it's that time again and I've got some new projects to share.

It's Christmas Eve and today it's all about tags. Every special package needs a tag so why not create some personalized tags.


Using Makin's Clay, I created mittens, bells and snowflakes. 


I created a pointsettia and added it to a tag.  Then I used Whisker Graphics twine so I could tie the tags to the packages.


I hope you've enjoyed my 10 days of quick and easy gift ideas.

If you missed my previous posts, you can find them here: 

Day 1
Day 2
Day 3
Day 4
Day 5
Day 6
Day 7
Day 8
Day 9

11/28/17

Lovely Gift Bag

Hi everyone, this week the Ann Butler Design Team is sharing projects created with products from Ann Butler Designs, Rita Barakat and Lisa Jimenez. 


Supplies:

Ann Butler's Crafter's Ink by Clearsnap  - Berry and Canyon
Rita Barakat's Art Foamies - Hot Air Balloon
Lisa Jimenez Colorique Ink by Clearsnap - Honey Bee and Wisteria


I began by inking the Hot Air Balloon with both Berry and Canyon Inks.  This is a large stamp that I knew would be perfect for a gift bag.  Once stamped, I then fussy cut both pieces.


I placed several drops of Honey Bee and Wisteria Colorique on a gift bag, then used a paint brush to create the streaky background.  Colorique Ink is blendable so where the colors overlap, a third color came to life.


Colorique works on a variety of surfaces so I selected a metal charm and painted it with Honey Bee.  Before it dried, I rubbed off the color as I wanted the color to soak into the letter spaces.  Finally I painted Wisteria on the charm and heat set it.


Next, I inked some ribbon with Berry Ink.


Then I used my Bowdabra to create a ribbon.


To finish,  I matted the hot air balloon with cardstock and adhered to the bag.   I tied the ribbon to the handles and added the charm.  I also used Berry Ink around the edges of the gift bag.


I hope you enjoyed my project and will try these lovely supplies.
 
Thanks for stopping by today.
 
Steph
 

10/3/17

Creating with Joy Clair stamps

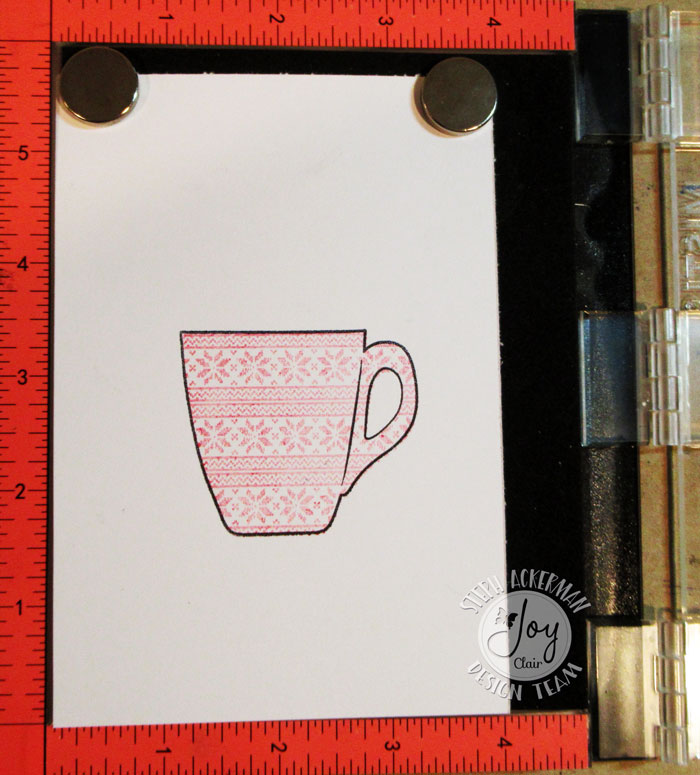
Hi everyone, I'm on the Joy Clair blog today with 2 different stamp set.

I've used the Christmas Coffee stamp set, creating 2 different cards.


The MISTI really helps when aligning images.  I first stamped the pattern in gray ink, then stamped the mug outline on top.


I created a card from green cardstock and pattern papers.  The top panel was wrapped with Whisker Graphics twine and added to the card with foam adhesives.  This cup was die cut and matted with a larger die cut.  The sentiment was added to the corner and stamped leaves underneath.


Using the MISTI again, I stamped the pattern in red ink and placed the mug outline on top with gray ink. 


The card was created by adding the stamped panel on layers of black and red cardstock.   The sentiment was stamped, matted and added to the card with foam adhesives.  The leaves were stamped, colored and fussy cut.  I ended by adding pearls to the mug.


I also created another card using the Out of this World stamp set.


I used Fireworks spray with a stencil creating both positive and negative images which I used on my card.  The negative image was achieved by placing another sheet of cardstock on top of the spritzed stencil.


Each panel was matted with cardstock and added to the card.


The spaceship and world were fussy cut, colored and then matted with cardstock.


Thanks for stopping by.

Steph


9/1/17

Bermuda Mini Album

Hi everyone, I'm on the Rinea blog with a mini album I created to document our recent cruise to Bermuda.


This month we are partnering with Joy Clair stamps so I incorporated stamps from the Dream Big and Wild and Free stamp sets.  


I covered the front of the album with pattern paper then die cut letters from black cardstock and Silver/Silver Glossy Foiled Paper using my Cricut Expression.  I used an older, less sticky mat and set my pressure setting to medium and the letters cut without issue.


Next, I embossed the letters with a Cuttlebug embossing folder.


I placed the foiled letters onto the black letters.  I found using my Xyron Sticker Maker was the best way to add adhesive to the letters.  Then I added the letters to the front cover.


My interior pages consist of cardstock, pattern paper and Rinea Foils.  A strip of Gold/Gold Glossy Foiled Paper was added along the edge of the right side and Emerald/Gold Glossy Foiled Paper was torn and added on top to coordinate with the photo.  I used Joy Clair stamps as embellishments.


Did you know that Rinea now has a Ghost Ink?  Stamping with Ghost Ink removes the color from the foil creating a reverse stamping effect.  I stamped "explore" repeatedly on the Gold/Gold Glossy Foiled Paper, then used a baby wipe over the words.  As you can see, the gold was removed from the stamped words but not the surrounding foil!


I created a pocket page on the left side to hold extra photos.  Sapphire/Gold Glossy Foiled Paper was placed on the pocket and a photo added on top.  Using foil as mats really brings out the colors in the photos.  Then I simply placed additional photos in the pocket.  On the right side, I added a strip of Sapphire/Gold Glossy Foiled Paper under the photo.  I used another Joy Clair stamp as an embellishment.


To finish I inked around the pages with brown ink, added rings and ribbons.

Now I have a memento of our Bermuda vacation.

Thanks for stopping by.
Steph


8/1/17

Just For Fun August Challenge

Hi everyone, it's time for a new challenge at Just For Fun Rubber Stamps and this month it's all about the heat.  Summer is in full swing here and it is hot, hot, hot.


Begin by creating a 4 1/4" x 5 1/2" card from black cardstock.  Cut 2 layers of blue cardstock each 4" x 5 1/4".  Cut 1 piece of white cardstock 3 1/2" x 5".

Stamp the Beach Fence on the center of the white panel in black ink.   Add color around the image using Ann Butler Design's Crafter's Ink and a water brush.  I used Tangelo, Aquamarine, Blueberry, Sand and Canyon inks.


Place the 2 pieces of blue cardstock together, place a small oval die in the center and die cut both pieces at the same time.  This ensures that the ovals will be in the same place.  Remove one of the pieces and place a larger oval on the other piece and die cut creating a larger window.


Place the stamped and painted white panel behind the smaller window and adhere to the card.


Using Scor-Pal, score 1/4" lines down the second die cut panel, then lightly ink with Blueberry Ink.  Also ink around the larger oval opening with Blueberry Ink.  Place this piece atop the card with foam adhesives for dimension.


Stamp the phrase on white cardstock, mat with black cardstock and add to the card with foam adhesives.

What do you think?  Does it remind you of watching the sun setting?

Thanks for stopping by.

Steph


6/24/17

Stamped Clipboard

Hi everyone, my newest project  on the Ann Butler Designs blog is this altered clipboard.


Begin by painting a clipboard with white paint.    Use Blueberry Ink to stamp the 2" Dots across the bottom plank.


Stamp the striped stamp using Aquamarine Crafter's Ink.  Repeat on the remaining planks.


Paint Tattered Angels High Impact Grey Paint about the panel for more definition.


 Use Blueberry Crafter's Ink to add color to the chipboard elements.


Use the Scor-Pal to score cardstock, forming a pen holder.


Add the chipboard elements to the panel.  Add the pen holder in the right corner.


 Add paper under the clip and pens to the pen holder.


 I think this would make a wonderful gift to help someone remember all the tasks to be done on a daily basis. OR, hang it in your own home and track what you need to do.

Thanks for stopping by.

Steph