Showing posts with label treat bags. Show all posts

10/26/24

Fairy Hugs Trick or Treat

 I am so happy to share that Fairy Hugs is back!!!!!  Check out the New Release - it is awesome!  

Today, however, I am using older Fairy Hugs stamps for sweet Halloween Treats. 


On 2" circles, stamp the pumpkin stack.


Mask the pumpkin stack and over stamp the web background.


Create the boxes and add the circles to the front panels.


Place some treats in each box.
Seal the boxes with twine.
Stamp Treat and adhere to each box.

Thanks for stopping by.

Steph

10/1/24

Halloween Treat Bags

  Hi everyone, it's time for a new Scor-Pal challenge.  Just create a project with more than one score.


I think these cute little treat bags would have everyone enjoying Halloween this year.


Cut cardstock 4 1/4" x 11".
Placing the long edge at the top of the Scor-Pal, score as follows:
Score at 3 1/2", 4 1/4", 5", 8 1/2", 9 1/4" and 10".


Rotate the panel and score at 3/4" to create the bottom.


Fold the panel in mountain and valley format.
Cut up to the score line on the side panels.
Place Scor-Tape along the right side and assemble to create the box.
Fold up the bottom edges and use Scor-Tape to assemble.
For additional support, I added another strip of black cardstock to the bottom.


Decorate as desired using assorted pattern papers and phrases.
To create the top flaps, cut cardstock 2" x 3 1/2" and score the panel in half.
Adhere to the back of the box and fold towards the front.


Finish by punching holes in the top flat.
Run twine through the holes and tie off.
Add stamped images.

Thanks for stopping by.

Steph

10/10/22

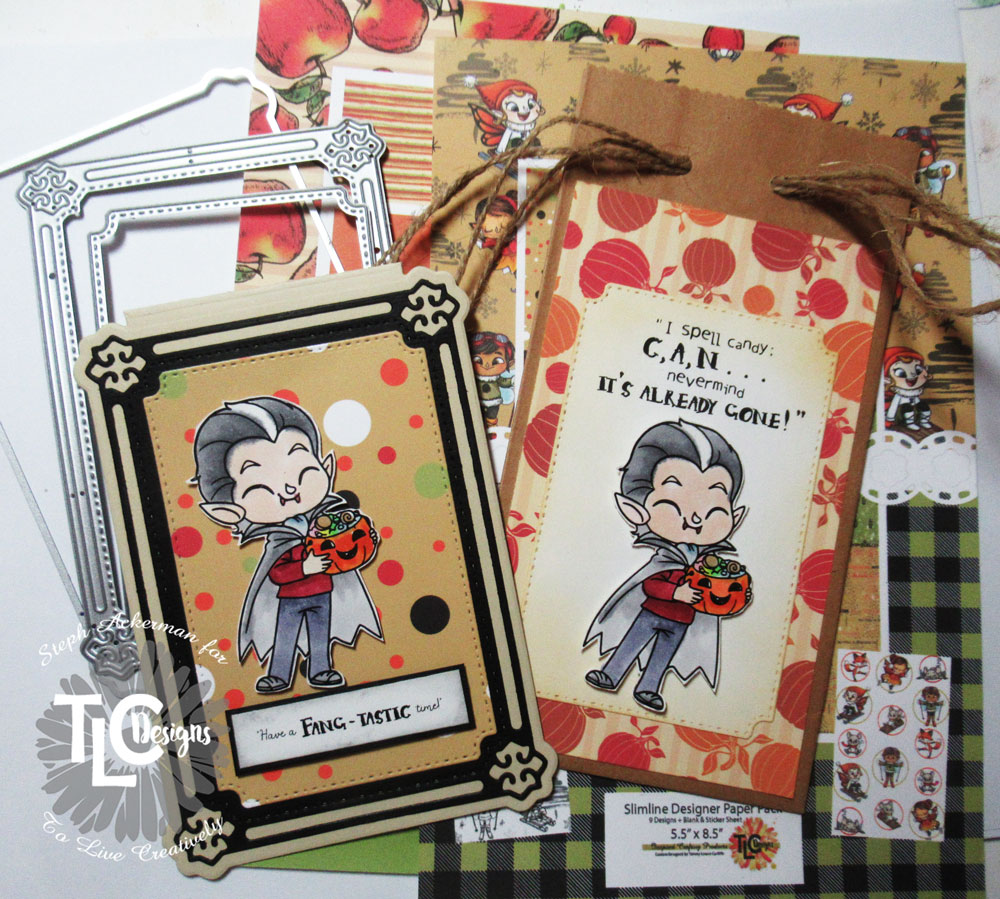
TLC Designs - Happy Halloween Ensemble

 Hi everyone, I'm on the TLC Designs blog sharing a sweet Halloween ensemble.


Using the largest die, create the card from kraft cardstock.


Create the 2nd layer with the middle die and black cardstock.
Create the 3rd layer with the smallest die and paper from the Chilly Fun Paper Pack.


Print the vampire and color with Copic Markers.
Fussy cut and add it to the card with foam adhesives, then add the sentiment under the image.


Create the treat bag by adding paper from the Delicious Paper Pack.
Print the sentiment and die cut with the smallest die and lightly ink it before adhering to the bag.
Print and color the vampire and adhere to the treat bag with foam adhesives for dimension.


What a sweet ensemble for Halloween!

Thanks for stopping by.

Steph

2/9/21

Valentine's Day Treat Bags with TLC Designs

Hi everyone, I've got a quick and easy Valentine's Day project to share using some fun stamps and dies from TLC Designs.

It's almost Valentine's Day and that means it's time for little treats for the "kids" in your life, no matter how old they are!


I used the
Apple A Day Die which consists of 14 dies that can be used in so many different ways.  I selected the 2 frame dies in this set, using the largest die with cardstock and the next die with pattern papers from the Soft Blush Digital Paper Pack,  Krafty & Sweet Digital Paper Pack, and the Perfectly Precious Digital Slimline Paper Pack.


Scoring the cardstock and pattern papers in half, I adhered them together to create treat toppers.


 I filled treat bags with Conversation Heart candies then, punching holes in the toppers and the treat bags, I tied them together with ribbon.  They definitely are pretty as is, but I wanted to go a little further.


Using left over cardstock, I die cut the included scalloped die which I was going to use as a base for my phrases.


Using stamps from Sweetie The Dragon stamp set, I stamped the phrases on the scalloped die cuts.  I also used a phrase from the Happy Bouquet Digital Flower Stamp.

  The phrases were then placed atop the treat topper with foam adhesives for dimension.


Who will you be giving Valentine's Day treat to this year?

Thanks for stopping by.

Steph

5/24/19

Teacher Treat Bags

Hi everyone.  With the end of the school year nearing, it's time to start creating gifts for your kid's favorite teachers.


For quick and easy treat bags, use the Rinea Oma's Postcard Stamp and VersaFne Clair ink.


Die cut medallions and circles bases from assorted colors of Rinea Foiled Papers.  I used Violet/Gold Glossy Foiled Paper, Lavender/Gold Glossy Foiled Paper, Marigold/Glossy Foiled Paper, Ebony/Gold Glossy Foiled Paper and Silver/Gold Glossy Foiled Paper.


Adhere the medallions together and place on each bag.  Use Makin's ClayⓇ to create clay embellishments and add them to the center of each medallion.


Using the Joy Clair Gnome is Where the Heart is stamp set, stamp  and die cut "thanks".  Add to font with foam adhesives.  Finish by filling the bags with candy and tying the bags closed.

Thanks for stopping by.

Steph

1/4/18

Treat Bags with Rinea Foils

HI everyone Happy New Year with Rinea Foils.

Now the holidays are behind us, it doesn't mean the fun should stop.  Goodie bags are fun to create and with Rinea Foiled Papers, the options are endless.


Using Spellbinders dies, I die cut an assortment of shapes from the foiled papers.


Once they've been removed for the dies, look at the results and all those beautiful colors of foils -  Emerald/Gold, Sapphire/Gold, Blush/Gold, Silver/Gold, Ruby/Gold, Blush/Gold, Silver/Silver Starstruck, Ruby/Ruby Starstruck.


I inked kraft bags with white dots, then adhered the die cut elements with Helmar Adhesives.


Once the die cuts were adhered to the bags, I die cut initials for each. 


Now the goodie bags are ready for our New Year's party, and, since they are personalized, everyone will know which one is theirs.


Thanks for stopping by.

Steph