9/27/21

Halloween Decor with Etchall

Hi everyone, it's time to start thinking about Halloween.  Are you ready?


Placing etchallⓇ dip 'n etch in 2 containers, I put the jars in the containers and let them sit for approximately 15 minutes.


Removing the jars, I poured the dip 'n etch liquid back in it's original container.  It's reusable so you can save it for future projects.


The jars were rinsed and dried.


Then I decorated each with ribbons and bows and Halloween elements to create a Halloween centerpiece.

Thanks for stopping by.

Steph

9/26/21

Thinking About You

Hi everyone, just know I'm thinking about you today.


Using Memory Box, I die cut the flower from white and green cardstock.  To fill in the flower pieces, I also die cut another layer from pattern paper.

Thanks for stopping by.

Steph

9/25/21

Under the Sea with Oscar

 Hi everyone, I have another Fairy Stamper project to share.  


I created a background using the Gel Press and paints in shades of green and blue.  After pulling several prints, I found the one I liked the best for Oscar.


Once the panel was dry, I cut it to size and stamped Fairy Hugs Oscar in black ink slightly off the panel.  Oscar was one of my very first Fairy Hugs stamps and I love him.  Then I stamped Fairy Hugs Hanging Vines to simulate seeweed along the bottom.  Oscar looks like he's happily playing under the sea.


The panel was matted with white cardstock then added to a blue card.

Thanks for stopping by.


9/20/21

Autumn Blessings 2021

 Hi everyone, I have a sweet card to share full of Autumn Blessings.


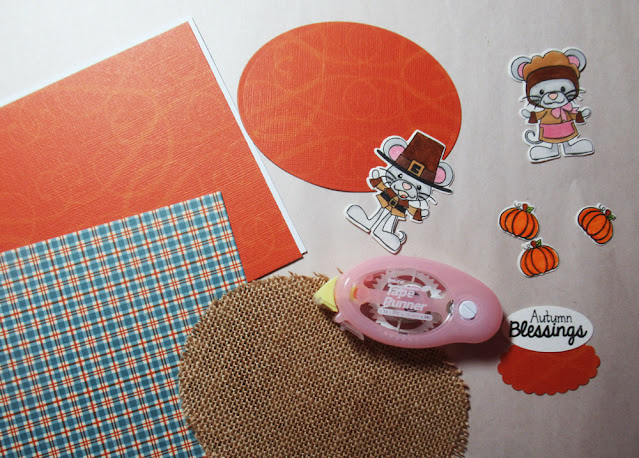
Pink and Main has sweet stamps and coordinating dies.  After stamping the images and coloring with Copic Markers, I then die cut them.


To complete the autumn effect, I die cut a piece of burlap to use on the center of the card.


I adhered the layers together using Tape Runner adhesives.


Thanks for stopping by.

Steph


9/19/21

Who You Are

 Hi everyone, I have another Fairy Stamper project to share.  


Thanks for stopping by.


9/18/21

Just A Note Daisies

  Hi everyone, I have another Fairy Stamper project to share.  


I wanted to use a pattern paper background for the large FH Daisies stamp and think it turned out fabulous.  I've also used FH Just a Note and added several FH Bees fluttering around the daisies.

Thanks for stopping by.


9/17/21

Spooky Halloween Treat Bags

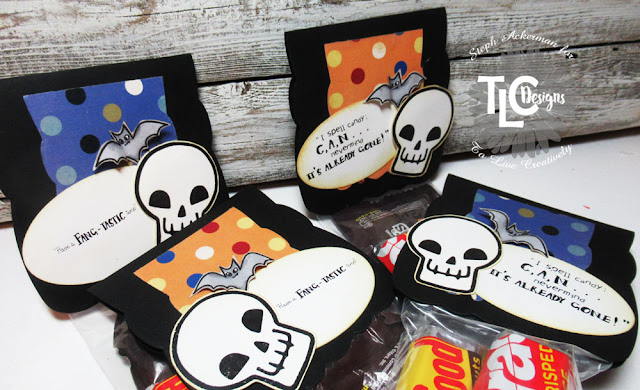
Hi everyone, I'm sharing some spooky Halloween Treats using assorted TLC Designs products.


I've used the Creeping It Real Slimline Digital Paper, the Creeping it Real Digital Stamp Set and the Zinnia Slimline Die to create these fun candy toppers.


I used the largest Zinnia die to die cut the topper, then used the smallest Zinnia die to die cut the paper, cutting it in half to fit 2 candy toppers


I fussy cut the skulls and bats, then used the smallest die from the Celebrate Frame die set to die cut the phrases.  Then I simply attached the toppers to candy bags for this year's Halloween Party.


Thanks for stopping by.

Steph


9/16/21

Self Binding Mini Album with i-Crafter

Hi everyone,  I'm participating in the Designer Crafts Connection blog hop, and this month we are partnering with i-crafter.


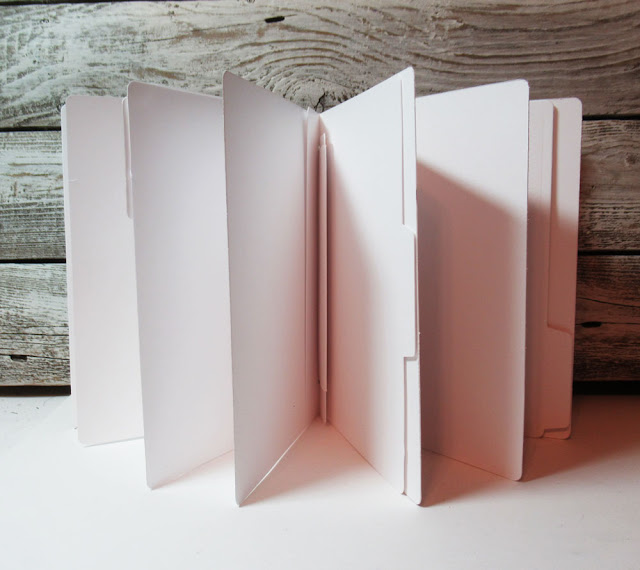
i-crafter has a wonderful selection of products and I received this pretty self binding mini album to create.


This mini album was fun to create and the kit comes will everything you need, sorted by page.  The instructions were quite extensive and easy to follow.


I never realized you could create a self binding mini album - but this kit showed me how easy it was.


The pages easily went together.


Then the fun began with decorating the album.  
Simply follow the directions adding all the elements, or add your own spin to the kit.


Please stop by the Designer Crafts Connection blog to see what the designers have created this month with products from i-crafter.

Thanks for stopping by.

T

Steph


9/15/21

Enjoy The View

Hi everyone, I've created a gatefold card using wonderful stamps from Blank Page Muse.


Stamp the image and add color with Copic Markers.
Die cut the image.
Use Distress Oxide Inks to add additional color.


Create a gatefold card.
Mat the stamped image with a larger scalloped die and adhere to the left flap.


Thanks for stopping by.

Steph

Looking for more Inspiration? Click the links below!
The Blank Page Muse Shop https://blankpagemuse.com/

Save 15% of your Blank Page Muse orders with discount code:  BPMSteph

9/14/21

Sending Fairy Dust Wishes

 Have you seen the new Fairy Hugs release?


I've used FH Bonnie and FH Fairy Dust Wishes to create this sweet card.  Bonnie was set upon die cut ovals using TLC Designs Tiny Vine Oval and she was surrounded with the included flower die cuts.  Copic Markers added some color to Bonnie's wings and pearls were added to the flower centers for dimension.


Thanks for stopping by.

Steph

9/11/21

Who You Are Peacock

   Hi everyone, I have another Fairy Stamper project to share.  


I've used FH Peacock and FH Who You Are stamps on a spritzed panel which was die cut with TLC Designs Dies and placed on a background of FH Chinese Lantern Stems.

Thanks for stopping by.


9/10/21

Fairy Hugs New Release

It was another wonderful showing of Fairy Hugs products on the English craft show this month.  35 new stamps were released along with 4 new stencils and all the designers created some wonderful samples.

Here are links to the shows if you would like to see them:

Here are some of my samples:


TLC Designs Dies: Daisy Frame

Thanks for stopping by.

Steph


Time to Celebrate Slimline Card

 Hi everyone, DT-Steph Ackerman here to share a sweet card using assorted TLC Designs products.


Have you seen the new Zinnia Slimline Die?  It's a fabulous shape and makes a wonderful card.


I began by folding cardstock in half and die cutting the largest die slightly over the folded edge so the card stayed together.


Since the card had one flat edge, I die cut the largest die again and added it to the base so the full die shape would be visible.


Using the Watercolor Naturals Slimline Stock Paper, I used the smaller die to die cut the panel for the center of the card onto which I would add my elements.  I stamped and fussy cut the Foraging Fairies Digital Images, coloring them with Copic Markers.


Finally I stamped celebrate from the Celebrate Sentiments stamp set, punched it out and added it to the card.
Thanks for stopping by.
Steph

Autumn Pop Up Card

 Hi everyone, I'm on the Dies R Us blog with a fabulous easel card.


Autumn is my time of year.  I love it.  

This Poppy die was perfect to create a wonderful Fall themed card.


This die comes with everything you need to create a Pop Up Easel Card.  It even folds flat to fit in a standard envelope.


Creating a card from green cardstock with the base die and the second layer, I then die cut the top layer from a script paper.   I inked this layer with Distress Inks in green, brown and red to simulate the colors of fall.


Using oval dies, I die cut 2 layers, stamping the phrase on the top layer.
The card was assembled with foam adhesives between the layers for dimension.

Stop by the Dies R Us Store to see all the amazing dies that are available.

Thanks for stopping by.

Steph

9/9/21

Graphic 45 Tags

Hi everyone, I've got a set of tags using some beautiful papers from Graphic 45.


I started by inking chipboard tags in a variety of colors.


Using office tags, I cut Graphic 45 papers to fit and used Taperunner to adhere the layers.


I added ribbon to the tags and adhered additional tags to the tags to complete them.


Thanks for stopping by.

Steph