Showing posts with label tombow. Show all posts

12/5/17

Sunsational Christmas Stockings

Hi everyone, Steph here today on the Sunsational blog using The Stockings were Hung stamp.  Christmas will be here very soon so be sure to get your Christmas cards mailed.


I colored each stocking a different color and added brads to "hang" them from the phrase.   


Thanks for stopping by.

Steph


10/25/17

Happy Thanksgiving

Hi everyone, I'm on the Just For Fun Rubber Stamps Blog today with a Thanksgiving card.


I used one of the newest released stamps - Harvest Bounty.  Love the detailing.  I fussy cut around the image then die cut it, matting it with a larger die. 


The sentiment is from Sentiments 1 and I stamped it on a felt tag which I placed behind the image.

Thanks for stopping by.

Steph


8/7/17

Christmas Penguins with Joy Clair Stamps

Hi everyone, Steph here today and I'm using an older stamp set from Joy Clair - Christmas Penguins.  These little guys are adorable and make for some fun Christmas cards.


Consisting of 10 different Penguin stamps, this is an adorable stamp set.  I selected two penguins I wanted to use then stamped them in black ink on white cardstock.  I added a touch of color to his beak as well as the Christmas ornaments and Christmas lights with Copic Markers.


The cards were created from green cardstock and cut 4 1/4" x 11".  As I wanted top folding cards, I scored the panel at 5 1/2".  Red cardstock was cut 4" x 5 1/4" and the pattern paper was cut a little bit smaller.  After inking the panels with red ink, I adhered the panels to the red cardstock.


Whisker Graphics twine was wrapped around each panel and the panels were added to the green card with foam adhesives.  After coloring the penguins, I used Spellbinders dies to die cut them.   I also inked the oval with red ink then matted the images with larger dies.  As I wanted the images to pop, I added them to the cards over the twine with foam adhesives.


Merry Christmas is from the Cozy Snowman Wishes stamp set.  I also stamped it in black ink on scraps of white cardstock.  After inking the sentiments, I matted them with red cardstock before adding to the cards with foam adhesives for dimension.

Aren't they adorable? I see lots of penguins in my Christmas cards this year.


Thanks for stopping by.

Steph


7/18/17

Merry Christmas Santa

Hi everyone, I'm on the Sunsational blog today with a Christmas card.  It's mid July, so we are half way towards Christmas!!


How cute is Santa stuck in a chimney!


Please stop by the Sunsational Stamps store to see all the designs available.

Thanks for stopping by today.

Steph

3/24/17

Spring Coffee Lovers Blog Hop


Image may contain: text


Hi everyone, the Joy Clair design team is participating in the  Spring Coffee Lovers Blop Hop.  Joy Clair is a Super Sponsor!!!!   Please stop by the Joy Clair blog to see all the amazing projects created for this hop.

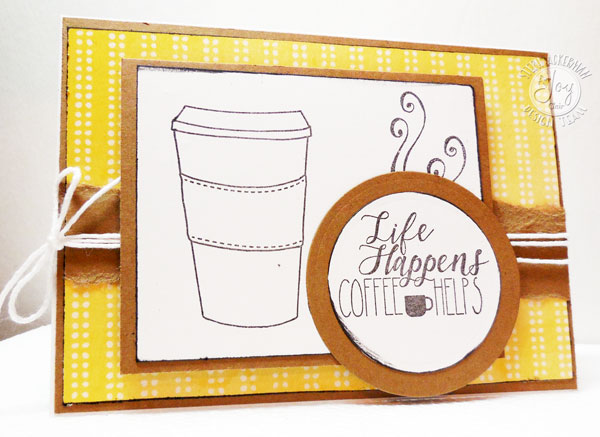
I've used the Coffee Lovers stamp set and created 2 different cards.  This stamp set has 18 Coffee sentiments and images and is a must for the coffee lover in your family.


You got this is my first card.


I stamped the coffee cups using a masking technique so the center cup would appear to be in front of the other two cups.  I carefully cut around the tops of the cups so I could die cut without cutting off the edges.


Then I placed a large die cut circle behind the cups and placed it upon a doily which I placed on my card.  A little color was added and "Latte" was stamped in black ink on the center cup. 

For my second card, I wanted a simple black and white plus one color card. 

 
The cup was stamped on a white panel and the flourishes wee stamped under the sentiment.   Some white Whiskers Graphics twine was tied around the card for additional depth.
 
And finally, I decided to create a shaker card.  I'd forgotten how much fun they could be!!!
 
I used the My Cup Runneth Over stamp set - a fun set of 3 stamps.
 
 
I stamped and colored the cups, cutting them to fit my card.  The phrase was stamped and embossed on vellum and sandwiched between an embossed frame and a cardstock panel.


I used foam tape between the layers for dimension and so my beads could shake freely.


After inking all layers, added the cups and used stickles to add dimension for the flower centers and the flowing liquid from the cups.

 
 Please stop by the Joy Clair blog to see all the amazing projects created for this hop.
 
Thanks for stopping by.
 
Steph


3/16/17

My Redeemer Stamp set with JoyClair

Hi everyone, the design team at Joy Clair is working with a new stamp set - My Redeemer.  This stamp set is a mixture of 9 amazing phrases and images.


Image may contain: text


I've decided to this stamp set in my planner and it looks lovely!  I began by adding some color to the page with Faber Castel Gelatos, using a baby wipe to blend the colors.  Next, I stamped a variety of stamps from this set about the page.


I added some additional color to the crosses with Zig Markers as they span the page.


LIFE got in the way but I had time to create a quick tag with this set.  The phrase was perfect to coordinate with the Spellbinders Cross Die.


Each designer has a KEY WORD in their blog post.  You need to find the key word from each post and create a sentence which you need to send me.  Please do NOT post the key word or sentence.  A winner will be randomly selected from all the correct emails.  The winner will be announced the last day of the month and will receive a $25 gift card from the Joy Clair Store.

Blog List:
 
Martha Lucia Gomez Hernandez -  http://wp.me/p5TnaH-4PN
Donna Green Idlet - http://myblogidlet.blogspot.com/…/joy-clair-my-redeemer.html
Kerry Urbatch - http://thestampingbug.blogspot.com/2017/03/my-redeemer.html
Steph Ackerman - HERE
Lori Kobular - http://loriskreations.blogspot.com/…/joy-clair-my-redeemer.…
Lindsay Adreon - https://craftingwhilecaffeinated.wordpress.com/bible-journa…
Helen Gullett -  http://helengullett.com/?p=11614
LeeAnn McKinney - https://goo.gl/fZXnac
Jessica Pascarella - http://kissinkrafts.blogspot.com/…/joy-clair-my-redeemer-ma…

Please stop by everyone's blog to see what they've created AND don't forget to create the sentence and send it to me.
 
Thanks for stopping by.

Steph


2/3/17

Joy Clair February Blog Hop


No automatic alt text available.


It's release day at Joy Clair and the new stamps are amazing once again!!

I'm using the Happy Camper stamp set for the images, then used the Wild and Free stamp set for the sentiment.  Most of the Joy Clair stamps can be combined together so you can create an endless amount of projects simply by mixing and matching stamp sets.

 
I first stamped the camper on white cardstock.  Then, using a masking technique, I stamped the trees so they appear to be behind the camper.  I wanted a fun and funky camper so I used lots of bright colors.

 
I placed the fire pit to the left of the camper and colored it so it appears so realistic!  After inking the edges of the panel, I matted the panel with cardstock and added it to the card.

 
Wild and free was stamped and die cut into an oval shape and placed on another die cut tag and placed above the fire pit.  It fit perfectly in that bare spot!
 
Please be sure to check out everyone's projects and leave a comment for a chance to win a prize.

LINE UP:

Steph - You are here

Thanks for stopping by.
 
Steph
 

12/16/14

Birthday Wishes

It's a new challenge at Cornish Heritage Farms, and Frances has asked us to use a Thomas Kinkade stamp.

I've used the Golfer's Paradise, Living Waters.  I wanted to create a sunrise effect, so  I spritzed the areas with water and colored for a water color effect.


The sentiment is from Script Essential Expressions.


Don't forget to check the Cornish Heritage Farms Design Team's cards on their blogs:


Thanks for stopping by today.

Steph

12/10/14

Today was a Good Day

Hi everyone.  It's Wednesday and I've been thinking of you.
 
My mother loved roses and would spend hours getting her roses "just right".  She would have loved this stamp!  I found this striped card in my stash, so I added some polka dot paper across the card backed with brown cardstock.  Pink and brown is such a wonderful combination.


I  added the sentiment and die cuts which would hold my rose.  The rose was stamped, colored with Tombow Markers and fussy cut before adding to the die cuts with foam adhesives for dimension.
 
Thanks for stopping by today.
 
Steph


10/27/14

Tombow Design Team Call

Tombow is looking for fun and creative people to join it's design team.  I absolutely LOVE Tombow products and am submitting an application for their design team call.

One of my favorite tags that has been inked, embossed and stamped.  Assorted die cuts were added to the tag and a stamped Prima image was fussy cut and added with foam adhesives for dimension.


A mini card and matching candy bar wrapper makes a sweet gift for someone special.


This butterfly card was embossed, the front was die cut with a Spellbinders oval die.  Then some mesh ribbon was added behind the die cut.  Flowers, butterflies and dew drops were used to finish a feminine card.


Nothing says I'm thinking of you more than flowers and butterflies.  The pink panel was added on a slight angle with foam adhesives for dimension.  Ribbon was added amongst the flowers giving the illusion of leaves.  Add in chipboard elements and the card comes together quickly.


And one of my favorite pieces is this 3" x 9" canvas.   I selected  Wendy Vecchi's  Stamp It Stencil It - In Full Bloom - to work with.  I love stamps and I love stencils so seeing them working in harmony was going to be fun. 
 
 
I stamped the leaves along the side of the canvas first in ColorBox Limelight Ink, then added the flowers with ColorBox Berry Ink. 


I stamped the flowers in black ink on top and as you can see, I didn't get a wonderful impression.  Honestly, I was ok with it because I knew I wanted some dimension and would "fix" this issue later.

 
After stamping the 3 flowers, I created masks of the flowers so I could add 2 additional flowers between them. 
 
 
Then as I wanted the flowers to be 3 dimensional, I stamped, colored and fussy cut 5 flowers.  I placed dimension adhesives between the flower layers. 
 
 
Some Robin's Nest Dew Drops finished off the centers of each flower.  I used Claudine Hellmuth Gesso to adhere torn strips of book paper to the canvas before spritzing with Art Anthology Patience.  It dries very quickly and I was able to add color around the outside of the canvas using the Inkssentials Foam Blending Tool,  with Ranger Distress Ink in Worn Lipstick and Tattered Rose.  I probably should have added the book pages before I began my project, but a work in progress takes on a life of it's own, doesn't it? 


I loved the Prima doll stamps when I first saw them.  While a little big for cards, I love how well they work with a canvas.  I used Pocket Doll, fussy cutting her as well as the dress.  I redressed her before adding her to the canvas with foam adhesives for dimension.  A little ink in her hair and headband and she look lovely amongst the flowers.  I had some tiny stickers in my stash and used them to provide the phrase - "stop and smell the flowers" which I placed around my gal.

Here is a close up of the gorgeous flowers.


 I hope you enjoy this canvas as much as I did creating it.
 
Thanks for stopping by today.
 
Steph

 

9/9/14

Birthday blessings

It's a new challenge at Cornish Heritage Farms, and Amber has asked us to create a masculine card.

I've used the  Lighthouse 3  digital stamp (one of my favorites!) which I've colored with Tombow Markers, Gelli pens and Faber Castel Gelatos.


The paper I chose to use was a little dark, so I tore the bottom edge and mounted it on red cardstock before adhering to the card.


Don't forget to check the Cornish Heritage Farms Design Team's cards:

  • Amber Hillman
  • Ann Marie Saunders
  • Irit Shalom
  • Kelly Santi
  • Kristine Reynolds
  • Maureen Russell


  • Thanks for stopping by today.

    Steph

    8/16/14

    Fancy Florals

    Hi everyone, I've got a sweet card to share using the G023 Dahlia Bouquet from the Stamp Doctor in conjunction with some amazing Spellbinders dies.  I LOVE how this card turned out.

    I wanted to focus on the beautiful Dahlias so I  colored them with Tombow Markers and then fussy cut them.  Once cut, I added them to die cut circles with the top layer on foam adhesives for dimension.


    The card seemed very plain, so I used the Spellbinders S2-003 Fantastic Flourish 3 to create a wrought iron feeling for the background.  I die cut it 4 times and they fit perfectly on this 5 1/2" square card.  I just aligned the circles in the center of the card.

     
    What do you think? 
     
    Thanks for stopping by today.
     
    Steph

    8/12/14

    Wish Big

    It's a new challenge at Cornish Heritage Farms and Kristine has asked us to use a water theme.

    There is nothing better than the Thomas Kinkade stamps for this theme and I chose  The Good Life, coloring in portions of the stamp with Tombow Markers.


    The sentiment is from Script Essential Expressions.

     
    Don't forget to stop by everyone's blog today for more inspiration.


    Cornish Heritage Farms Blog - http://cornishheritagefarms.blogspot.com
    Frances Byrne (Design Team Co-ordinator) - http://stampowl.blogspot.com
    Kristine Reynolds - http://stampingandscrapingincalifornia.blogspot.com
    Steph Ackerman - http://stephaniescraps.blogspot.com/  HERE
    Amber Hillman - http://ambersantics.blogspot.com
    Ann Marie Saunders - http://cre8nart.blogspot.com
    Irit Shalom - http://iritshalom.blogspot.co.il
    Kelly Santi - http://sandcastlestamper.blogspot.com
    Maureen Russell - http://maureensmagic.blogspot.com

    Thanks for stopping by.

    Steph

    7/15/14

    Christmas in July

    It's time for a new challenge at Cornish Heritage Farms and Ann Marie has asked us to create a Christmas card.

    I used the Brick Wall Backgrounder stamp - stamping it with black ink on red cardstock


    The 4 elements are from the Night Before Christmas stamp set and I've opted to color in just a few small areas of the stamps.


    The background stamp is an amazing stamp that truly complements the other stamps.

    Don't forget to check the Cornish Heritage Farms Design Team's cards on their blogs:

    Thanks for stopping by today.

    Steph