Showing posts with label DCWV. Show all posts

5/21/20

Designer Crafts Connection Blog Hop with DCWV

Hi everyone,  I'm participating in the Designer Crafts Connection blog hop, and this month we are working with Die Cuts With A View using Petal Papers.   These fun papers can be found at JOANN.com.


Petal Papers are a fun addition to the DCWV paper pads.  These papers can be used in many ways as they can be shaped.  I had fun shaping Petal Papers to fit around a tall bottle.  I first wrapped the bottle with the dark green petal paper, then chose coordinating papers and created the ruffle effects.  Kind of looks like a dress doesn't it?


Finally, I added assorted flowers, leaves and butterflies to complete my project.


DCWV has been a long-time producer of the stack-- a set of  coordinated papers.  Stacks have been made in so many themes and colors  over the years.  Happy members of the American Crafts family of  products, they continue their pursuit of serving the consumer and their  crafty needs with new paper stacks releasing several times a year in  updated themes and colors.  Please stop by the Designer Crafts Connection blog for more ideas on how to use these wonderful papers. Thanks for stopping by.


Steph

1/8/20

Customized Vacation Album

Hi everyone, I've got a new post on the Proxxon blog using Proxxon tools to create a customized vacation album.


You can purchase all kinds of albums, but why not create your own?  With assorted Proxxon Tools you can create any type of album you want.


I found this pallet sign.  It's basically layers of compressed chipboard with a layer of melamine on top and I wanted to see how the Band Saw would cut this sign.  Begin by using the Kapro 313 Measure Mate to size out the album.


The Band Saw easily cut through the pallet sign.  There was no shredding or distortion.

.
While I didn't need to, I used the Disc Sander to sand the edges of the album.


Use the Bench Drill Press to drill 2 holes in the album.


Paint the covers with FolkArt Acrylic Paint in Blue Echo.  Randomly dry brush on FolkArt Acrylic Paint in Windsor Blue.


Cut assorted pattern papers to fit.

Decorate the front cover with assorted left over elements.  Add Alaska 2019 to the corner.

Thanks for stopping by.

Steph


7/30/15

Good Witch or Bad Witch?

Hi everyone.

Today is my day to share a post on the Paper Wings Production Blog.


Please stop by the store and see all the amazing stamps available.

Thanks for stopping by today.

Steph

10/18/14

Just a Note to a friend

Hey everyone, have you stopped by the Rubber Dance store yet?  You must see all the fun stamps that are available.

Today I've used #T1-7F: Road Map, #TR1-6D: Vintage Hotel Recipt, and #JNEN-2E: Just a note.


Love how all the stamps work so well together.


To see more of the stamps available, visit the Rubber Dance store.

For more inspiration, please visit the Rubber Dance blog.


Supplies:
Stamps:  Rubber Dance
Ink:  Clearsnap
Cardstock:  Bazzill

Thanks for stopping by today.
 
 
Steph

5/24/14

Spring blog hop with Ann Butler and Walnut Hollow


Hi everyone I am so thrilled to be participating in the Ann Butler and Walnut Hollow blog hop today.

The Walnut Hollow product I am working with is the 11" x 11" Rustic Pallet.  It has so many possibilities!!!


I lightly white washed the pallet with yellow paint.  Since I really wanted a white washed appearance, I spritzed it with a lot of water as I painted.  Once dry, I added some Earth Safe Finishes - Iridiscents to the top three panels, applying it with my fingers.  Spritzing with water allowed it to be a little more fluid.


Using burlap from DCWV, I die cut the 2 banner layers using Sizzix dies and added brads to hold the banners together.  The Kellycraft 2" Flourish ABCs were stamped with ColorBox Berry Ink and then heat set with Clearsnap Opalescent Embossing Powder.  Once the letters cooled, they were fussy cut and added to the banner.


Along the bottom panel, I painted some ColorBox Limelight Ink which I mixed with water.  When dry, a striped stamp from Ann Butler's acrylic stamps from Kellycraft was stamped along the bottom twice to give the illusion of grass.

Using another Sizzix die, I cut the tree trunk in brown cardstock and then fussy cut the tree top from burlap.  I then used a stamp from Ann Butler's 2" Doily Picnic stamp set from Unity, stamping it on the tree top in Limelight and Tangerine Inks to give the tree some dimension.

The fence was cut with my Cricut Expression.   Before adhering, I held it in place and stamped the leaves from Ann Butler's 1" Leaves All Over stamp set on and about the fence.  The fence was then added with foam adhesives for dimension.


The birds were stamped in Sunshine Ink and once they were die cut, they were inked with Tangerine Ink.  The flowers were added to the fence after being stamped in Tangerine Ink and Berry Ink and then fussy cut.

I had so much fun working on this pallet and it looks amazing hanging in my room.

Now what is a blog hop without prizes!!!!!   To Enter for the giveaway please leave a comment.  For each blog you leave a comment on your name will be entered into the giveaway drawing, so be sure to check out the entire Blog Hop for more chances to win!  Thanks for stopping by today.

The Prize:

  Download Ann Butler Designs - Walnut Hollow Blog Hop - Giveaway.JPG (116.2 KB)

 
Blog hop order:
Beth Watson
Connie Hall
Irit Shalom
Kristi Parker 
Larissa Pitman
Lisa Rojas
Paula DeReamer  
Roberta Birnbaum
Steph Ackerman         HERE
Vishu Reberholt
Judi Kauffman
Sara Shirman
Chris Wallace
Emma
 
Steph


5/11/14

Work like a Captain, Play like a Pirate

Hi everyone.  Basically Bare is teaming up with DCWV this month. 

I've used the  Basically Bare Timeless Tabs (BK001) with DCWV Sailor pad.  This paper pad is full of images of anchors and ships and sealife and included lots of glossy papers. 

I'm taking my first cruise later this year and thought this album would be perfect to record those memories.


This album consists of canvas pages which I inked and painted and added rub-ons to.


I used a Basically Bare gear embellie as a stencil and spritzed it with Art Anthology Colorations.


The DCWV papers are fun to use as is or cut them apart and mix them.


Acrylic pages in this album were fun to paint and adhere DCWV papers.  The paint became the adhesive.  Additional rub-ons were adhered to the acrylic.


There is plenty of room for photos and the last page was turned into a pocket page so I can store memorabilia from my trip.


Thanks for stopping by today.

Steph

1/1/13

Wishing you peace and joy

Happy New Year.

This 3D window pane set from  Globecraft Memories is awesome.  2 layers of panes can be added together to create an amazing effect.


I used Mardi Gras Embossing Powder on the bottom frame and Poodle Skirt Embossing Powder on the top frame, coating each piece twice. 


I adhered the two pieces together with The Best Glue Ever from Scraperfect and used alligator clips to hold the pieces together.


While waiting for the pieces to adhere, I die cut two sizes of a candle scene using my Cricut Expression and A Quilted Christmas Cartridge.  Placing the windows atop my candles, I was able to determine exactly where I wanted the window panes to sit.


After creating my card, I stamped a sweet sentiment on cardstock and place it on the card before adding the window.  I used The Best Glue Ever  to adhere the window to the card.   I added some Gold Stickles on the tops of the candles so they appear to glow through the window panes.
 
Thanks for stopping by today.
 
Supplies:
Adhesive: Scraperfect
Globecraft Memories - Bookboard, Enamel Powders
Cardstock, pattern paper:  DCWV
Stamp: Hampton Arts
Ink: Clearsnap
Stickles: Ranger


12/28/12

A Rose For You

This is my post at Classy Cards n Such.

Love this stamp from Stampavie.  It's called A Rose For You and would be perfect for any occasion from Valentine's Day to Mother's Day to birthdays.

I created a 5 1/2" x 5 1/2" card and added a sheet of paper from Glitz' Pretty In Pink paper pad.  I inked the edges with brown ink.  Another sheet of paper from this same collection was die cut with Spellbinder's Labels Eighteen, in two sizes, the smallest of which was also inked with brown ink.  This die makes for a great backdrop for the stamp.


The image was colored with Copic Markers and added to the frame with Joy Foam Adhesives.

 
The sentiment is from Justrite Stampers Spring Words set which is perfect for all your crafting needs.

Thanks for stopping by today.

12/7/12

Scor-pal and Pink Paislee

This was last week's post on the Scor-pal blog where I worked with Pink Paislee's Portfolio Collection.

I loved the block of quotes on the Outstanding and Unbelievable papers so I designed a card to work around them.  As I wanted to keep my card simple to maintain the focus on these quotes,  I decided to created a scored background.


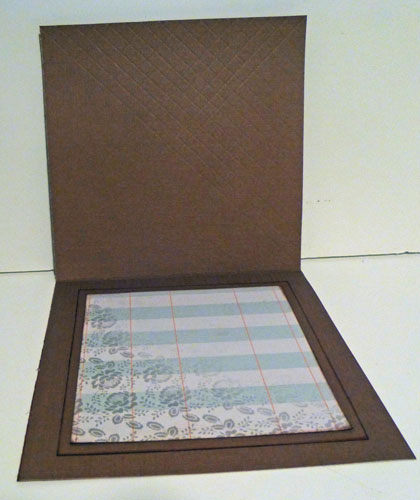
Cutting cardstock 5 1/2" x 11", I scored it in half to create the card.  Then, lining up the card diagonally on the #6, I began to score every 1/4" until I reached the edge of the card.


Next, I turned the card 180 degress so that I could score the other side of the card every 1/4".


This is the finished look of the card base. 


Cutting the Unbelievable paper into a 4" x 4" square, I created a base for the quotes.  I then took the elements I wanted to use and inked them with Clearsnap Ink before adhering to the square. This entire piece was then added to the card front with foam adhesives for dimension. 


Here's a close up of the grouped elements and the score lines.  The Artisian butterfly chipboard and brackets were fun elements that added some visual interest to the card.  To highlight the scored lines, I inked around the edges of the card so that the scored lines would become more prominent.


I don't usually finish the inside of my cards, but this Incredible paper was perfect for the inside.


For my next project, I created a tri-fold card which could easily double as a gift card holder. 


I cut the Amazing paper 6 1/2" x 8 1/4".  Placing the longest side at the top of the Scor-pal, I scored at  2 1/2" and 6 1/2".    I used a punch along the edge of the narrower piece to finish the flap.


I selected elements from the Unbelievable paper and used them as my interior sentiments, inking the edges and matting with cardstock. 


I love creating rosettes and the Scor-pal makes it so easy. Just cut a 1" x 12" strip of Amazing paper and score every 1/2". Once the rosette was completed, I added an Artisian Butterfly on top.

 
Finally I added the rosette to the center of the front flap and used velcro as the card's closure.


This next project is a mini post-it note holder.  The Unbelievable paper had just the right elements to use.
 

Cutting cardstock 3 1/2" x 10", I scored it at 4", 4 1/2", 5" and 9".


Fold on all score lines, creating an accordian fold for the bottom of the holder.


I used the Incredible and Unbelievable papers to finish this project, cutting and shaping the elements I wanted and then inking the edges.


For the interior, I adhered post-it notes and another element from the Outstanding paper.  A velcro closure holds the book together.


Thanks for stopping by today.
 
Supplies:
Scoring Tool:  Scor-pal
Pattern paper, chipboard: Pink Paislee
Cardstock: Bazzill, DCWV
Ink: Clearsnap
Punch: Fiskars