Showing posts with label smoothfoam. Show all posts

9/4/19

Autumn Sign

Hi everyone, I'm on the Proxxon blog today showing you how to create a new autumn sign.


Drawing a leaf on Smoothfoam, I used the Hot Wire Cutter to cut the leaf. 


I wanted the leaf a little thinner so I cut the leaf  in half with the Hot Wire Cutter.


I painted the leaves and the plaque with Folk Art Paint.


Using a Plaid stencil, I added a design with modeling paste


 Once dry, I used the Bench Drill Press to add holes in the top of the sign.


For additional colors, I spritzed the sign with Fireworks Shimmery Craft Sprays and used a baby wipe to remove some of the colors.  I also spritzed the leaves to make them more realistic.


String was added in the holes.  The phrase was stamped with brown ink and die cut.  The phrase was matted with a larger die using Rinea Marigold Foiled Paper.


Finally, I added Gold Stickles as the veins.

Happy Fall.

Thanks for stopping by.


3/21/18

Smoothfoam Easter Egg

Hi everyone, I've got a new project on the Proxxon blog using the Hot Wire Cutter.  It's almost Easter, so time to get home décor items ready.


I created a stencil using my Cricut then taped it to a panel of Smoothfoam.  Using the Hot Wire Cutter, I easily cut around the stencil.


After removing the stencil, this is my Easter Egg.


The Easter Egg was painted with Gold Plaid Metallic Paint.


I placed the stencil back on the Easter Egg and painted with additional Plaid Metallic Paints.


 Finally, I added some dew drops around the Easter Egg.


Happy Easter.

Thanks for stopping by.

Steph

2/7/18

Steampunk Heart

Hi everyone, my newest post on the Proxxon blog is a steampunk Valentine's Day project.

This project uses the Proxxon Hot Wire Cutter, Smooothfoam foam sheets and foam balls and Plaid paints.

Stop by the Proxxon blog for complete details.

Thanks for stopping by.

Steph

6/16/17

Summer Party Decorations

I've got some party decorations on the Proxxon blog using assorted tools.

Who wouldn't have fun creating a banner from mini party hats?  Tie them together with Whisker Graphics and spell out Summer with Rinea Foiled Papers.


And when the sun goes down, turn them over and place battery operated candles inside each hat. 


Please stop by the Proxxon blog for more details.

Thanks for stopping by today.

Steph

4/21/17

Blue Plant Stand

My newest project is on the Proxxon blog.


I sanded the plant sand with the Proxxon Delta Sander.


I painted the stand with Plaid Milk Paint in Jamestown Blue (on the top) and Meeting House Blue (on the base).


I used the Proxxon Hot Wire Cutter to cut Smoothfoam into a heart and used the heart as a stamp.  I painted the heart with Plaid Coastal Texture Paint in Sand Dollar and stamped it on the plant stand.


Painting the heart with Plaid Coastal Texture Paint in Sand Dollar, I used the heart as a stamp and stamped a heart in each corner.  I also painted Sand Dollar within the hearts of the base.


And a pretty stand is ready to be used.


Thanks for stopping by.

Steph

2/12/17

Star Wreath with the Bowdabra

Hi everyone, my newest project in on the Bowdabra Blog.  This month's theme was red, white and blue.

This star wreath can be displayed for so many different holidays – think Memorial Day, President’s Day, 4th of July, Labor Day.  You could even leave it out all summer.


I wrapped the Smoothfoam Wreath with navy blue ribbon and pinned the ribbon to the wreath to hold it in place.


Creating bows with the Bowdabra is easy.  Simple fold the ribbon and twist it as you place in the Bowdabra. 


Make as many loops as you want then pull up on the Bowdabra wire and tie it off to hold the shape.


Using the excess bow wire, tie the bow to the wreath.  Selecting assorted chipboard stars spritz with Tattered Angels Glimmer Mists.  Once dry, add chipboard stars and display.

Thanks for stopping by today and be sure to stop by the Bowdabra blog for more ways to use the Bowdabra.

Thanks for stopping by today.

Steph


1/2/17

Decorative Watering Can

Hi everyone.  It may be cold outside, but I'm thinking of Spring - the flowers, the warmer weather, the spring showers.  I've got a Spring post on the Bowdabra blog.

 
Stop by the Bowdabra blog to see how I've created a two ribbon bow for my watering can.
 
Thanks for stopping by today.
 
Steph
 

9/16/16

Halloween Decorations with Proxxon

On the Proxxon blog today I've got some creepy Halloween tombstones using the hotwire cutter and Smoothfoam.


Please stop by the blog for the details.

Thanks for stopping by today.

Steph

9/2/16

Basket of love for Christmas

It's time to start thinking about Christmas!!!  Oh my.

Check out the Proxxon blog today as I have a post up.


Easy peasy basket anyone would love!
 
Thanks for stopping by today.
 
Steph
 

5/28/16

Wreaths

How to Make Bows : Bowdabra


Bow making can be challenging.  But with the right tools, bow making can be so much fun.  Bowdabra has the tools to help you create bows for wreaths, cards, packages and even hair bows.


I recently needed a baby shower decoration so I used a Smoothfoam ruled wreath and covered it with assorted blue ribbons. 


Using Proxxon's Model Building and Engraving Set, I made holes in the baby shoes so I could insert ribbon.


Finally I created a bow to finish it off.


And how about a straw Easter wreath. 
Just wrap it with ribbon until totally covered.
Tie a multi looped bow over a die cut bunny and her eggs.
 
 
 Thanks for stopping by today.

Steph

5/26/16

Summer Smoothfoam Wreath

It's time to get ready for summer and today I'm working with a Smoothfoam ruled wreath as part of the Designer Crafts Connection blog hop this month.  These ruled wreaths allow you to evenly space the ribbon or fabric you are working with.


I began by cutting strips of Metallic Olyfun (Rose Gold, Gold, Silver) and wrapping them around the wreath.  Overlapping the strips adds nice interest to the wreaths.  Using the Silver as the main color, I altered Rose Gold and Gold around the Silver.


Once the wreath was wrapped, all that was left to do was add flowers and a bow.


I cut a larger strip of Silver Metallic Olyfun to create a ribbon which I then tied to the wreath.


And now I have a beautiful wreath for the upcoming summer.
 
Thanks for stopping by today.
 
 
Steph

3/18/16

Happy Easter Bunny

My newest project for Proxxon tools is an Easter Bunny with Easter Eggs created from Smoothfoam.

It was so easy creating this Bunny using the Proxxon Hotwire Cutter.


Supplies:
Proxxon Tools:  Hotwire Cutter
Smoothfoam
I easily cut Smoothfoam with the Hotwire Cutter.  Love the bunny and eggs.


And eggs don't scream Easter until they are decorated.  Rather than dying these eggs, I used stamps, inks and stencils.

 
So what do you think of my Easter Bunny and eggs?

 
Thanks for stopping by today.
 
Steph
 

1/15/16

I Heart You with Proxxon

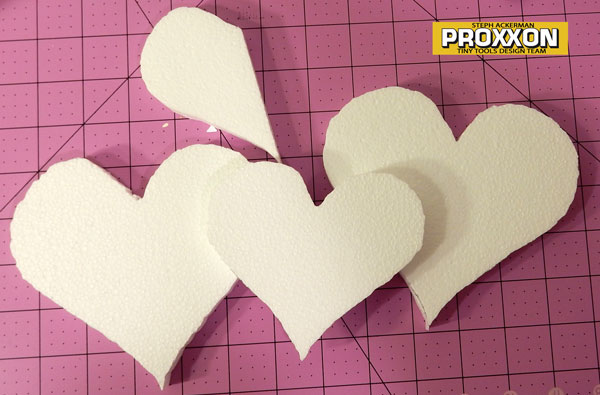
Today is my day to post on the Tiny Tools blog and I've used the Proxxon Hotwire Cutter to create hearts.

 
I love playing with the Hot Wire Cutter - it cuts Smoothfoam like butter.
 
Stop by the blog to see how I've used these Smoothfoam Hearts.
 
Thanks for stopping by today.
 
Steph
 

3/7/15

Strawberries

Need something sweet today?  What about a basket of strawberries?  I've got a post today on the Clearsnap blog with this sweet basket.


I cut the strawberries from Smoothfoam and colored them with assorted Clearsnap Inks.  Molding paste through an art stenceil gave my strawberries some character.

To "fill in" the rough patches, I used Izink.  Check out the full post.

Thanks for stopping by today.

Steph

8/14/14

Blog Hopping with Clearsnap and Smoothfoam


Smoothfoam Clearsnap 2 Collage.jpg


Welcome to the Clearsnap and Smoothfoam blog hop.  Hop along to each blog in the hop list to see inspiring ways to use Smoothfoam with Clearsnap's ink, created by teams of designers.  Be sure to comment on each blog in the hop, then use the Rafflecopter widget at the end of this post to enter to win a prize pack of Smoothfoam and Clearsnap goodies.

Smoothfoam is styrofoam that has a smooth finish so it can be used for all kinds of projects.  Smoothfoam is definitely a fun product to work with because it  has endless possibilities.  I chose to use it as a base for a 3 dimensional mixed media layout.


To begin, I spritzed the 12" panel with ColorBox Spritzers in Lemon Drop, Putty, Mermaid, and Pumpkin Pie.


Using a baby wipe, I randomly mixed and moved  the colors around the foam.  I wanted some areas smooth and some  a little more blotchy.


Placing the ColorBox  Tropical Art Screen  on top, I added modeling paste through the screen to create 3 dimensional images in the corners.   The more modeling paste I added, the more dimentional the leaves became.  Once dry, I added color to the leaves using Guacamole Chalk Ink with an  art dauber.    Using Chestnut Roan Chalk Ink, I gently rolled the Wordwords Rollagraph Wheel across the foam in the corners opposite the stenciled leaves.  Using an art dauber, I then inked around the edges of the panel with a ColorBox 6 color ink pad in Farmhouse.


Using an art dauber, I added additional layers around the panel using the Tropical Art Screen with ColorBox Crafter's Ink by Ann Butler in Limelight; the Fun Flourish Rollagraph Wheel with ColorBox Crafter's Ink by Ann Butler in Aquamarine; and a Hampton Arts stamp with  ColorBox Crafter's Ink by Ann Butler in Aquamarine Ink.  Adding the different images and assorted colors added a nice collage effect.


I added some May Arts ribbon leaves around the right side of the panel and added some smaller strips of self adhesive gold ribbon around the panel. 


Using French Swirl Designer Adhesives with Goldmine Designer Foils added another layer of  dimension around the panel.   You will not get a complete image transfer because of all the inks used, but the bits that do adhere provide some real character to the panel.  I added the left over pieces of Designer Adhesives and Goldmine Designer Foils to the May Arts ribbon leaves.


Since I wanted the title to blend with the  colors I used, I inked white cardstock with the Fun Flourish Rollagraph Wheel and ColorBox Crafter's Ink in Aquamarine, then added the title above the photo.


To finish, I used an art dauber  to add more color around the edges, blending more color from the edges onto the panel. 


Then I used Ann Butler's stamps from KellyCraft to finish the sides of the panel with ColorBox Guacamole Chalk Ink.
 
Smoothfoam is an amazing surface for mixed media work.  The inks and spritzers do not dry immediately so you have time to create some fun effects.
 
Thanks for stopping by today.  Your next stop on the hop is  Carmen's blog.   Don't forget  to enter below to win a prize package

Hop List

Clearsnap Blog

Suzanne Austin - What's in a Lousyananut

Julie McGuffee - Life in the Craft Lane

Jennifer Priest - Hydrangea Hippo

Lisa Fulmer -  Lisa Liza Lou

Meihsia Liu - Simply Paper Crafts

Anita Scroggins - The Flamingo Chronicals  

Steph Ackerman - Live Laugh Scrap

Carmen Flores Tanis -  Flores Tanis Studio
 
Tami Sanders - tami sanders * paper crafter  
 

Beth Watson - Beth Watson  
 

Sabrina Alery - The Honor Roll
 

Marilyn Gossett - Marilyn Gossett Designs
 
Denise Hahn - In My Blue Room

 
Thanks for stopping by today.

Steph