2/28/21

Dream Lighthouse Card

Hi everyone, I'm on the Clear Scraps using the 6" Lighthouse Stencil.


Placing the stencil on a white panel, I inked it with assorted colors in keeping with the lighthouse look.


Taking off the stencil, you can see what you've missed, realign the stencil and add additional colors.

I inked around the panel with light blue ink before matting it with black cardstock.  


I matted the panel on a blue card with foam adhesives for dimension.  Dream was die cut from black cardstock and added to the card.


Thanks for stopping by.

Steph


2/27/21

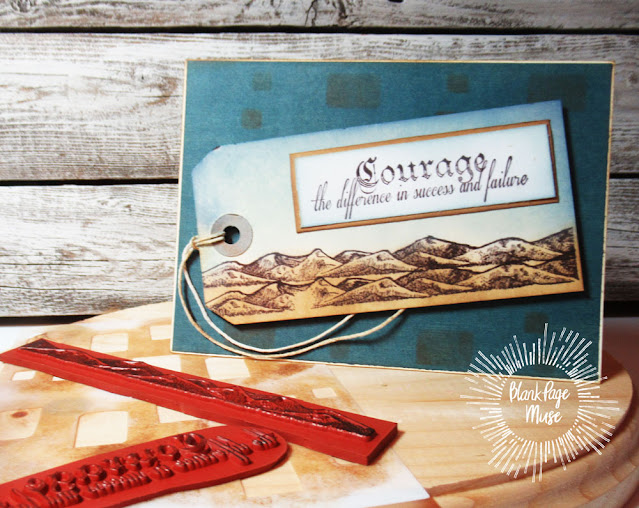
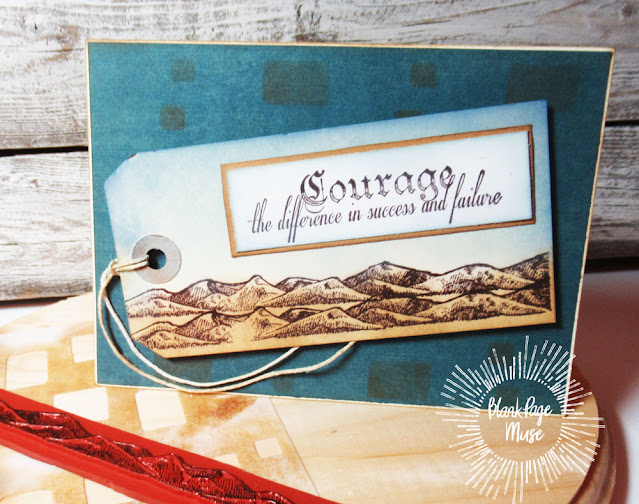
Courage Tag Card

Hi everyone, I'm on the Blank Page Muse blog  with a courageous card.


Supplies:
Blank Page Muse Stamps: CourageMountain and Beaches Stamp Set
Blank Page Muse Stencil: Blocks Pattern
Distress Oxide Inks
Cardstock
Tag


I began by starting with a tag and stamped the mountain twice, one slightly above the other.

Next, I added color with Distress Oxide Ink in Faded Jeans above the mountains and Distress Oxide Ink in Ground Espresso.


Next, I used the Blocks Stencil with Ground Espresso Ink on blue cardstock.

Love the effect it creates on the paper.


Courage was stamped on a scrap of white cardstock and matted with kraft cardstock.
Then it was added to the tag.
The tag was added to the card with foam adhesives for dimension.


Thanks for stopping by.

Steph

2/25/21

Sweet Tulip Fairy Card

 Hi everyone, I'm on the Dies R Us blog with this sweet fairy card.


Placing the Lavinia stamp -  Moments Like These on the Misti stamp her on white cardstock using assorted colors of ink.


Using the coordinating Fairy Cuts - Tulip Fairy and die cut her.


Using Misty Morning background paper, ink Lavinia Fairy Words in VersaFine Clair Morning Mist Ink, stamp on scrap paper first , then stamp along the right side for a subtle effect.  


  Mat the panel with white cardstock, then add it to a blue card.  Place the Tulip Fairy in the left corner.  Using a glue pen, add dots of glue around the panel then pour on Fairy Hugs Silver Lightning Glitter.


Sweet isn't she?


Please stop by the Dies R Us Store for all the supplies I've used today.

Thanks for stopping by.

Steph


Fairy Stamper Hugs Fairy Swing

 Hi everyone and welcome to the first challenge at Fairy Stamper Hugs.


Stamp Tiana with VersaFine Clair in Versafine Clair Paradise Ink.  Next stamp the Fairy Swing with VersaFine Clair Pinecone Ink.  Die cut the image and ink with Ranger Distress Oxide ink in Bundled Sage and Speckled Egg.


Mat the panel with brown cardstock, then adhere to a printed background.


Die cut some floral elements for the corner of the card.

Thanks for stopping by.


2/23/21

Beautiful Purple Card

Hi everyone, I'm on the Rinea blog with a beautiful spring card in shades of purple.


Die cut Lavender Starstruck Foiled Paper using Sizzix floral shaped dies, then die cut the leaves using Emerald/Gold Glossy Foiled Paper.


Create a card from lavender cardstock.  Cut purple cardstock to fit.  Stamp a phrase on white cardstock.  Die cut the phrase and mat with progressively larger purple and white dies. 


Assemble and shape the flowers.  Adhere the flowers along the left side of the card.  Form the leaves and slip amongst the flowers.  Add 3 die cut circles in the opposite corner.

Thanks for stopping by.

Steph

2/18/21

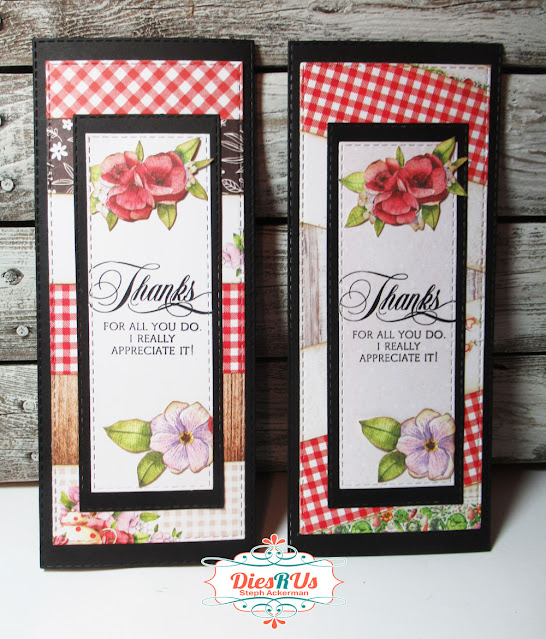
Thank you cards with Tutti Designs

Hi everyone, I'm on the Dies R Us blog with some sweet slim line cards.


I often have left overs from various projects and these particular pieces were perfect to use as slim line cards.  I inked each scrap with Distress Oxide Ink in Ground Espresso.


Adhering the inked pieces to cardstock, I used Tutti Designs Slimline Stitched Rectangle Die to die cut the panel.


I used additional scraps to create another card, but this time I placed them on an angle before die cutting the panel.


The panels were added  to black cards.


 I die cut smaller layers for the center of each card, then added my Thank you phrase.  To fill in some of the white space, I fussy cut flowers, lightly inked them then added to the card. 


What do you do with your left overs? 

Stop by the Dies R Us Store to see all the amazing dies that are available.

Thanks for stopping by.

Steph

Kite Flying with Tiana

Hi everyone, it's Thursday and my day to share another Fairy Stamper project. 


I stamped Fairy Hugs Tiana on a die cut white panel using VersaFine Clair Purple Delight.  Placing a mask on Tiana, I stamped the largest of the Fairy Hugs Log using VersaFine Clair Acorn Ink


Next, ink the edges with VersaFine Clair Ink in Twilight.  Using the Lawn Fawn Stitched Kit Dies, die cut Rinea Foiled Papers in Cobalt/Gold Glossy Foiled Paper and Gold/Gold Glossy Foiled Paper.  Place the kite tail in Tiana's hands.


Mat the panel with brown cardstock and add to a kraft card.  Assemble the kite and add to the card with foam adhesives for dimension.  Add a little extra color to the log with Copic Markers.


Thanks for stopping by.


2/16/21

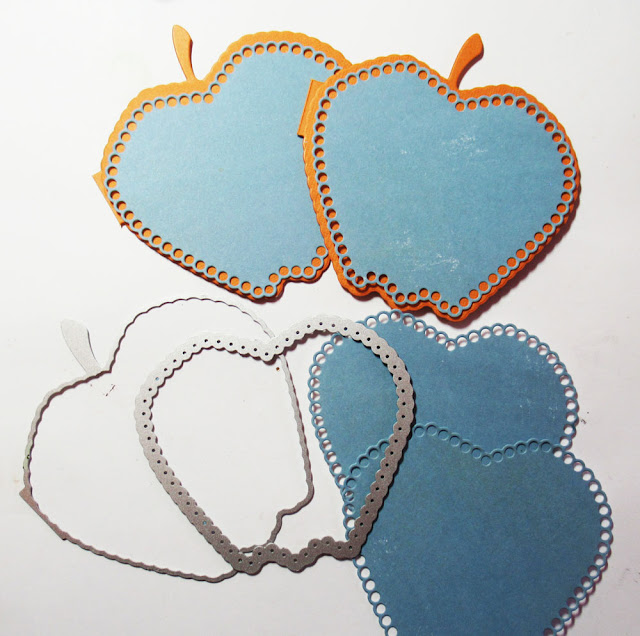
Hi Apple Card with TLC Designs

Hi everyone, I've got a quick and easy set of cards to share using some fun dies from TLC Designs.


I used the Apple A Day Die which consists of 14 dies that can be used in so many different ways.  Using the apple base, place it on cardstock along the fold.  The die has a little lip that serves to create the card.

I taped the die to the cardstock then ran it through my die cut machine.

 
And voila!  A perfect apple shaped card base has been created!!


Use the dotted insert die to die cut cardstock for the face of the card as well as the interior and adhere.


Use the included dies to add flowers, leaves, the bumble bees, and then add Hi to the card.


Sweet, isn't it?

Thanks for stopping by.

Steph


2/15/21

New Baby Card

Hi everyone, I'm on the Clear Scraps blog with a new baby card using the Stroller Chipboard Embellishment.


Remove the stroller from it's frame and ink it with distress inks.


I realized I wanted a card for a new baby girl, so I reinked the stroller carriage with pink ink, then embossed it with clear embossing powder.


I created a 5 1/2" square card from pink cardstock, then cut baby paper slightly smaller.


Die cutting a large circle, I placed it on the card.


Die cutting a slightly smaller circle, I adhered the stroller to the circle, then placed it on the card using foam adhesives for dimension.


I stamped the phrase on another smaller circle and added it to the card with foam adhesives.  Some  Robin's Nest dew drops were added about the stroller.


Thanks for stopping by.

Steph