Showing posts with label mixed media. Show all posts

9/25/23

Adventure Mixed Media Panel

Hi everyone, it's time for an adventure so I created a mixed media panel, with the theme of "adventure".


Dies:  Tim Holtz
Ink:  Distress Oxide Inks
Spray Inks:  Imagine Crafts
Stamps:  Tim Holtz, 
Stencil: Crafter's Workshop


I wanted to create a mixed media project using an assortment of supplies from my stash:
Wood panel, tags, chipboard elements, wood butterflies, mini stones and more.


Finally, I added "adventure" across the panel.

Thanks for stopping by.

Steph

8/6/23

Altered Jars with Tissue Paper

 Hi everyone, I'm sharing a mixed media project today.


Begin by scrunching tissue paper.
Then use Mod Podge to adhere tissue paper to the jars.
Be sure to allow lots of creases and to show.


Allow the tissue paper to dry complete before proceeding further.
Trim away the excess tissue paper.


Once the jars are dry, the tissue paper has hardened and then use paints to add an amazing affect.
Using assorted paints, dab the paint on rather than painting the jars.


If you don't like any color you used, or want to change a color, dab on some Gesso.
You can also use Gesso to add a subtle effect on the jars.


Wrap and glue some twine around the top of the jars.


Fill with flowers and use as a centerpiece or place in the window.

Thanks for stopping by.

Steph

12/19/21

Quick and Easy Christmas Ideas - Day 5

Hi everyone.  Christmas will be here before we know it.  The last seven years I've blogged about last minute Christmas ideas you could make in under 60 minutes.  Well, it's that time again and I've got some new projects to share.


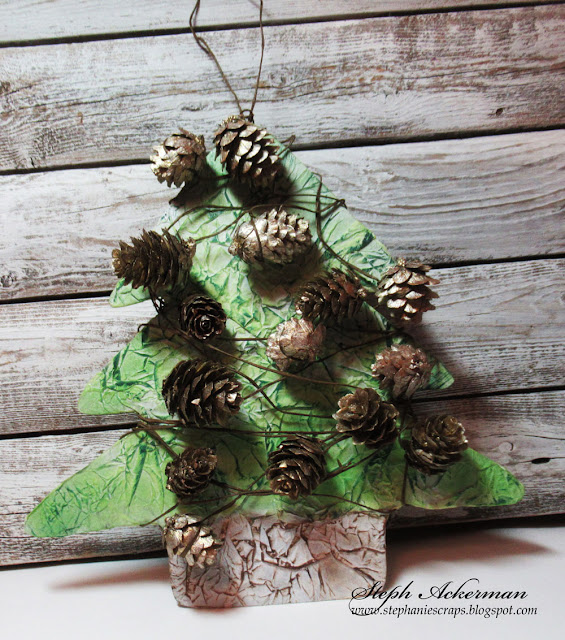
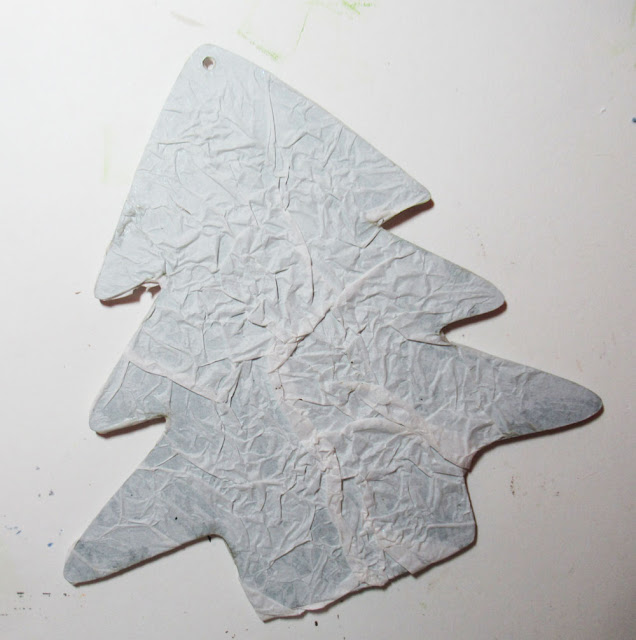
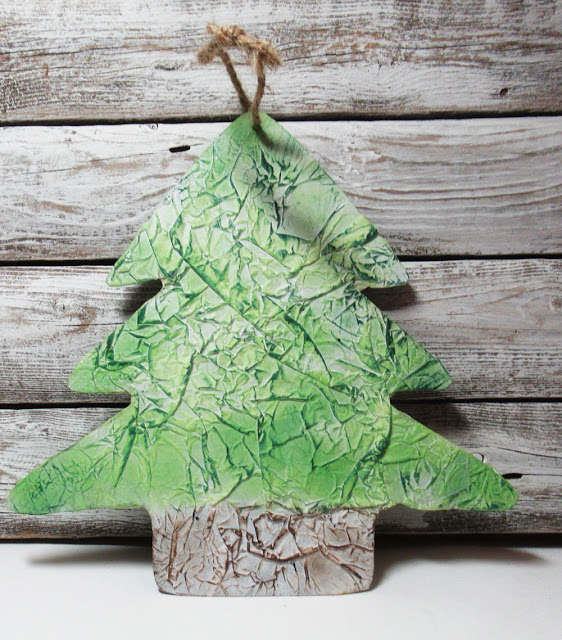
This metal Christmas Tree was found at the dollar store.  Crinkling tissue paper, I used Mod Podge, to adhere the tissue paper around the tree.


Allow to dry.  Depending on how thick the Mod Podge, it could take several hours to dry.


Once dry ink the tree with a several shades of green ink, then lightly ink the crinkles with dark green ink.  Ink the basket with 2 shades of brown ink.


Wrap the tree with pinecone garland and put on display.

Thanks for stopping by.

Steph

If you missed my previous posts, you can find them here:

Day 1:  Christmas  place cards/candy treats

Day 2:  Rustic Wreath

Day 3:  Sled

Day 4: Decorative Gift Bag


6/18/20

Designer Crafts Connection Blog Hop

Hi everyone,  I'm participating in the Designer Crafts Connection blog hop, and this month we are decoupaging.  I used to decoupage when I was younger and it's fun seeing it's resurgence.


I used some lovely Ltttle Birdie papers and Deco Magic to decorate my oval box.


To cover the edges, I used Brilliance Inks.


I found some rose ribbon in my stash and I wrapped that around the box top to finish.


Please stop by the Designer Crafts Connection blog to see more decoupage projects.


Thanks for stopping by.

Steph

4/24/20

Mixed Media Travel Album

Hi everyone, I'm on the Clear Scraps blog with a Mixed Media Travel Album using the Mixable Lovely Album.


This album is a combination of acrylic and chipboard panels in a variety of shapes.


Remember to remove the plastic covering on the acrylic pieces before adding your papers and embellishments.   The beauty of the Mixable Albums is that you can create them any way you desire by using all the pieces or not.


Going with a travel theme, I used papers from Stamperia's Around the World collection to create my album.


 Some of the papers were cut to fit the pages.  Some papers were torn and assembled together on the pages.  Pockets were created to add more space for pictures and journaling.  Tags were inked and added about the album.  Assorted metal embellishments were placed about the album.


Additional tags were included as pages for more journaling opportunities.  Die cut words were added to the front cover and on various pages inside the album.


I will be traveling this year and think this album will be a fun way to document my upcoming trip.

Thanks for stopping by.

Steph


4/18/20

Enjoy the Little Things

Hi everyone, I'm on the Proxxon blog hoping, during this current situation, that you are taking time to enjoy the little things, whether it be enjoying family time, playing with pets, reading a book or being creative.  Just remember to enjoy!!!!!


I began by drawing a light bulb on a piece of foam.  You could also take a stencil or large die cut to create the same effect.


Then I simply cut it out using the Hot Wire Cutter.  It's so easy to cut any project from foam using the Hot Wire Cutter and the results are amazing each time.


Look at the great result I was able to achieve.


Once it was cut out, I began decorating.  I started by painting the bulb with Martha Stewart's Home Décor Paint in Eggshell and then the electric portion with Folk Art Coastal Texture Paint in Seal Grey.  Once dry, I placed a stencil on top, and used modeling paste and spray inks to achieve the look I wanted.


Next, I proceeded to finish the light bulb by adding paints and inks to my project.


I finished by adding some chipboard elements I found in my stash.  Each was painted with Plaid Paints then adhered around the light bulb.


Again, don't forget to enjoy the little things during this trying time.

Thanks for stopping by.

Steph

7/6/19

Altered Tissue Box with Makin's Clay

Hi everyone, I'm on the Makin's Clay blog sharing an altered tissue box with lots of Makin's ClayⓇ elements.  Makins' ClayⓇ allows you to create wonderful embellishments that can be used on all your creative projects.


Supplies:
The Crafter's Workshop stencils
Prima mold
Plaid FolkArt Paint
Imagine Crafts Gold Creative Medium
Imagine Crafts Fireworks Shimmery Craft Spray - Lady Bug, Pear Tart
Gesso


Begin by painting black gesso on a tissue box, covering both the inside and outside.  Once dry, use assorted stencils with modeling paste to add texture along the sides and the top of the tissue box.


Using a Prima mold with white clay, create 2 sets of wings.  Use the roller to force the clay into the mold to create as much detail as possible.


Adhere the wings as shown and place buttons in the centers.    Also create several buttons using Terra Cotta clay with a circle mold and place in 2 corners.


Once all the elements are dry, gesso the entire tissue box again.  I wanted a uniform background onto which I could add color.


Paint the box with FolkArt Wisteria.


Dry brush on FolkArt Cameo Blush.  Add touches of FolkArt Cayman Blue to the wings, the buttons and along the edges.


Realign the stencil and use Gold Creative Medium to add definition to the words on the top.  Do the same along one side with the word Memories.


Once completely dry, spray Lady Bug and Pear Tart Fireworks Sprays around the entire tissue box to add a little shimmer.  Use a tissue to blot excess spray.

Let dry thoroughly and enjoy or give it as a gift.


Thanks for stopping by.

Steph

7/4/18

Gone Fishin' with Proxxon Tools

Hi everyone, I'm on the Proxxon blog using assorted tools to create a new sign.


I began by drawing a fish on a piece of plywood.


Using the Scroll Saw, I cut around the pattern.


I used the Delta Sander to sand the fish.


I painted the fish with Plaid FolkArt Coastal Texture Paints in High Tide, Largo Blue and Seal Grey, blending the colors together.


I used a stencil with Plaid FolkArt Coastal Texture Paints in Sand Dollar for some texture.


To decorate, I added an assortment of metal gears and washers around the fish.  Then I added dew drops and a wiggly eye to finish.


Didn't he turn out awesome?

Thanks for stopping by.

Steph


2/21/18

Proxxon Mixed Media Sign

Hi everyone, I have a new mixed media sign on the Proxxon blog.


I've used the Proxxon Delta Sander and Proxxon Bench Drill Press along with Plaid paints.


I've used an assortment of left over embellishments - chipboard, buttons, keys, clocks and flowers created with Makin's Clay.

Stop by the Proxxon blog for full details.

Thanks for stopping by.

Steph