5/30/21

Etched Gag Gift

Hello.  I've used etchallⓇ dip 'n etch to create a gag gift for a friend who is "over the hill"


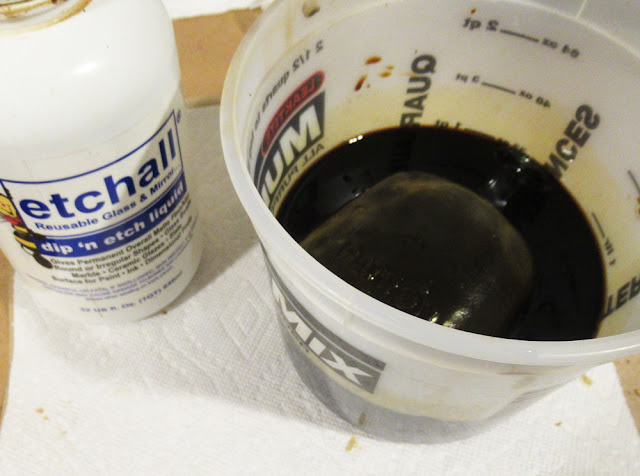
Place the bottle in a plastic container and add  etchall dip 'n etch.  Let it sit for approximately 15 minutes.


Pour the liquid back into the original container.  Since it is reusable, you can use on numerous projects.  As you can see my dip 'n etch is quite dark as it has been well used; however, that does not stop the etching process, so continue using dip 'n etch for all your glass projects.


Rinse the jar and dry off.


I've decorated the bottle with some stickers.


Finally, I added a bow to finish the effect.  

The bottle will now be given as a gag gift filled with jelly beans!

Thanks for stopping by.

Steph


5/29/21

Believe

  Hi everyone, I have another Fairy Stamper project to share.  

I first stamped Fairy Hugs Melia (which is a wonderfully oversized fairy) in VersaFine Clair Twilight Ink.  Using a mask, I then stamped the Fairy Hugs Tree Stump.


I added color using Copic Markers, then cut the panel to card size.


Using scrap paper, I colored the background with Distress Oxide Inks in Bundled Sage, Speckled Egg and Faded Jeans.


Believe was die cut from a scrap of cardstock and added to the card.


Thanks for stopping by.


5/25/21

Hello Sunshine

 Hi everyone, summer is on it's way!!!!


Cut cardstock 5" x 5" and stamp the  Beach style umbrella  in the center using several colors of ink.  Add color to the background with Distress Oxide Inks creating a small sandy section to break up the card.   Make the top portion of the panel a little darker than the bottom portion.


Mat the panel with blue cardstock before adding to a card base.  Stamp the phrase and place it on the left side with foam adhesives for dimension.


Use Stickles to add some sparkled to the umbrella and add a little to the sand.


Thanks for stopping by.

Steph

Outdoor Friends with TLC Designs

  Hi everyone, just swinging by to say HI with lots of fun products from TLC Designs.

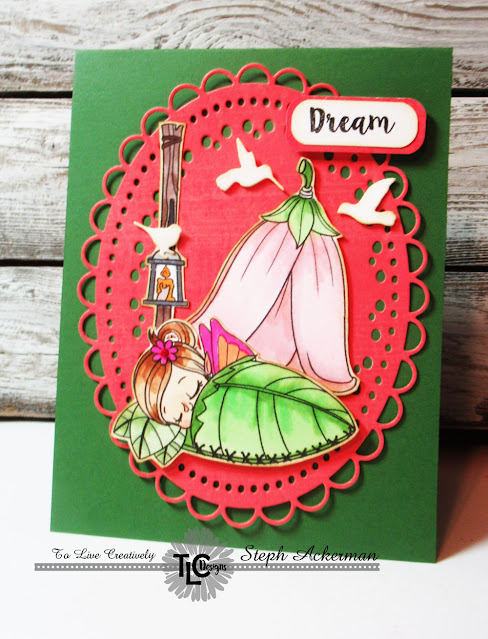
TLC has a limited selection of the Outdoor Friends stamp set and boy is it adorable!!!!  This stamp set has 9 stamps so your creativity is endless.

I stamped out the elements and colored them with Copic Markers.  Then I fussy cut them all out.  Some people don't like to fussy cut, but I find it can be therapeutic!


I created a card from green cardstock, the used the Aviary Oval Die with dark pink cardstock to create my background panel as I wanted to focus on the stamps.


All the pieces were added to the card with foam adhesives for some dimension.  The tiny birds are form the Aviary Oval Die and were perfect little additions. 

Dream is from the Dreamer the Dragon stamp set and sets the tone of the card, don't you think?

Thanks for stopping by.

Steph

5/23/21

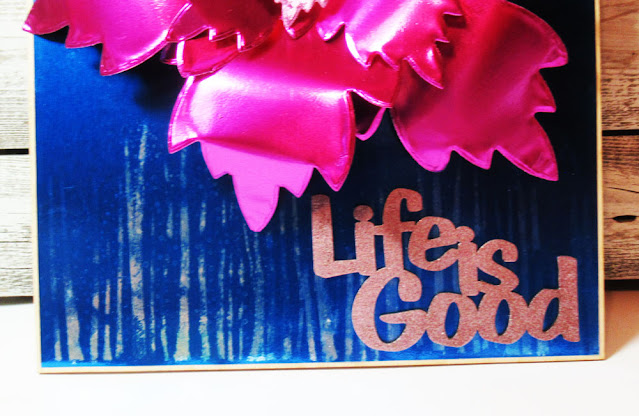
Life is Good Floral Panel

 Hi everyone, I'm on the Rinea blog with this Floral Panel.


I've used one of the panels from the Clear Scraps Wood Rectangle 3 Pack as my base.  Then I cut  Rinea Cobalt/Gold Glossy Foiled Paper slightly smaller, allowing the wood base to show.


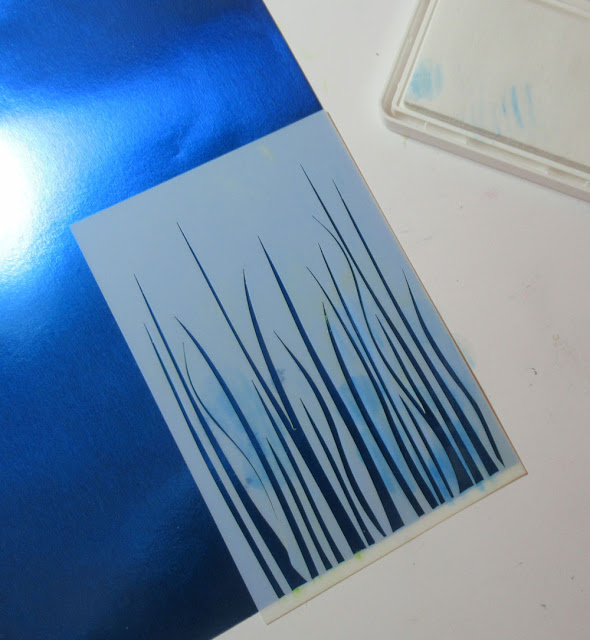
Using Clear Scraps 4x6 Grass stencil, I applied it to the foil then used Rinea Ghost Ink to add some dimension.    Ghost Ink removes the top layer of foil revealing the silver layer underneath.


I flipped the panel and did the same on the opposite end.  The Grass Stencil added different sized lengths along the panel.  I wanted to add a pattern to the background, but I didn't want it to be overpowering, so this effect created a nice background.
Then I adhered the foil to the wood panel.


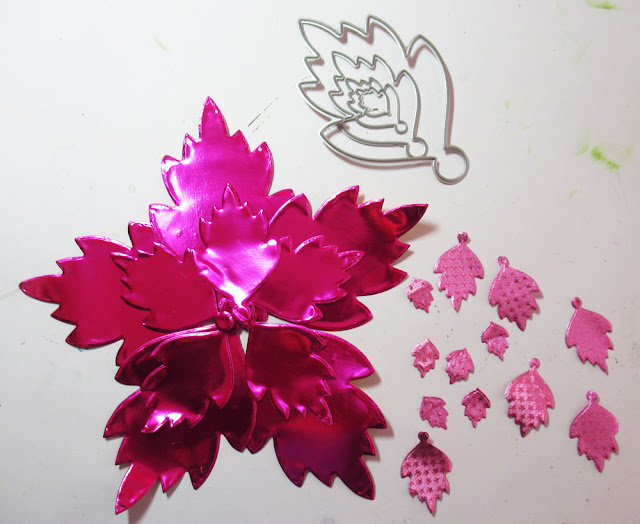
Using Crafter's Companion dies, I  created a huge flower using Rinea Fuchsia/Gold Glossy Foiled Paper and Fuchsia Starstruck.  Assembling the flower, I added a brad to the center then adhered it to the panel.


Clear Scrap's Life is Good Chipboard Word Title was inked and placed in the lower corner.

Finally, I used my Crop-a-dile to punch holes in the panel then threaded ribbon through the holes.


Thanks for stopping by.

Steph

5/22/21

Mermaid Booklet

 Hi everyone, I have another Fairy Stamper project to share.  


I created a book shaped card using Heartfelt Creations dies.

I first die cut all the pages of my "book", then stamped the sea elements on a Fairy Hugs Fairy Scapes background paper.

Fairy Hugs Stamps:
Ivy Seaweed, Serenity, Fan Plants, Doria


Welcome Sign

 Hi everyone, I'm on the Clear Scraps blog with some amazing wood products.


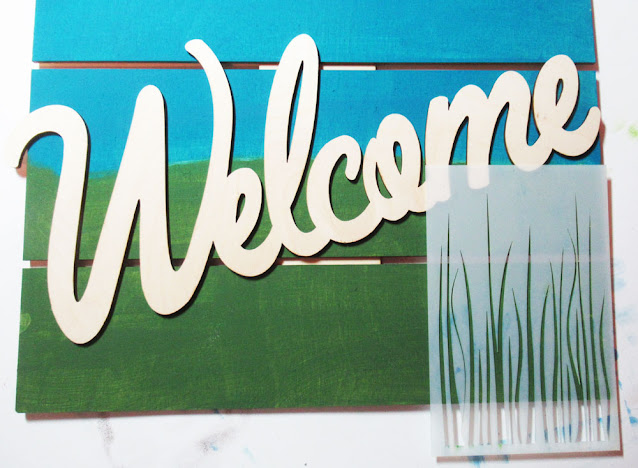
Using the 12x10 Medium DIY Pallet Shape, paint with 2 colors


Since I was going for a spring/outdoor scene, I painted it blue and green.


Placing the Welcome XL Script Word across the panel, I angled it slightly.


Placing the 4x6 Grass Stencil on the panel, I inked through it with green ink.


I moved the stencil along the panel until it was completely covered.


Then I placed the Wheelbarrow Chipboard Embellishments on the panel, placing flowers on top.

Thanks for stopping  by.

Steph

5/21/21

Dream and Wish

Hi everyone, I'm on the Dies R Us blog today.


Please stop by the Dies R Us Store for all the supplies I've used today.

Thanks for stopping by.

Steph


5/20/21

Fairy Hugs on the Craft Store Show


I'm so excited to have several of my cards on the British Craft Show today using an assortment of Fairy Hugs stamps.


This card uses FH Condo Dwellers 2Condo Dwellers 2, FH Dotted Mushrooms and FH Fairy Life.  I added some grass along the bottom using dies from TLCDesigns - Land and Seas Dies.


This card I is fairly simple as I wanted to focus on the FH Lantern set.  I needed the Lanterns to hang off something so I chose to stamp part of the FH Moon Tree in the background.  Wonder is cut from  the  FH Wisdom stamp.  I used the TLC Designs Aviary Oval Dies.

Thanks for stopping by.

Steph

5/18/21

Dragonfly Card

 Hi everyone, just wanted to say hello today.


I created this background quite by accident.  I was spritzing a chipboard dragonfly and realized I loved the underlying paper I spritzed it on.


I cut the panel to size, inked the edges with brown ink and adhered the panel to green cardstock.


A sweet phrase was stamped directly on the spritzed panel and then added to a brown card.


Thanks for stopping by.

Steph

Sweet Forest Pals with TLC Designs

Hi everyone, just swinging by with a happy card using  lots of fun products from TLC Designs.

TLC has a limited selection of the Forest Pals stamp set and boy is it adorable!!!!  This stamp set has 14 stamps so your creativity is endless.


I stamped and colored the deer, the stump and the robin.  Then I fussy cut them as I wanted them to pop on today's card.


I die cut the grass from the Land and Seas die set, then placed it on white cardstock which I then die cut with Happy Dragonfly Circle.  Loved the stitched edging!


The background is a panel from the Spring Fun Digital Paper Pack and had the perfect colors for my card.  Using brown cardstock, I die cut the largest die from the Happy Dragonfly Circle and adhered the smaller on top.  I wanted the design to be off center so I placed it towards the right side of the card.  The stamped elements were then added with foam adhesives for dimension.  The sentiment is also from the same stamp set and creates a perfect friendship card.

Sweet stamp set, don't you think?

Thanks for stopping by.

Steph

5/15/21

Daisy Cards with Clear Scraps

 Hi everyone, I'm on the Clear Scraps blog with a set of pretty cards today.


Start by using some low tack tape to tape the 6" Bouquet Daisies Stencil and cardstock to your work surface so they don't move around while you are inking.  Beginning with the first color, ink the daisies.


Add a second color to the daisies for dimension and add green ink to the leaves and stems.


Remove the stencil and ink around the panel.


Repeat the process for a second card with different colors of ink.


Mat each panel with coordinating cardstock and add to a card.  Using a Fairy Hugs phrase, stamp it directly on the panel.


The cards are fairly simple and easy to create, but they are pretty, aren't they?

Thanks for stopping by.

Steph