5/27/19

Stenciled Hello Spring Cards

Hi everyone, I'm on the Clear Scraps blog with some spring cards using the Hello Spring Stencil.


I created an assortment of backgrounds using gelli printing.  I had lots I put aside for future projects.


I taped the stencil to one of the backgrounds, taping off the flowers as I did not want them for this project.  I used a pallete knife and Gold Creative Medium to cover the words.


The results are stunning.


I wrapped this panel with twine before adding it to the card.


And I added flowers to this panel before adding it to the card.


Thanks for stopping by.

Steph


5/25/19

Happy Gnome Cards

Hi everyone, I've got a new  project for Dies R Us - a fun set of Gnome cards.


I began by stamping and die cutting a number of elements from this collection, being sure that I had enough for both cards.  I added color with assorted Copic Markers.


 Next, I die cut two of the rectangle dies.  This gave me two pieces from which I created my cards.


White cardstock was die cut  to create the mountains and then the edges were inked with distress ink.


Assembling my card, I added a blue background before matting to black cardstock.  Then I adhered the cute elements to the card and assembled my card.


Then I used the left over elements to create my second card.


Stop by Dies R Us for all the supplies I've used today.

Thanks for stopping by.

Steph


5/24/19

Teacher Treat Bags

Hi everyone.  With the end of the school year nearing, it's time to start creating gifts for your kid's favorite teachers.


For quick and easy treat bags, use the Rinea Oma's Postcard Stamp and VersaFne Clair ink.


Die cut medallions and circles bases from assorted colors of Rinea Foiled Papers.  I used Violet/Gold Glossy Foiled Paper, Lavender/Gold Glossy Foiled Paper, Marigold/Glossy Foiled Paper, Ebony/Gold Glossy Foiled Paper and Silver/Gold Glossy Foiled Paper.


Adhere the medallions together and place on each bag.  Use Makin's ClayⓇ to create clay embellishments and add them to the center of each medallion.


Using the Joy Clair Gnome is Where the Heart is stamp set, stamp  and die cut "thanks".  Add to font with foam adhesives.  Finish by filling the bags with candy and tying the bags closed.

Thanks for stopping by.

Steph

5/23/19

Etched Baby Container

Hi everyone, I've got a new project to share using etchallⓇ etching crème.


Die cut an assortment of bunnies and duckies from vinyl and place them around the container.  I placed painter's tape around the top edge to keep the etching creme away from the top edge.


Place etchallⓇ etching creme around the jar and allow to sit in place for 15 minutes.


Remove the etching creme and place it back in the original container.  Since etchallⓇ etching creme is reusable, it can be used on other projects.


Rinse and dry the container.   Then fill with an assortment of baby necessities.  It's perfect for cotton balls and other baby essentials.


Thanks for stopping by.

Steph

Never Let Go Of Your Dreams

Hi everyone, it's time for the first challenge at Lavinia World Challenges.  Please check it out and join in the fun.

Lavinia World has some really sweet stamps and I used Daydreaming Silhouette as the focal image of my card.  She was stamped and embossed on a background created with paints and stencils using a Gel Press.  I wanted the background to be as whimsical as the stamp.


Surrounding the image, I stamped and embossed a row of Toadstool MiniaturesNever Let Go is a set of 6 individual stamps that can be stamped as one phrase or as separate words.  I matted each and arranged them on the card.


Would love to see what you create for Challenge #1.  The winner of the challenge will receive a $15 gift certificate to Lavinia World to shop for more goodies.   Remember there is a new challenge every other Thursday.  Can't wait to see what you create.
 
 
Thanks for stopping by.
 

Steph


5/22/19

Create and Sew Panel

Hi everyone, I'm on the Proxxon blog with a fun sewing panel for that special someone who enjoys sewing.


I started by drawing a circle on a panel.  Using the Micro Bandsaw, I easily cut out the circle.


Next, I used the Disk Sander to quickly sand the edges of the panel.


Finally I used the Bench Drill Press to put a hole in the panel for the hanger.


Now that the panel was ready, I used a stencil with molding paste to add dimension to the panel.  Once dry, I painted the panel with Plaid paint.


For more dimension, I used the stencil again on the painted panel.  Then I pulled assorted sewing elements and arranged them on the panel, painting them with Plaid paints.


Create and Sew were die cut from Rinea Foiled Paper.  A piece of burlap was draped over a hanger and a sewing machine added on top.  


Twine was wrapped around the 2 spools and threaded through the 2 needles.  

What do you think?

Steph

Sailing the Ocean

Hi everyone I'm sharing a new card on the Just For Fun Rubber Stamp Blog using some great stamps available from the store to create my cards.  


I stamped the Fishing Boat in black ink and colored it with Memento Markers.  Adding Nuvo Drops to the windshield created a faux windshield.  The panel was lightly inked and matted on red and black cardstock then a dotted panel before the card.

The phrase was stamped on a white panel and matted to coordinate with the card. It was then added with foam adhesives giving it some dimension.


Thanks for stopping by.

Steph

5/20/19

Clear Scraps and Stampendous blog hop

Hi everyone, I'm on the Clear Scraps blog today and this month Clear Scraps has teamed up with Stampendous.


Using the Paws Wood Card I created a mini album.  Inking the Cling Wild Texture Rubber Stamp with VersaFine Clair Nocturne and Pinecone inks, I stamped both sides of the wood card.  At 6" x 6", this Stampendous collage background stamp was perfect to completely cover the wood panels.


Cutting papers 3 1/2" x 5 1/2" I created the pages for the album.


To finish the front cover, I used the Giraffe Cling Rubber Stamps and Cutting Dies Set.


Die cutting the savannah setting from green cardstock, I further die cut it into a circle to add to the front of the album.  The sweet giraffe was then stamped with black ink, die cut and added atop the savannah setting.  The phrase was added off center.


Adding rings to the album, I tied strips of burlap.


Who wouldn't love this?

Thanks for stopping by.

Steph


5/18/19

For a Sweet Friend

Hi everyone, I'm sharing a new  project for Dies R Us.  It's a a fun glittery card for you today.


Using the Oriental Screen die, die cut pattern paper or cardstock.  I chose to die cut pattern paper because I wanted a pattern on this top layer.  Place the die cut on an adhesive sheet and cut it to size.  Then pour on different colors of glitter, one color at a time.  Remove the excess glitter and add a second color.  Repeat until the entire card is covered.  Mat the glittered panel with cardstock and wrap with twine.


Die cut 2 circles, stamping phrases with both black and green ink.   As I didn't want a full circle, I stamped closer to the left side.  This way I could cut off the right side and align it with the right edge of the card. 


Finally, I added the phrase to the card with foam adhesives for dimension.


Stop by the blog for all the Dies R Us supplies used.

Thanks for stopping by.

Steph


5/17/19

Summer Days with Rinea Foiled Papers

Hi everyone, I'm on the Rinea blog  with a Summer décor wall hanging.


Starting with a wood panel, I painted it with white paint, then die cut Sapphire/Sapphire Starstruck with a large oval die which would serve as the base of my project. Next I die cut Gold/Gold Glossy Foiled Paper with the same oval then tore the top edge and adhered it to the background.


To give the illusion of sand, I added mini art stones.  I die cut Silver/Gold Glossy Foiled Paper to create clouds, then I embossed them to give them a whispy look.


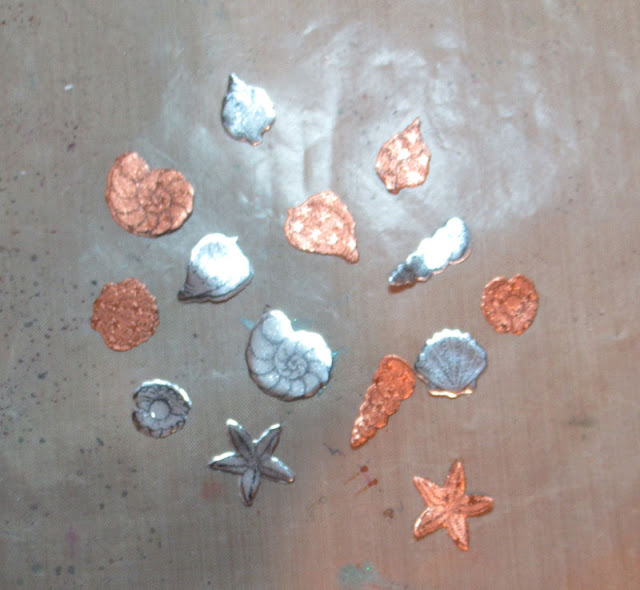
Next, I stamped an assortment of shells on Silver/Gold Glossy Foiled Paper and Marigold Starstruck.


Using a Prima stamp, I stamped her on white cardstock, adding touches of color with Copic Markers, then fussy cut her. Since I wanted to dress her, I stamped her again on Violet/Gold Glossy Foiled Paper, then fussy cut the dress and hairbow which I adhered to the main image. I also stamped her on Ebony/Gold Glossy Foiled Paper which I used for her hair and pocket.


Once she was ready, I added her to the panel, then placed the clouds. I gave the seashells some dimension and added them atop the sand.


Finally, I die cut "summer days" from Marigold/Glossy Foiled Paper and adhered the words around the panel.


Thanks for stopping by.

Steph